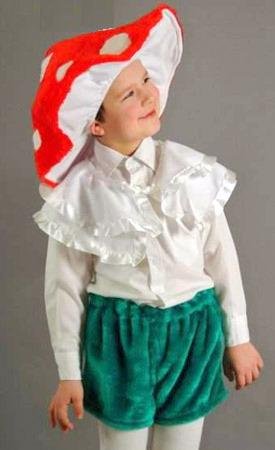
How to make mushrooms out of cardboard. How to sew a fly agaric hat for a children's party: MK with step by step photos and videos
After spending a few hours, you can make a charming new Year costume mushroom for a boy or girl. A home-made costume will not hamper the movements of the child and delight the eye with its brightness and originality. Therefore, if you decide to sew an outfit for the New Year, russula, boletus or fly agaric, you can watch this photo master class and step by step make a mushroom costume and hat with us.
How to make a New Year's mushroom costume for a boy with your own hands
Do-it-yourself fly agaric hat
Cut out a circle with a diameter of 45 cm from cardboard.
From the circle you need to make a cone. To do this, cut out a circle segment.
We form a cone.

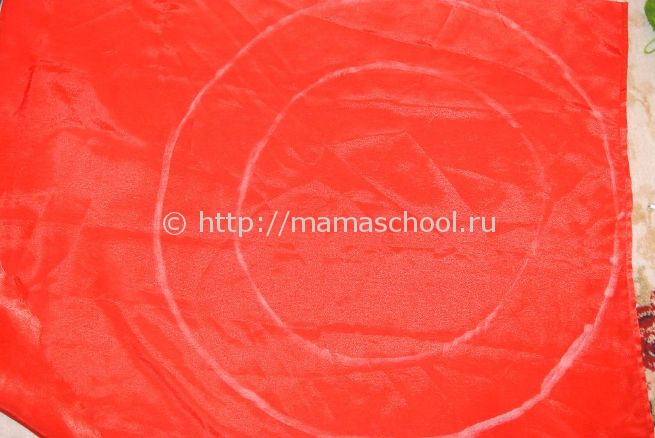
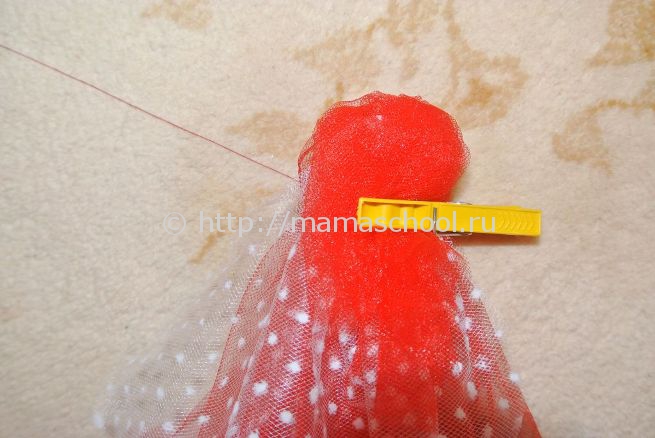
We take red fabric. We draw a circle on it with the same diameter as the cardboard circle. We make an allowance of 5-7 cm. Cut out.


Insert rubber band.

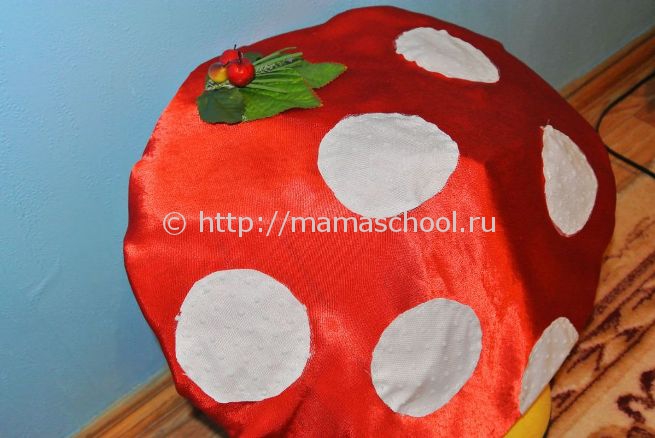
Cut out 12 circles. Six pieces of white fabric and six of organza.

We pin the circles to the main fabric. Then we sew.

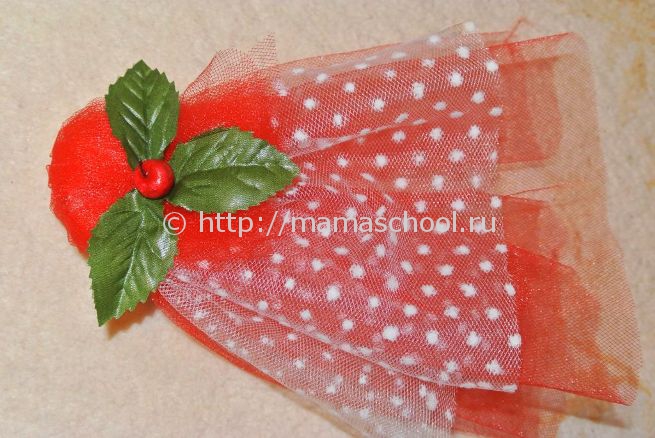
We take artificial leaves and fruits. We make a composition. Glue to the hat with a silicone gun.
We put the fabric on the cone.
Fly agaric hat is ready!
Making Jabot
We take 2 pieces of organza: red and white.

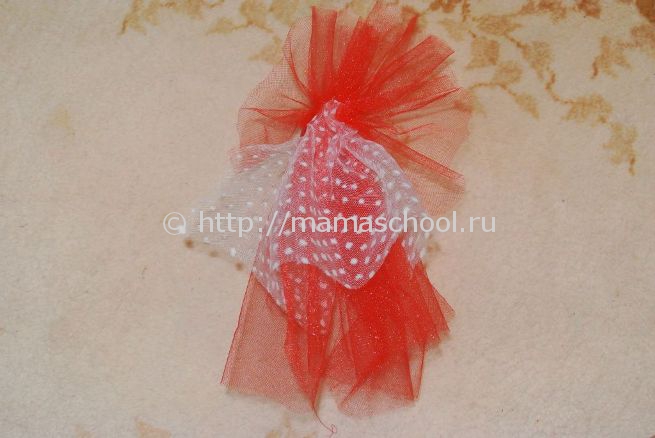
We bend the top edge. Then we sew again.
We glue artificial leaves and an apple with a silicone gun.
Here is a frill we got.
The top of the suit is a white shirt or golf.
We sew panties
We are looking for a pattern on the Internet or in a magazine. You can also sew panties for a costume using the child's clothes. I cut my pants. We sew all the details. Insert rubber band.

The costume is ready.
Happy New Year holidays!
The closer the New Year, the more relevant the issues of tailoring various fancy dress. In some kindergartens and schools, this can also be timed to coincide with the autumn holidays, as a result of which young mothers are hastily looking for opportunities to dress their child as expected. For example, in a fly agaric costume, the main thing is a hat, which can be made in several ways.
Soft fly agaric hat in the kindergarten: simple tailoring
A large round fly agaric hat should hold a given shape, so it will take a lot of materials: the main fabric will be red fleece, and on the wrong side you can take a more unassuming fabric - crepe satin, cotton, chintz. But it must be monochromatic white color.
The frame for the hat will be a large sheet of foam rubber or penofol - a thin, foamed material used to protect fragile items. Each of these fabrics, as well as the material for the base, will need at least 60-70 cm in length, provided that the width is the same. But you must measure the final dimensions according to your child. The finished hat will have a wide brim, but it should look so that it does not seem to be removed from an adult. And to fix the hat on the head, you will need a wide (1.5-2 cm) ribbon, 1 m long. A sheet (50 by 50 cm) of white dense felt will go to the finish.
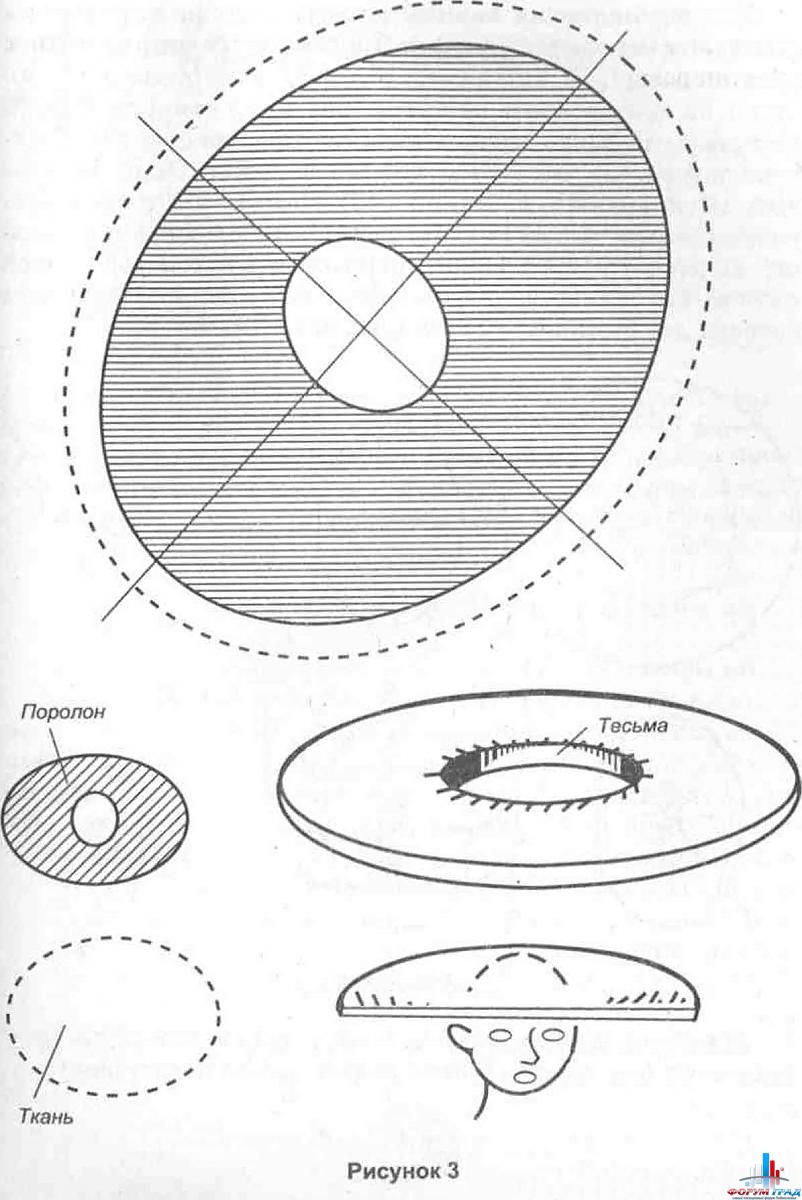
A fly agaric hat pattern is an incomplete circle with a radius of 35 cm. To draw it as correctly as possible, you can use a centimeter tape fixed in the center of the pattern paper with a simple needle. First, a full-fledged circle is drawn, after which, in its original form, it is transferred only to the fabric that is intended for the wrong side: cotton or crepe-satin.
On fleece and foam rubber, you need to cut out an incomplete circle - with a withdrawn sector of 30 degrees. The sector can be larger and reach up to 90 degrees - it depends on how sloping the finished hat will be: the more you remove from the circle, the sharper the top of the cone will be. When cutting out details, do not forget about the need to save about 1-1.5 cm for the seams.
The next moment is the combination of the main details. First, you need to fold the cotton lining and the red fleece top together. Due to the fact that the outer edge of the latter is shorter in length, the cotton will be slightly gathered. Secondly, foam rubber and fleece are superimposed on each other and immediately grabbed with a thread so that they do not deform in the future. The increments marked on the fleece are layered, the part is pulled together into a full-fledged cone, and sewn along the superimposed edges. The same thing happens with foam rubber, already fixed under the fleece, but without increments.
After that, the gathered cotton circle will be sewn to the blank of fleece and foam rubber, and turn the cap outward, turning all the seams inward. If you know that it will be difficult to turn out such a design, you can work immediately on the finished side, but sew the seam in a secret way, without using a sewing machine, manually.
Now you need to remove the extra empty space in the hat: for this purpose, the center of the cotton inside is pulled up to the top of the fleece cone in 1-2 stitches. Then it remains only to cut the long ribbon in half, grab its edges over the fire or process it with an overlock, and hem it to get side ties. And at the final stage, the fly agaric hat is decorated with white circles, the diameter of which is chosen arbitrarily, depending on the overall size of the hat. It is desirable to cut them out of dense felt so that they do not undergo deformation.
To make the fly agaric’s soft fabric cap look as realistic as possible, it’s worth adding a bottom layer to it in the form of a wavy airy fabric: this will be the same translucent “skirt” of the mushroom that looks out from under its hat. It is cut out in the form of a classic circle, without removing sectors, and sewn to the finished product. Remember that its edges should be visible, so the diameter of the circle will be 1-2 cm larger than the diameter of the upper surface of the cap.
Fly agaric hat: made from cardboard or paper

A fly agaric hat is made from paper using almost the same algorithm as from fabric. However, there is a main nuance here - fastening the cap to the head: unlike fabric, paper is smoother and does not fix itself. Therefore, a certain frame is needed for it: it can be a small fabric cap or a rim, which will also be covered with fabric in order to merge as much as possible with the cap.
There is no need to make additions at the seams on the pattern of the fly agaric paper cap: it is enough just to cut a circle with a radius of 40 cm from a large sheet of whatman paper, and then also remove the sector from it. In the case of paper, it is recommended to make a withdrawal of no more than 35-45 degrees, so that the cap turns out to be flat and easily sticks together with its edges: it will be problematic to work with a more sloping cone.
If you manage to find red cardboard of the right size, there will be no problems with the design, but if the paper is simple, you will need to additionally give it the desired color. It is recommended to do this with red velvet paper. With it, the most natural effect is achieved, in contrast to the simple design of whatman paper with acrylic paints or gouache. Small white circles are glued on top, which are also cut out of velvet paper or thick cardboard.
In order for the fly agaric paper cap to hold well on the child’s head, you will need a headband and 2 pieces of cotton, the dimensions of which are 40 by 40 cm. in the center. It is advisable to stretch the fabric a little so that it does not lie completely on the cardboard, but retains an air cushion under the very top of the cone. This will prevent the hat from falling too low on the head. The remaining fabric cut will be used to fit the rim around it.
You can use another option for fixing the hat on the head by cutting off 2 ribbons 40-50 cm long. They will need to be hemmed from the wrong side of the hat on the sides, making classic ties. In addition, you can fix the fly agaric hat if you make a small inner hat from knitwear with a wide edge - it can be sewn from an ordinary wide elastic band.
And if the density of the resulting cardboard cap is not enough for you, you can add 1 more sheet of drawing paper under it, also cut out in the form of a circle with the sector removed. Or use penofol for this purpose.
Fly agaric costume: photo
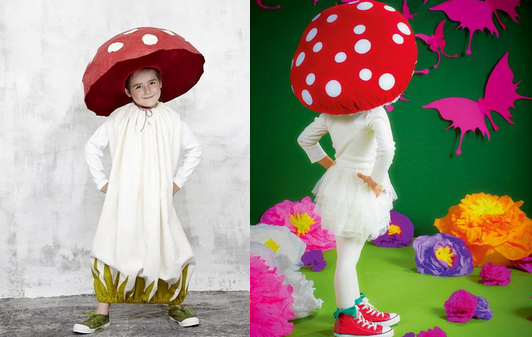
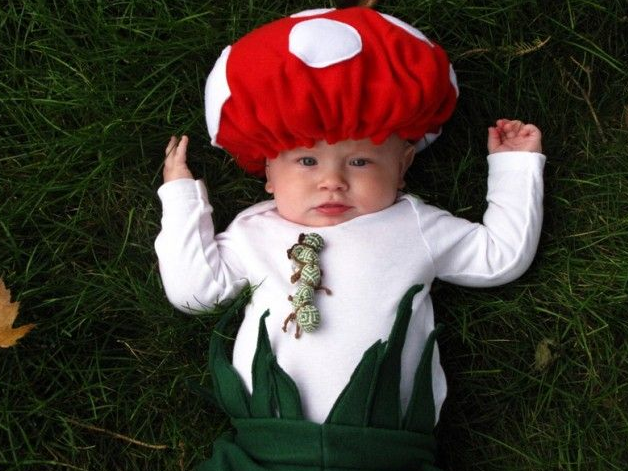
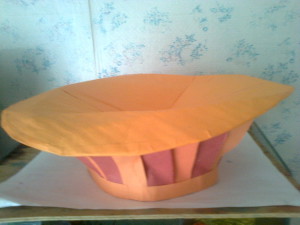
Making a fly agaric hat with your own hands is quite simple, and every young mother will cope with this task in an evening. For complete authenticity, it is recommended to choose white fluffy pantaloons and a loose blouse of the same color for the costume. And the finished hat can be decorated with a large butterfly that “sits down” on it, or a caterpillar that looks out of a mushroom.
Fly agaric mushroom - a frequent guest at matinees in kindergarten. Can't do without it New Year, no autumn festival. It is not necessary to buy a ready-made suit, because its main elements can be made without difficulty on your own. Below is a detailed instruction on how to sew a fly agaric hat with your own hands using two different models as an example.
Wide fly agaric hat with ties
A simple and original fly agaric hat is obtained using foam rubber, fabric in two colors and satin ribbons.
Necessary materials
- 65 cm each of cotton or fleece fabric in white and bright red;
- 65 cm foam rubber;
- white felt or fleece for spots;
- white satin or silk ribbon;
- linen or hat gum;
- needle and thread;
- tailor's pins;
- pattern paper;
- scissors;
- compass;
- sewing machine.
Operating procedure
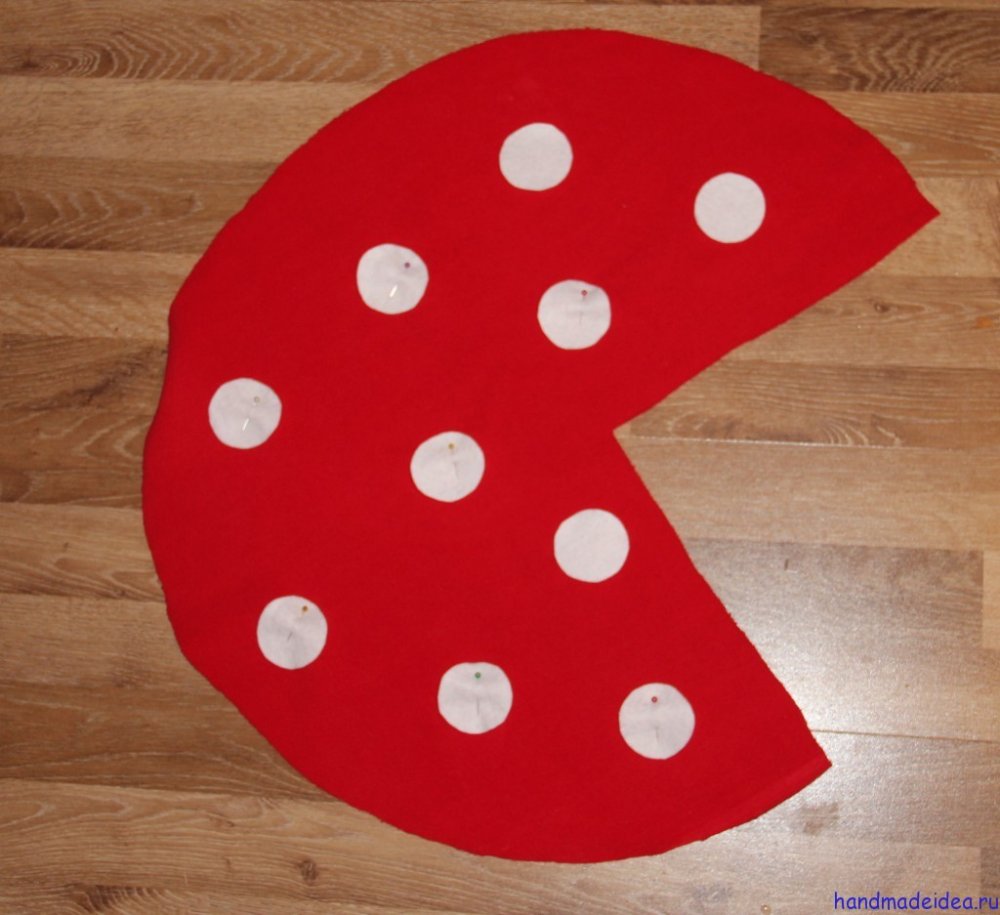
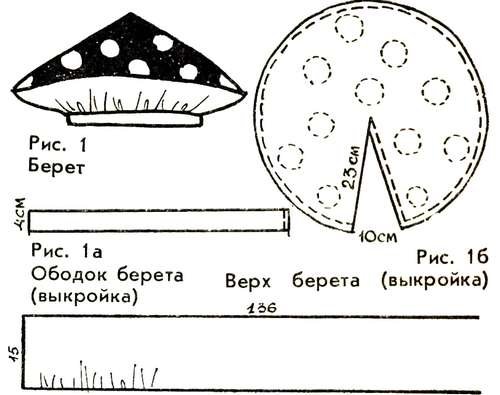
We draw a pattern on paper or newspaper: we build a circle with a radius of 27 cm and cut off one fourth of it. With the help of the resulting blank, we cut out the details from the top fabric of bright red color and foam rubber. We lay allowances of about 1.5 cm on the fabric. The foam rubber part can be cut out a little smaller.
We cut out a whole circle from a white fabric, also laying an allowance of 1.5 cm around the entire perimeter. We cut out 10 circles with a diameter of 5 cm from white felt or fleece. We evenly distribute the spots over the surface of the future hat and fix them with tailor's pins, here allowances are no longer needed. Gently sew each circle with a “back needle” seam close to the contour.
We steam the fabric with sewn circles. We fasten the upper part of the hat with pins, bending the side allowances inward and forming a cone.
Let's start processing the inside of the product. To do this, slightly trim the white fabric around the perimeter, as shown in the photo below.
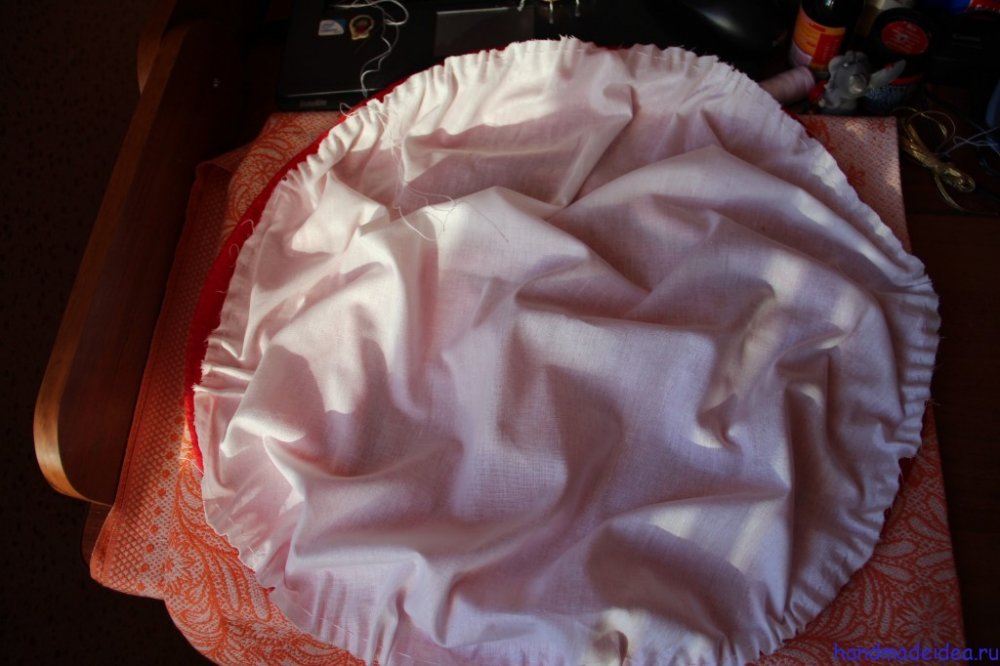
Sew the top and bottom of the hat together. To do this, we combine the blanks with the front parts inward, we tack them by hand and sew them on a sewing machine. We manually sew the foam cone and insert it into the stitched fabric blank. To do this, remove the pins from the red fabric to make a hole.
If you use thin foam rubber and want the hat to keep its shape better, the soft filler can be duplicated with an additional cardboard blank. We pull the lower fabric to the upper fabric, fixing it on the top of the cone with a needle and thread and pulling the white material as tightly as possible. After that, you can carefully sew up the hole in the hat with a blind seam.
We sew decorative satin ribbons on both sides and a hat elastic. A fly agaric hat with a wide brim is ready!
Fly agaric hat in the form of a beret
A beret-style headpiece will stay on your head better and will not require the use of additional ties. A hat of this shape can be sewn when the obligatory presence of wide brim is not required. During work, it is often necessary to try on the product on a child in order to achieve the ideal shape and size of the beret.
Necessary materials
- fleece in bright red and white;
- white cotton fabric;
- filler (synthetic winterizer in balls is best);
- pattern paper;
- tailor's pins;
- wide linen gum;
- needle and thread;
- tape measure;
- scissors;
- sewing machine.
Operating procedure
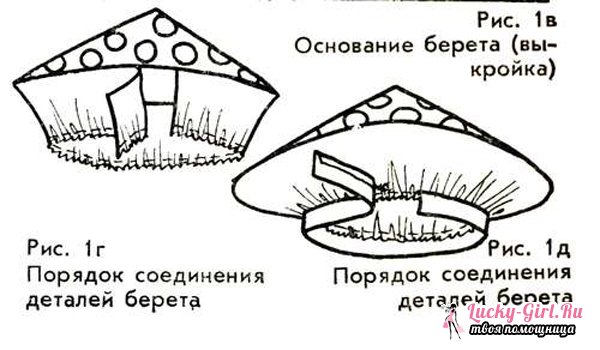
We measure the circumference of the child's head. For sewing a beret, the pattern below will be used.
From red fleece we cut out a circle without a small segment with allowances of 1-1.5 cm. From white fleece we cut out several circles of arbitrary diameter. We fix them on the fabric with tailor's pins and sew them on by hand. You can make spots from ordinary cotton pads.
From cotton fabric we cut out the inner part of the beret: a circle of smaller diameter, a lower rectangular part and two parts of the rim. We sew two circles, leaving a small hole to turn the product on the front side. We iron the sewn parts with a warm iron. We fill the internal space of the workpiece with padding polyester balls, evenly distributing them throughout the entire volume of the future beret. The hole is closed with a hidden seam.
We collect the remaining parts of the future beret. Slightly trim the lower rectangle in advance with a thread and a needle. We sew the details of the rim, cut off a piece of wide linen gum of the required length. We insert the elastic band into the rim so that the beret is held tightly on the head, we sew the ends of the elastic band and the edges of the fabric together. We baste and attach the lower part of the beret to the cone, then carefully sew the bezel to the rest of the product. During work, do not forget to carefully straighten the headdress, giving it correct form. If desired, we sew a frill made of organza or lace along the edge of the product.
Video on the topic of the article
Other options for the original fly agaric hats for a carnival or a matinee in kindergarten can be made according to the video instructions below.
Top. White or light yellow shirt. It is better if her sleeves are elasticated, with an assembly, that is, that the shirt and her sleeves are more magnificent.
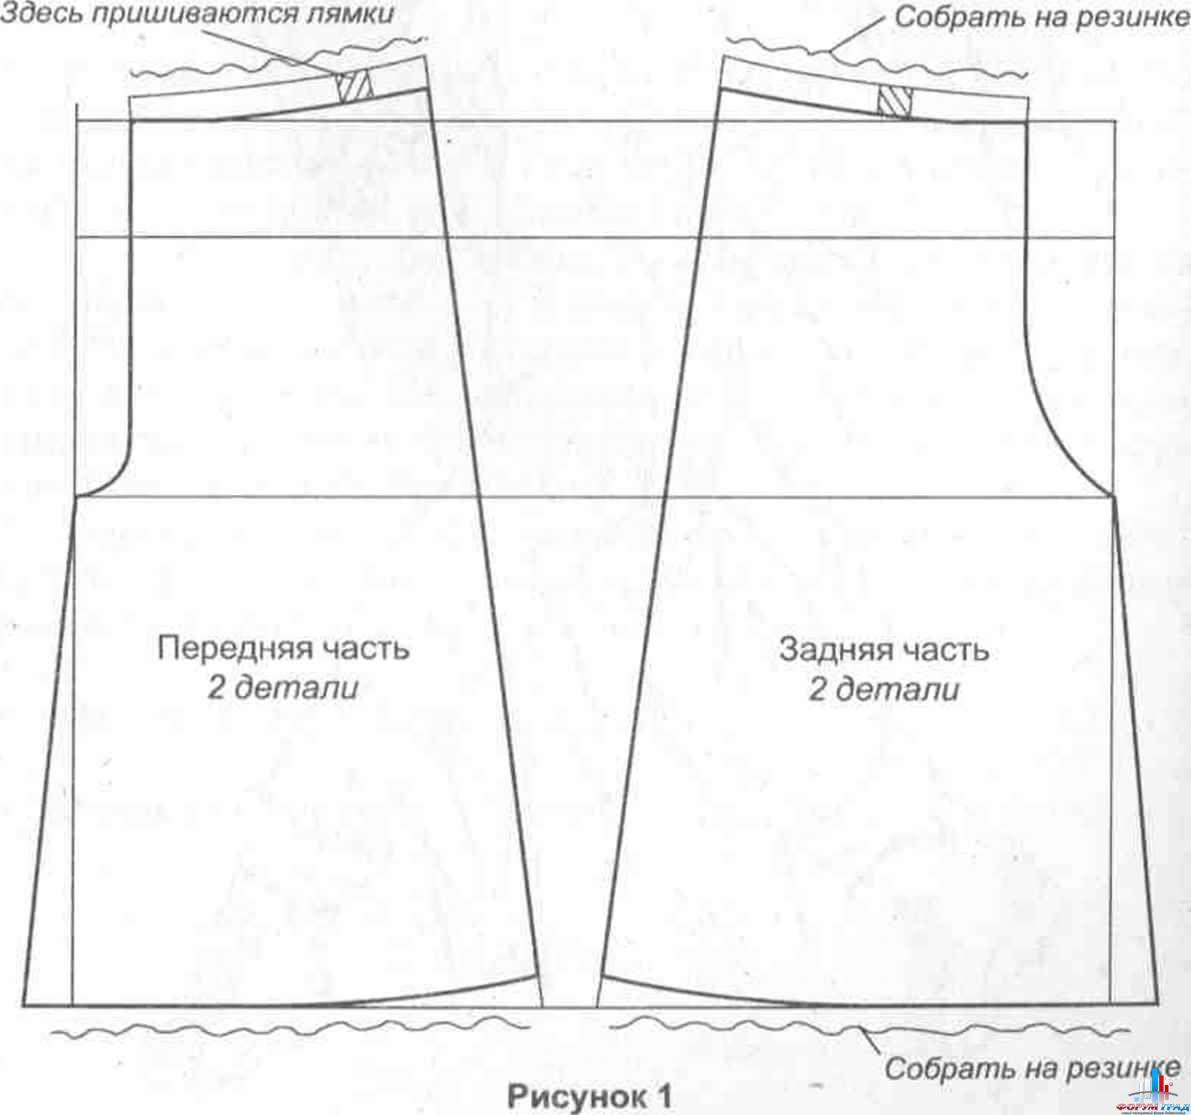
Bottom. Wide harem pants with a high waist, with an elastic band (Fig. 1). In order for the harem pants to hold on, straps are sewn to them from the fabric from which the harem pants themselves are sewn. Straps width - 1-1.5 cm.
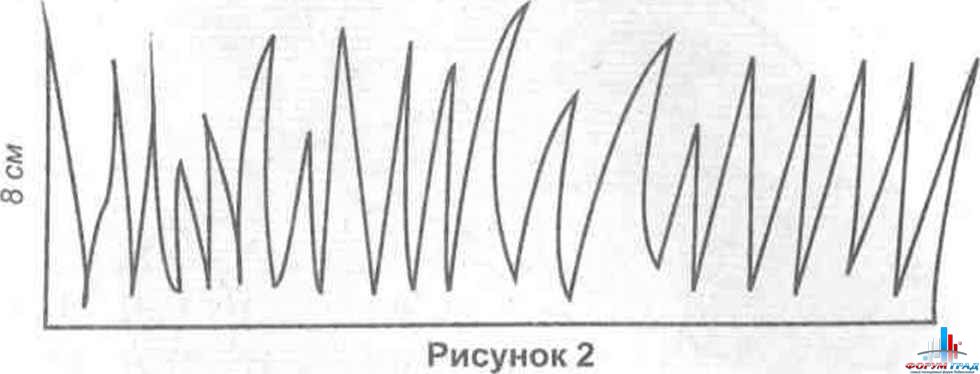
"Grass" is sewn along the bottom of the bloomers. To do this, cut the green fabric into cloves (Fig. 2), and then sew trousers to the edge.
If the fabric is thin, then it must first be starched. So that not all “blades of grass” equally “fell off” from the bottom of the bloomers, some can be attached to the fabric with a few stitches of bloomers (some at the very top, some in the middle, etc.).
On foot. Brown or greenish shoes.
On the head. A hat made as follows (Fig. 3). An oval is cut out of thick foam rubber. In its middle is a hole the size of a child's head. To make the edge of the hole more dense and not tear, a braid is sewn to it (on the hands over the edge), to which the hat ties are attached. The top of the hat (also an oval) is cut out of dense fabric, and its dimensions should be slightly larger than the dimensions of the foam rubber oval. It is better to put thin foam rubber under a thin fabric. The fabric is sewn to the foam around the entire circumference on the arms.
Top of the hat- all shades of brown. Underparts are white or slightly yellowish.
Hat it is done either with ribbons so that you can tie them under the chin, or with an elastic band (linen or hat).
A ladybug can be planted and strengthened on a hat (Fig. 4).
To make a ladybug you need to cut a circle with a diameter of 8-10 cm from red fabric, put a piece of cotton wool in the middle (Fig. 4a), and on top - an oval made of cardboard (Fig. 46). Collect the fabric along the edge on a thread (Fig. 4c) and pull it off. Distribute assemblies evenly. Pull the hole again and fix it (Fig. 4d). This is the bottom of the ladybug. Legs and antennae are also sewn here (Fig. 4e). Legs - 3 pieces of wire, curved at the ends. Antennae - thinner wire. Drag the body of the ladybug along with a thick black thread. Draw circles on the back with a marker and sew two beads in front - eyes (Fig. 4e).
Props. A green leaf with a petiole can be given to the child's hand (see the chapter "Making Flowers and Leaves").
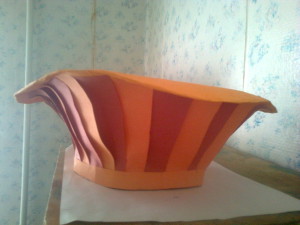
Autumn has come and in our kindergarten, as usual, the "Autumn Festival" matinee should take place. Our grandmother was told: "Your granddaughter will be a fox, make and bring a hat." That's how it was passed on to me. What could be easier, I thought. I’ll go to the store, buy a fox costume and everything is ready and calmed down, I’ll have time. But they gave us a poem to learn, and it turned out that
we are the chanterelle mushroom. And need chanterelle mushroom cap.
 Something needs to be done urgently. I searched, searched, searched on the Internet, but alas, I did not find it. I had to invent myself.
Here is a detailed instruction for the same "chanterelles"
You will need:
Round object (in our case there was a cutting board 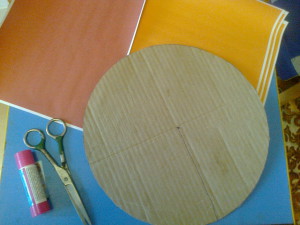 diameter 30.5 cm)
Cardboard (best from under cardboard boxes, like mine)
Sheets of colored paper: orange - 8 pcs, brown - 1 pc colors
We make a blank from cardboard round shape, with the help of any round object of suitable diameter. Cardboard is best taken from under cardboard boxes, like mine. It is dense and well accepts and retains a given shape: various bends and waves. You can ask for an empty box in any store or market.
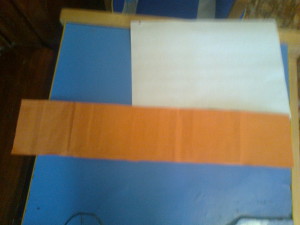
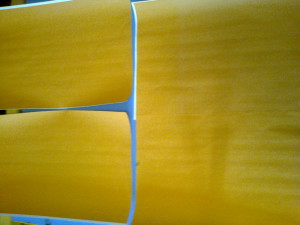 We glue 5 pieces of orange sheets together in such a way as to get one canvas on which a cardboard template can be placed 2 times.
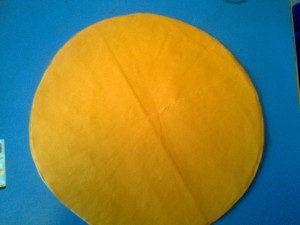
Trace and cut out two circles from colored paper. 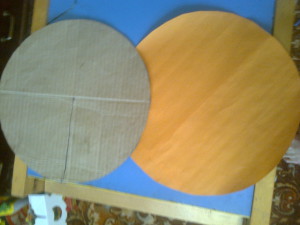 We glue them on a blank of cardboard on both sides.
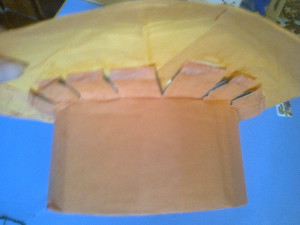
 We mark the center and along the radius we make an incision to the center.
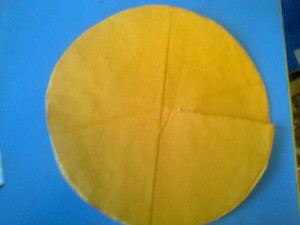
We turn and glue a light cone. Thus, the hat of our fox turned out.
To make the edges of our hat look neat, we proceed as follows.
We cut thin strips of orange paper 1 cm wide. 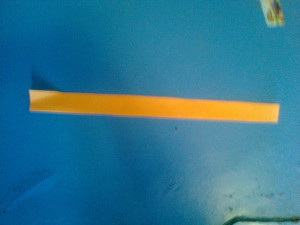
We cut the fringe along the edges and glue the edges of the hat. 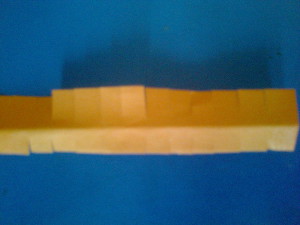
Now let's start making the legs of the mushroom.
 We measure the circumference of the child's head with a centimeter. Cut out a cardboard rectangle long = head circumference + 1.5 cm for gluing. (our circumference was 48 cm) 6-7 cm wide.
We also glue it on one side with orange paper.
Then we cut a fringe 1-1.5 cm wide along one edge. 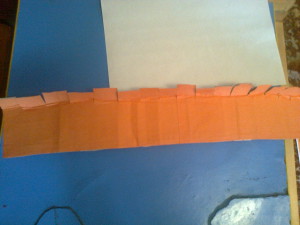
We bend the resulting fringe and glue our rectangle into a cylinder.
Then we grease the fringe of the cylinder with glue and glue it to the hat.
Next, fold the orange and brown sheets of paper as follows: 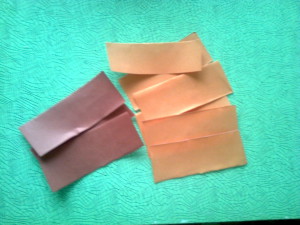
Along the length, once in half, it turned out again in half, and again in half (3 times in half). A thin long strip was obtained from the sheet. Fold it in half across and cut. Then we cut the resulting two accordions into strips along the folds.
Next, we make an accordion mushroom under the hat. Gluing the edges of the strips one to the hat, pulling the other edge to the leg. Alternate brown and orange stripes, overlapping a little on the stem and right next to each other on the hat.
It remains only to glue or attach ribbons or elastic and chanterelle mushroom cap ready.


