Cardboard suits. Do-it-yourself dog costume and mask for an adult and a child: how to sew according to diagrams and patterns. Necessary materials for a dog costume for a boy
By their dress code, costume parties (Halloween, etc.) require first-class costumes. In addition, competitions are usually held at such holidays for the best, most detailed superhero costume. Who would not be pleased to participate in such a competition in the costume of their favorite character?
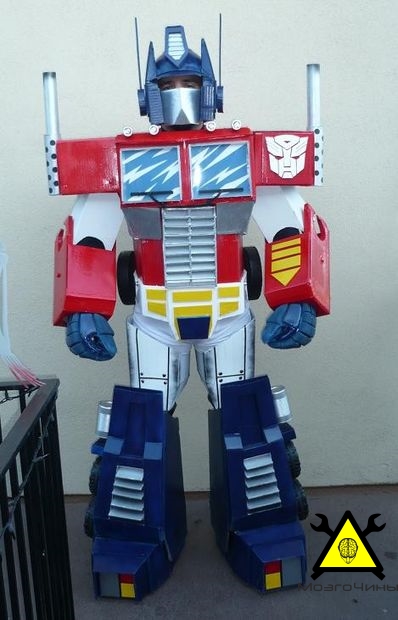
I present to your attention an article on how do Optimus Prime costume their hands.
How to create an origami jacket Origami
Yeah, that's the Juggernaut bitch!
Cardboard Iron Man Suits? - Computer games
This will save you from spending a lot of money in a bad quality suit that you will find on the heads of your friends. for example, a girl. Finally, self-made awareness often takes longer than expected!We choose the theme of the costume
And if the disguise can be passed on later, that's even better! This stage is where we will use our talents of imagination and creativity! Yes, because the old black fabric is perfect for Darth Vader's cape! It will be used to turn your child into Olaf, the Frozen snowman!
We define fabrics and use
We are planning a shot with scratches or just trousers or a skirt!Necessary materials:

- Hot glue gun + sticks to it;
- Adhesive tape (red, gray);
- masking tape;
- Rulers of different sizes;
- Stationery knife;
- Scissors;
- Aerosol paints (primer, red, blue, white and silver);
- 4 mini flashlights;
- Helmet;
- Velcro;
- Cardboard or foam board;
- 2 empty tins;
- 2 plastic "visors" (for windshields);
- Hockey gloves;
- PVC pipes.
We double the materials or expect the large size to accumulate layers below. We avoid fabrics that do not wash, satin type. It would be too bad if you got to work and not to reuse the suit. If you don't master the art of the needle at all, there are plenty of ways to avoid it, but no one checks the end of your work! You can choose fabric glue, glue, buttons to assemble the fabrics.
Here is my selection of sites to help you! Perfect for inspiring yourself, following a tutorial, disguising a little girl's dreams! For those who don't speak English language, go your own way. Masking ideas: fast, original, easy to make and free!
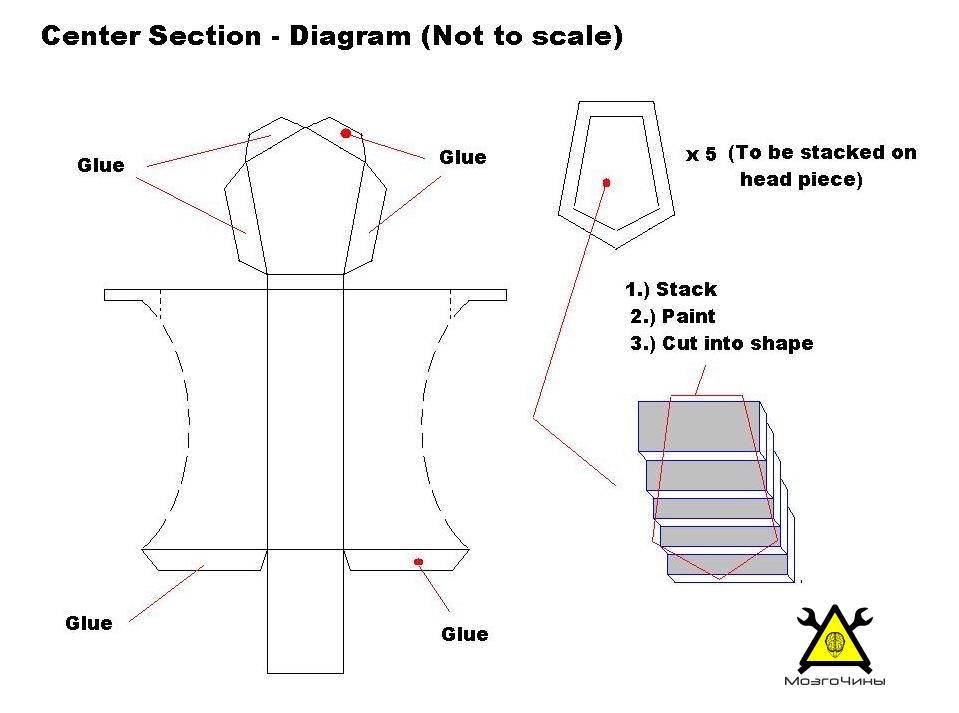
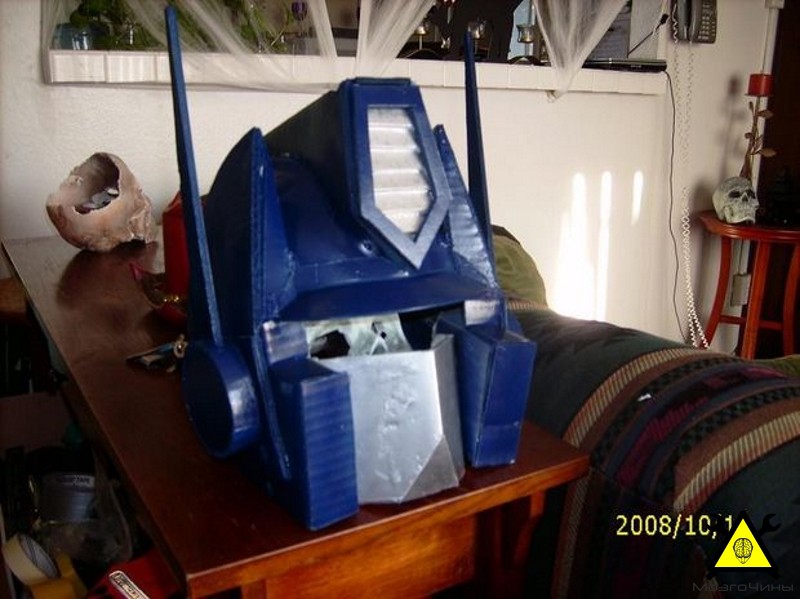
Step 1: Making the Head

Let's take a helmet or helmet as a basis. Cut out of cardboard (foamboard):
- Headphones (triangular pieces);
- Central block (rectangular piece);
- Side disks, on which it is planned to mount antennas in the future;
- Antennas.
The paper box on the dress is an ingenious solution for moving clean clothes and an extra on the shoulder strap. When moving clothes, the paper cabinet has been most successful. In this way, you can carry not only expensive suits and fur coats, but also shirts and everything else on the shoulder straps. After transport, clothes stored in a paper box are not wrinkled and are perfectly protected during transport. The paper clothes box is not only suitable for mobile apartments, but also for companies. The boxes are delivered directly to your home or office.
After everything is ready, it is necessary to cut recesses on the inside of the blanks. This is necessary in order to attach the "semi-finished products" to the helmet with hot glue.
Cut the material in the central block should be gradual, so as not to remove excess.
Paper box for clothes - will last a long time and won't damage the dress
Dimensions and properties of a paper box for dresses. Saving before moving is very simple and straightforward. The dress paper box consists of five carton boxes. With the right materials and high-quality technology, the packaging is as strong as possible. We deliver unfolded paper boxes in a dress along with hanging rods. According to their composition, the desired shape is achieved. these boxes come in a staggered pattern, they stack well so they can be neatly distributed.
We cut out 4 identical round disks, after which we fold the “inedible sandwich” from small pieces of cardboard and 2 disks. We glue them together, not forgetting to glue the ends of the resulting "sandwiches". While the glue dries, cut out 2 long strips (the length is equal to the length of the antenna). Let's cut grooves on the disks that will correspond to the size of the antennas. Then we apply some glue and put everything together.
The paper clothes box is designed specifically for carrying clothes and tops, which are suitable for moving around with a hanger. We transport the box to Prague, Brno or Ostrava. Move clothes through paper boxes into the dress in an upright position. The advantage is that the clothes do not shrink when moved, they are carefully laid down and closed from dirt. When unloading, clothes from the wardrobe can be removed directly into the wardrobes. You can borrow or sell moving boxes at competitive prices according to your request.

Before painting, cover the exposed areas of the helmet with masking tape. We primed, and then we applied blue color to the surface of the headdress.
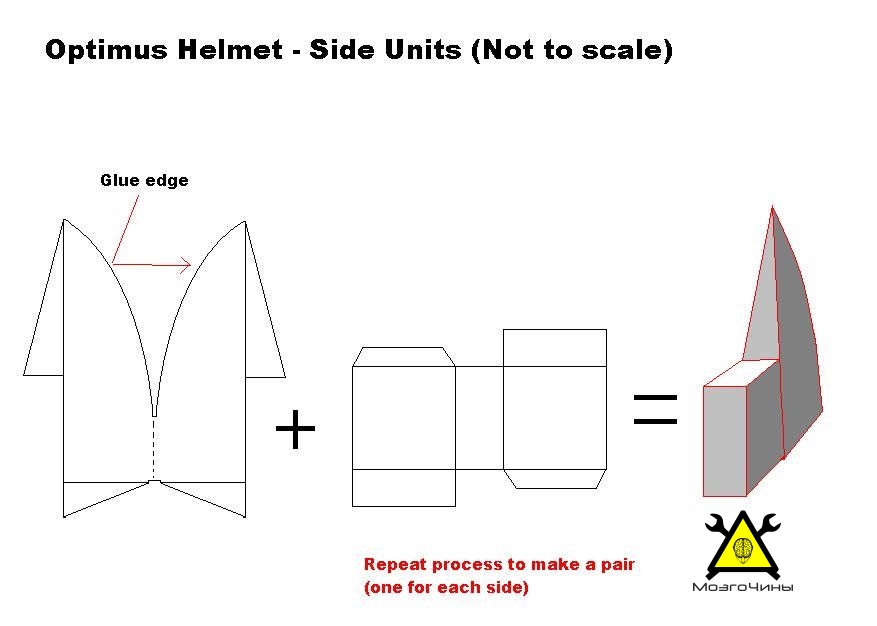
Step 2:

Most of our customers are most afraid of packing boxes in their entire move. Here's a handy guide on where to put to transport your items safely and interpret them easily in a new location. Size: We suggest you rent 2 sizes of cardboard boxes.
Empty paper boxes usually end up in an expanded state. Roll them up first and make sure they fit properly. It is advisable to connect the connections with a wide adhesive tape, which we also supply. Fill the box boxes so that you can carry them and do not exceed their carrying capacity.
The lattice was made of foam board.
On the main A4 sheet, glue the side walls and the central partition. Mark and cut grooves of small depth (16 pcs). Carefully glue the strips adhering to the angle of inclination.
When painting foam board, it is not necessary to prime the surface.
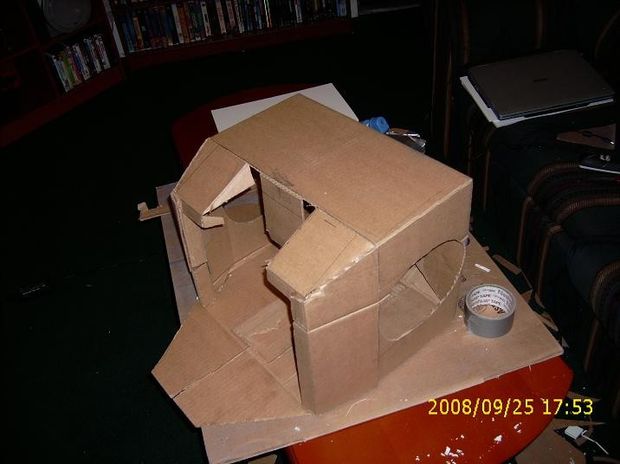
Step 3: Chest
Place heavier items. Fill the boxes filled with tape from both the top and the top. Don't forget to label them with a brightly colored tag so you remember what you have and as you move, everyone knows where the boxes go. Our advice! For bulky and lacy clothes like suits, shirts, dresses or suits, you like it.
Suitable for example: kitchen utensils, fragile accessories and household items, small electronics, files, binders or other office equipment. The plastic crates themselves are shaped. Therefore, it is also suitable for fragile items such as plates, glasses, porcelain, etc. we recommend wrapping them in blister foil, which we also supply. Plastic crates do not have lids and are folded for shipping. Therefore, fill them so that the contents do not cross the top edge of the box.
Take a box and cut out 2 large holes on the sides and try it on. If you feel uncomfortable, enlarge the holes.
We will make a vertical cut on the back to make it easy to put on and take off the suit.
Close the lid and cut out a large hole for the head. (The hole should be slightly larger than the head, so that the box itself does not rest on the neck).
Plastic closable boxes
Suitable for example: valuable items, important documents - also available in binders. You can fill the box to the brim. If you are putting loose fragile items, wrap them in advance with blister foil or wrapping paper, which we will also deliver. Once filled, fold both lids together and make sure they fit well. In sealed boxes, you can move around in safe or safe mode. In this case, you have a closed box on both sides with numerical seals that we will deliver.
Tape all inside curves with masking tape.
Step 4:

The opening on the back has an additional internal overlapping flap that will be used to secure the Velcro straps.
We fix the strips on hot glue. In addition, I strongly recommend flashing the fasteners with a wide seam (glue tends to tear off the top layer of cardboard).

Step 5: Coloring the Chest

Step 6:

After the paint on the sternum dries, glue the lanterns with hot glue.
We cut out two blanks from plastic according to the size of the “cabin windows” and paint them. Then we take two sheets of transparent plastic, cut them to size and glue them to the cabin.
If desired, window frames can be made from metal strips and fixed to the outer edges of the sternum.
Step 7: Putting the Torso Together

To increase the survivability of the suit, we will make the walls of the torso two-layered. Add a couple of braces to the inside to prevent slipping.
Step 8:

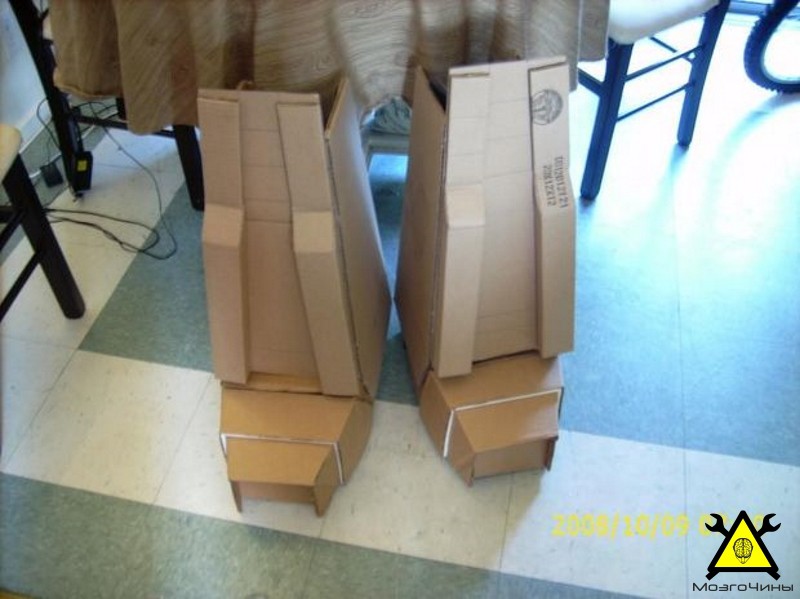
In order to make the feet, we need a pair of shoes and a rubber mat.
First, let's decide on the size of the feet. Let's make boxes by giving them the shape of a trapezoid.
Cut the rug into 8-12 pieces and glue them together with hot glue.

Leave a couple of layers in reserve to cover the top layer above the shoes.
Cut out a hole for the sneakers. Thanks to them, you will not slide forward or backward. Velcro will fix the shoes inside the foot.

Step 9: Making the Legs
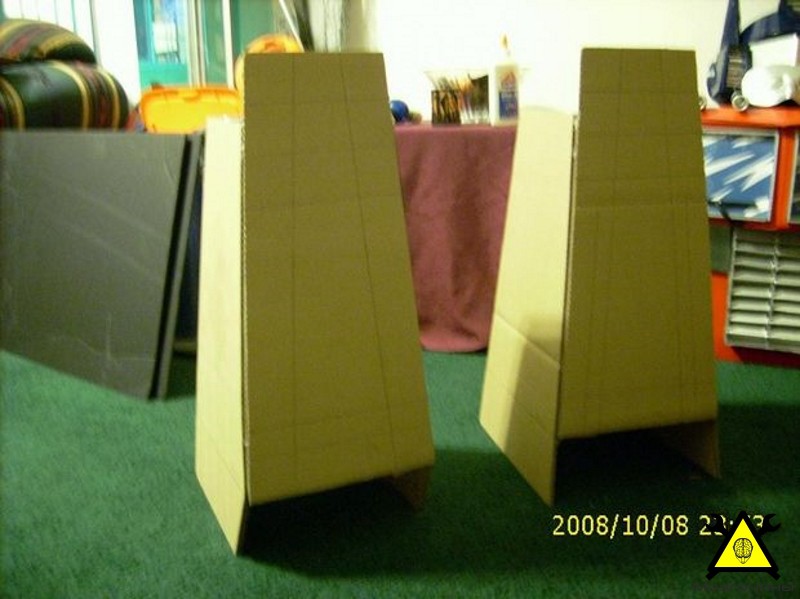
Unfortunately, cardboard boxes are not made in the form of pyramids. Therefore, I had to remember the lessons of geometry and make them their hands.
Measure the length of the leg by adding about 12 cm above the knee.
Reinforce the inside curves with duct tape.

Double walls will make the structure stronger, but at the same time make it heavier.
Step 10:
Fasten the Velcro to the inside of the boxes.
Let's start making the front part of the lower leg, where the ventilation holes will be located.
Step 11:

Let's add entourage with the help of old wheels from a children's car.
For gas cylinders, old tin cans were used.
Step 12: New Helmet
As it turned out, the old helmet was too heavy, hot and looked like a "melon" on top of the torso. Therefore, Prime needed a new headgear.
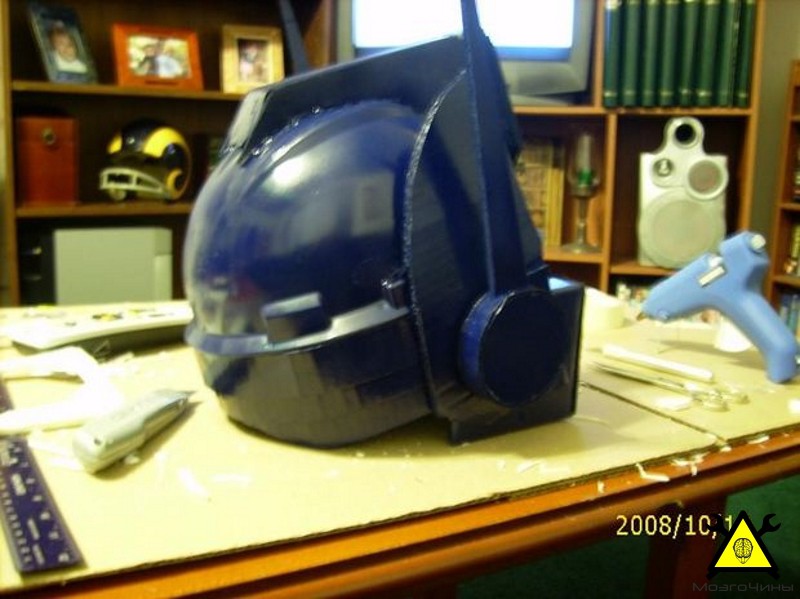
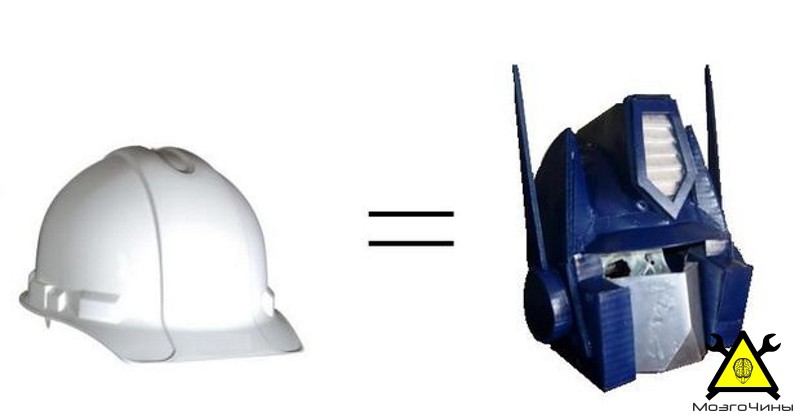
We will purchase a construction helmet and remove the belts from it. Instead, glue the lining from an old bicycle helmet.
Side flaps and antennae removed from an old helmet.
The face mask has been painted in colors that match other parts of the costume. It is removable and held in place by 2 small Velcro strips located on the inside.
Step 13: Almost done
After the finishing of the parts has been completed, we proceed to the fitting process (if necessary, we will cut off unnecessary parts and add adhesive tape for reinforcement).
Children love New Year's reincarnations. It's so fun to try on someone else's image, play the role of your favorite character, copy his behavior. You can’t do without fantasy and imagination in a festive carnival, but you can’t do it without a good costume, no matter how hard you try. Without burdening yourself with unnecessary worries, you can take an outfit and a mask at the nearest box office. Striking out thereby the originality and unique incarnation. Can you sew carnival costume for the child independently according to the schemes and patterns, putting into the idea the unique features and features of the hero beloved by the child. Not an easy task, but final result a well-deserved reward for your hard work. Today we will help you implement it and teach you how to make a do-it-yourself dog costume and mask from fabric, paper, cardboard and other primitive materials. Role yellow dog especially relevant in the new year 2018.
Do-it-yourself dog carnival costume for a child: photo

All variants of do-it-yourself dog carnival costumes for a child are conventionally divided into two categories:
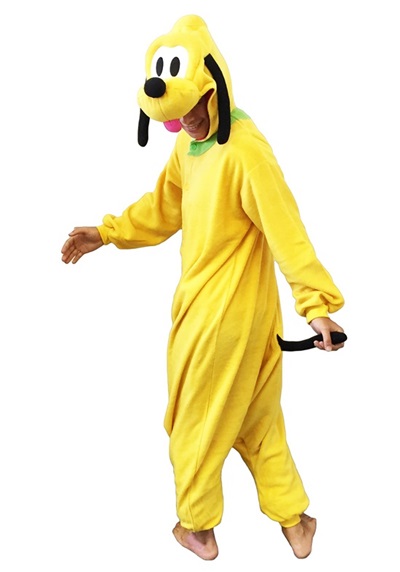
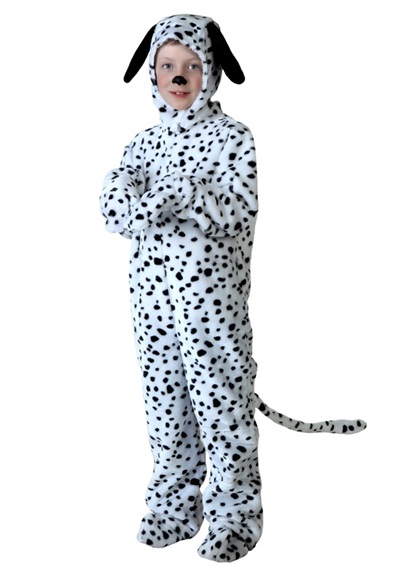
- Expensive and complex costumes, involving the tailoring of a full-fledged full-length jumpsuit with a hood and all the distinctive features of the animal;
- Simplified sets made up of individual thematic details (fur ears, long tails, masks, gloves, paws, shaggy shorts / skirts / vests);
At the same time, the tailoring of the first version of the costumes will lend itself exclusively to skilled and experienced craftswomen who have a clear understanding of the basics of cutting and sewing. And any caring and intricate mother will cope with the second version of carnival outfits. So why create unnecessary difficulties for yourself? Prepare a do-it-yourself dog carnival costume for a child using our lightweight master classes with photos and videos.
Photo of do-it-yourself dog carnival costumes for a child

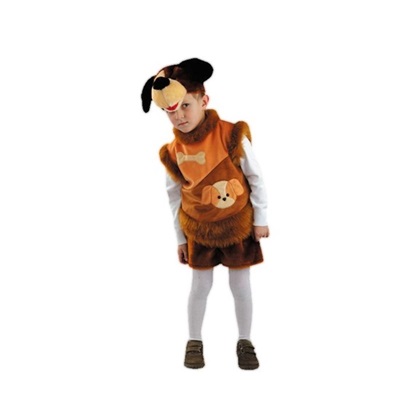


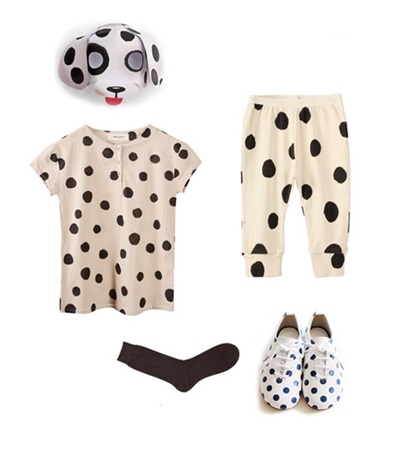
How to sew a do-it-yourself dog costume for a boy

The first master class on sewing a dog costume for a boy with his own hands is not at all costly, both in material terms and in time. The child himself will be able to make such an outfit, provided that all the materials are available. You don't even need your mother's help.
Necessary materials for a dog costume for a boy
- plastic hairband
- small piece of gray fleece
- thick cardboard
- gray thick yarn
- scissors
Step-by-step instructions on how to sew a do-it-yourself dog costume for a boy

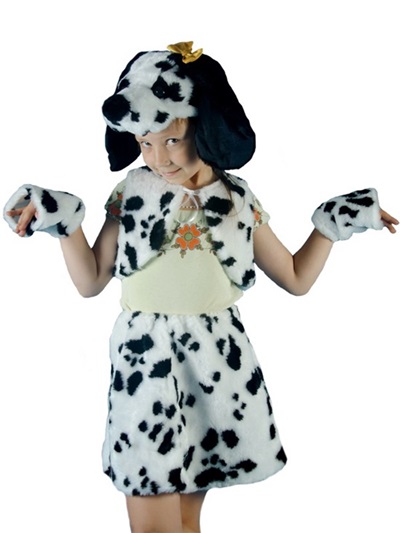
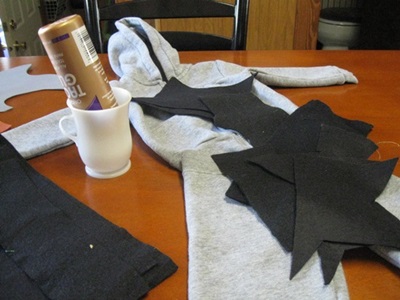
Do-it-yourself dog costume for a girl according to diagrams and patterns
Not only boys, but also girls are not averse to trying on a dog costume made with their own hands according to patterns and patterns. After all, the next year 2018 will be held under the auspices of the Yellow Earth Dog, and any imitation of it is the key to success and luck in the future. But how to master a complex outfit without having on hand rolls of suitable fabric and boxes of the necessary accessories? Very simply, you can try to make a dog costume for a girl with your own hands according to diagrams and patterns, taking as a basis an old tracksuit from a home dressing room.
Necessary materials for a dog costume for a girl according to a simple scheme
- gray or white cotton suit
- black felt sheets
- needle and black thread
- pins
- scissors
- crayon or narrow bar of soap
- white Czechs
- black marker
Do-it-yourself step-by-step master class on a dog costume for a girl
Do-it-yourself dog mask for a child or an adult from fabric, paper, cardboard: templates and patterns
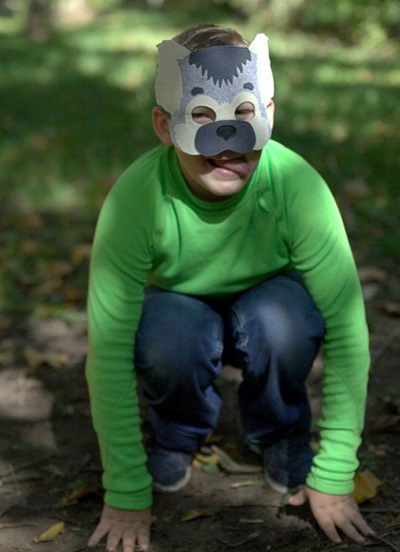
Dogs are loved by almost all children and most adults. These four-legged friends are a model of fidelity, justice, devotion and strong unconditional friendship. Dogs are excellent guards, brave defenders and good companions. This is probably why hundreds of children strive to try on their image at the New Year's masquerade in kindergarten and school. And also, from the fact that the Yellow Dog is a symbol of the next year, its unspoken patron. So, every mother should learn how to make a dog mask for a child or an adult with her own hands from fabric, paper, cardboard according to patterns and patterns.
Templates for dog masks made of cardboard and paper to create with your own hands for an adult and a child


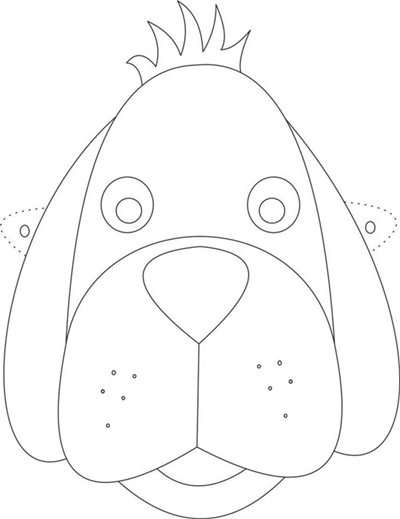
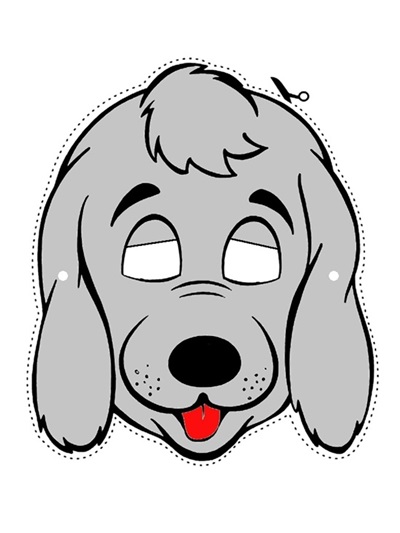


A simple do-it-yourself dog mask made of paper and cardboard for a child on the head

Using the paper and cardboard templates above, you can quickly and easily make a beautiful dog mask on your child's head with your own hands. To do this, just print the image, strengthen it with cardboard, cut it out and assemble it in detail. For more detailed instructions on making a simple do-it-yourself dog mask out of paper and cardboard for a child's head, see the next master class.
Necessary materials for making a dog mask from cardboard and paper for a child
- printout of the mask from i-net
- thick cardboard
- scissors
- scotch
- satin ribbons
Step by step tutorial on how to make a simple paper and cardboard dog mask for kids

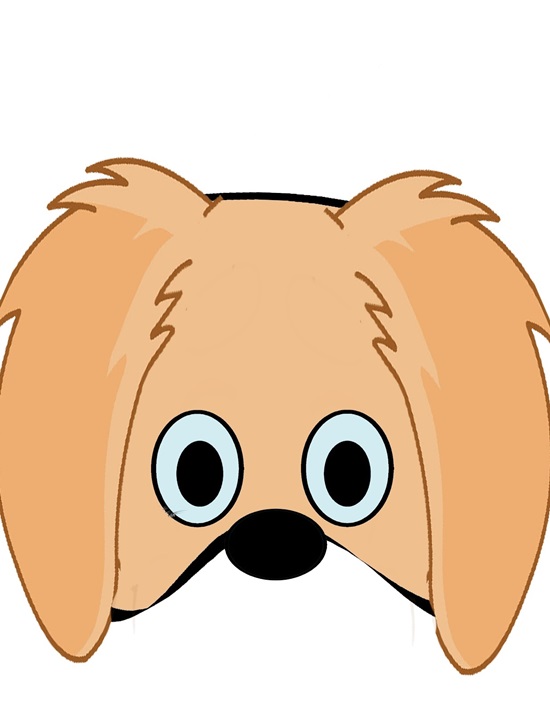
A complex do-it-yourself dog mask made of paper on a child's head

Today, not all children and teenagers can be surprised by a primitive flat mask with a picture of a puppy. Following the prescriptions of the current fashion and the desire to stand out among peers, the child can claim a more complex version of the 3D dog mask, and we will try to make it with our own hands from paper according to the most detailed video instructions. Some variants of such accessories are made from one or two solid parts, making many cuts and folding them according to the scheme. Other options are collected from dozens geometric shapes. See more details on how to make a complex paper dog mask on a child's head with your own hands in the step-by-step video tutorials.
Master class with video on making an intricate paper dog mask for a child
Do-it-yourself dog mask and costume made of paper, cardboard, fabric is always a joy for children and an extra hassle for adults. But not at this time! With our patterns, patterns and master classes, you will quickly understand how to make a mask and sew a carnival costume for a child in a matter of hours.


 Английский вокруг нас исследовательская работа")
