Hat fungus for a child made of cardboard. How to sew a fly agaric hat for a children's party: MK with step by step photos and videos
Do-it-yourself mushroom hats for kindergarten
Master class: "Mushroom hats"
Mushroom caps for a matinee kindergarten. Master Class With step by step photos.
Levchenko Tatyana Vitalievna.
Description: The master class is designed for teachers and parents.
Purpose of this work: can serve as an excellent attribute for various performances and holidays.
Target:
- making mushroom caps for the pupils of the group for the matinee.
Tasks:
Tutorial: to acquaint with the design and manufacturing technology of polyethylene foam caps, the ability to work with new material, to acquaint with the practical skills of working with fabric.
Developing: develop visual-figurative thinking, cognitive interest in design.
Nurturing: cultivate a creative attitude to work, artistic taste, accuracy in work.
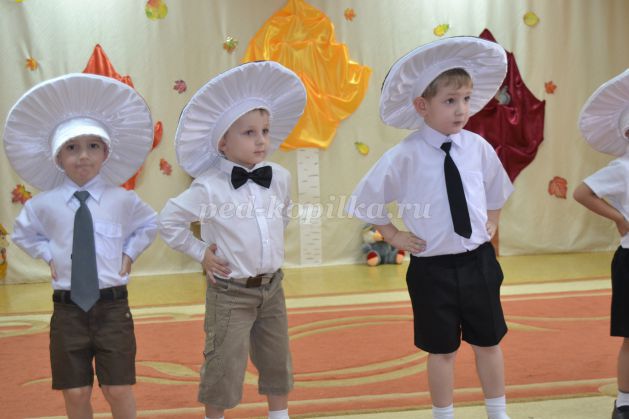
I invite everyone to make such hats for a matinee in kindergarten:
Matinee in middle group kindergarten.
Materials and tools:
- foamed polyethylene with a thickness of 10mm-2.5 meters;
- foamed polyethylene with a thickness of 5mm-2.5 meters;
- elastic band for 8 hats-4 meters;
-fabric crepe-satin in three colors: orange, cream, brown
(with a width of 1.6 meters by 55 cm);
-the cloth white color with a width of 1.5 m - 1.5 meters;
- a sewing needle and white thread size No. 40;
-sewing machine;
-scissors;
- felt-tip pen or pen;
- glue gun with transparent rods - only 3 pieces;

Step by step manufacturing process:
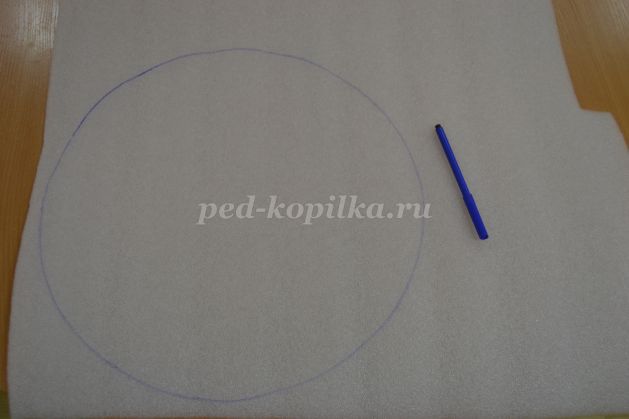
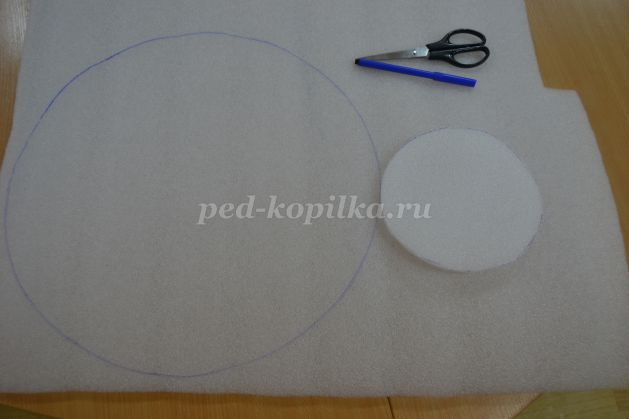
We take foamed polyethylene of white color, 10 mm thick, lay it out on the table and draw a circle with a diameter of 40 cm around it, circling it with a felt-tip pen.
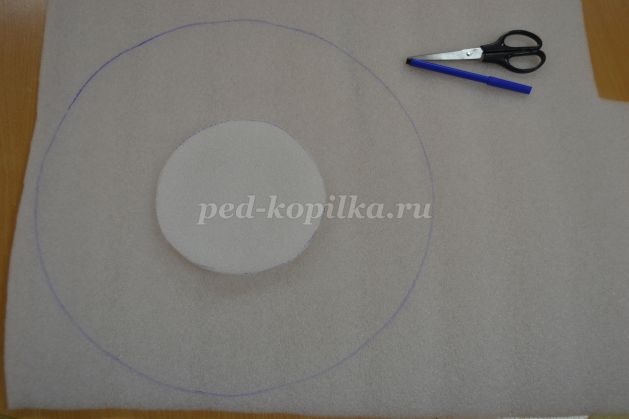
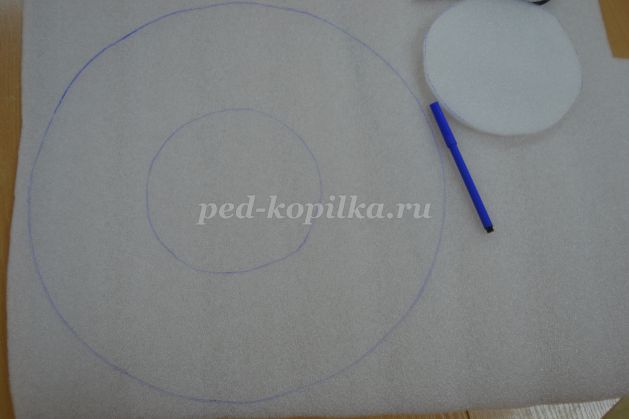
Now we take a workpiece-circle with a diameter of 10 cm, put it in the middle and circle it inside a large circle.
This diameter will depend on the size of the child's head, if the size of the head is smaller, then the diameter of this circle will be smaller or vice versa, larger.
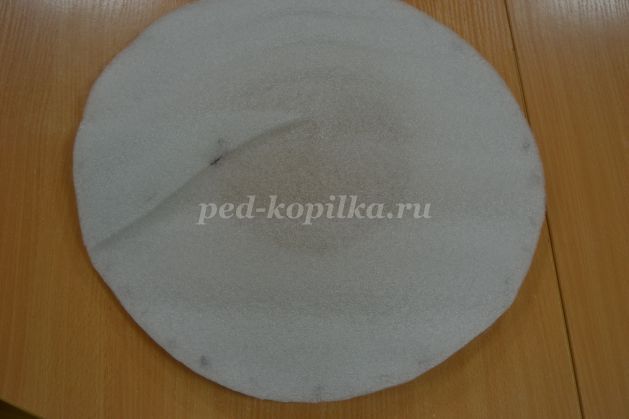
We take scissors and cut out first a large circle, and then a small one. The result is a circle with a hole for the head in the middle.
When buying material for polyethylene caps, for the base they took a thickness of 10 mm, and for the top such a density of the material was not needed, so they took the material - polyethylene foam thinner (it is blue) -5 mm. Cut out a circle with a diameter of 50 mm. Cut out with scissors and make an incision with scissors to the center of the circle.
Now you need to glue the entire construction of polyethylene foam. We heat the gun and try on a white circle, make a small dome from a blue circle so that you can then stick it on a white circle.
They folded part of the polyethylene inside, and glued the excess and glued the dome of blue material. It is necessary to glue slowly and it is not at all necessary to apply glue with a solid line, since there will be a large consumption of glue - we don’t need it. Therefore, we glue the dots at the same distance of about 3-4 cm from each other. Apply glue thinly, if you apply a lot - there will be a deep hole, the glue sets quickly.
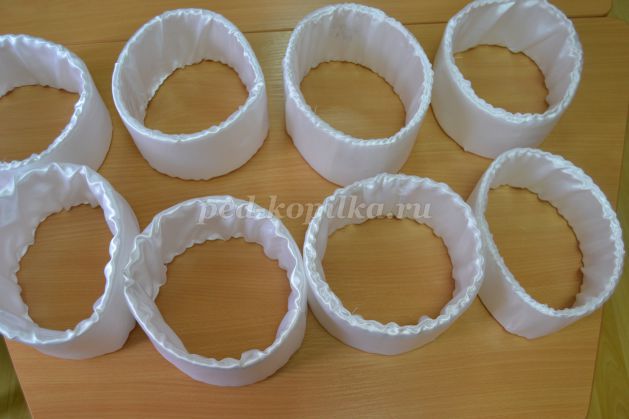
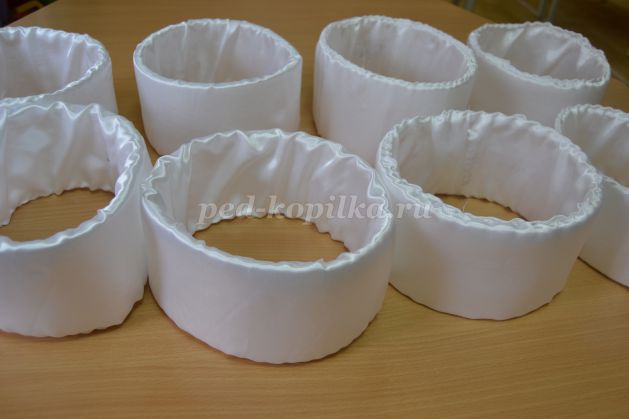
In order to be able to put a mushroom on a child’s head, it is necessary to make such a cylinder for the head according to the size of the children’s heads. We take white foamed polyethylene and measure the diameter of the hole for the head on the cap - cut off a strip 10 cm wide so that when gluing this cylinder could be inserted into this hole. It should enter tightly, not fall out of the mushroom. Similarly, we glue other cylinders with a gun and wait for the glue to grab. We make 8 pieces of such blanks and sheathe them with a white cloth by hand, as in the photo.
Now we cut hats from colored crepe-satin - cut out a circle of -50cm with a seam allowance of 1cm. Cut with scissors carefully and smooth. We need 8 such circles of different colors.
It is necessary to try on the fabric on a blank-dome made of polyethylene foam and make a dome of fabric with a hem, try it on again, and then sew it on a typewriter. It is advisable to sign or number for each hat separately. From a white fabric, cut off a strip, the width of which can be measured individually for each hat - we will have it -13 cm with seam allowances and elastic. We apply a white fabric to a colored fabric with wrong sides to each other and we sew a thread with a “needle forward” seam. After we sew a seam and overcast.


We fold the white fabric on the other side so that you can thread the elastic and sew it on a typewriter. We take an elastic band and a pin, thread a pin with an elastic band, then thread the pin through the hole and stretch it to the end. Now we correct the tightened fabric and evenly distributing it with our hands around the circumference - this will be the inside of the mushroom. We cut off the edges of the elastic with scissors and sew them together with our hands or on a typewriter.
Here are the hats!

Now insert the cylinder inside the hole for the head.
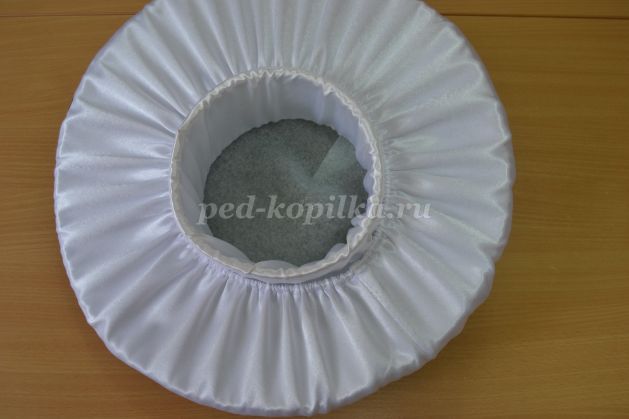
This is how the headgear turned out.
This is what the hat looks like from the side.


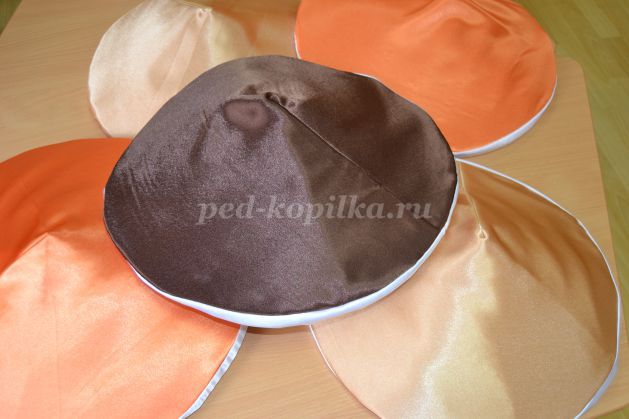
Thus, we make all the hats, and this is how the mushrooms look when they are already dressed in fabric.
According to the scenario, there were only edible mushrooms, but fly agarics can also be made using this technique.
Do-it-yourself mushroom hats for kindergarten
Master class: "Mushroom hats"
Hats of mushrooms for a matinee in kindergarten. Master class with step by step photos.
Levchenko Tatyana Vitalievna.Description: The master class is designed for teachers and parents.
Purpose of this work: can serve as an excellent attribute for various performances and holidays.
Target:
- making mushroom caps for the pupils of the group for the matinee.
Tasks:
Tutorial: to acquaint with the design and manufacturing technology of polyethylene foam caps, the ability to work with new material, to acquaint with the practical skills of working with fabric.
Developing: develop visual-figurative thinking, cognitive interest in design.
Nurturing: cultivate a creative attitude to work, artistic taste, accuracy in work.
I invite everyone to make such hats for a matinee in kindergarten:
Matinee in the middle group of kindergarten.
Materials and tools:
- foamed polyethylene with a thickness of 10mm-2.5 meters;
- foamed polyethylene with a thickness of 5mm-2.5 meters;
- elastic band for 8 hats-4 meters;
-fabric crepe-satin in three colors: orange, cream, brown
(with a width of 1.6 meters by 55 cm);
- white fabric with a width of 1.5 m - 1.5 meters;
- a sewing needle and white thread size No. 40;
-sewing machine;
-scissors;
- felt-tip pen or pen;
- glue gun with transparent rods - only 3 pieces;
Step by step manufacturing process:
We take foamed polyethylene of white color, 10 mm thick, lay it out on the table and draw a circle with a diameter of 40 cm around it, circling it with a felt-tip pen.
Now we take a workpiece-circle with a diameter of 10 cm, put it in the middle and circle it inside a large circle.
This diameter will depend on the size of the child's head, if the size of the head is smaller, then the diameter of this circle will be smaller or vice versa, larger.
We take scissors and cut out first a large circle, and then a small one. The result is a circle with a hole for the head in the middle.
When buying material for polyethylene caps, for the base they took a thickness of 10 mm, and for the top such a density of the material was not needed, so they took the material - polyethylene foam thinner (it is blue) -5 mm. Cut out a circle with a diameter of 50 mm. Cut out with scissors and make an incision with scissors to the center of the circle.
Now you need to glue the entire construction of polyethylene foam. We heat the gun and try on a white circle, make a small dome from a blue circle so that you can then stick it on a white circle.
They folded part of the polyethylene inside, and glued the excess and glued the dome of blue material. It is necessary to glue slowly and it is not at all necessary to apply glue with a solid line, since there will be a large consumption of glue - we don’t need it. Therefore, we glue the dots at the same distance of about 3-4 cm from each other. Apply glue thinly, if you apply a lot - there will be a deep hole, the glue sets quickly.
In order to be able to put a mushroom on a child’s head, it is necessary to make such a cylinder for the head according to the size of the children’s heads. We take white foamed polyethylene and measure the diameter of the hole for the head on the cap - cut off a strip 10 cm wide so that when gluing this cylinder could be inserted into this hole. It should enter tightly, not fall out of the mushroom. Similarly, we glue other cylinders with a gun and wait for the glue to grab. We make 8 pieces of such blanks and sheathe them with a white cloth by hand, as in the photo.
Now we cut hats from colored crepe-satin - cut out a circle of -50cm with a seam allowance of 1cm. Cut with scissors carefully and smooth. We need 8 such circles of different colors.

It is necessary to try on the fabric on a blank-dome made of polyethylene foam and make a dome of fabric with a hem, try it on again, and then sew it on a typewriter. It is advisable to sign or number for each hat separately. From a white fabric, cut off a strip, the width of which can be measured individually for each hat - we will have it -13 cm with seam allowances and elastic. We apply a white fabric to a colored fabric with wrong sides to each other and we sew a thread with a “needle forward” seam. After we sew a seam and overcast.
We fold the white fabric on the other side so that you can thread the elastic and sew it on a typewriter. We take an elastic band and a pin, thread a pin with an elastic band, then thread the pin through the hole and stretch it to the end. Now we correct the tightened fabric and evenly distributing it with our hands around the circumference - this will be the inside of the mushroom. We cut off the edges of the elastic with scissors and sew them together with our hands or on a typewriter.
Here are the hats!
Now insert the cylinder inside the hole for the head.
This is how the headgear turned out.
This is what the hat looks like from the side.
Thus, we make all the hats, and this is how the mushrooms look when they are already dressed in fabric.
According to the scenario, there were only edible mushrooms, but fly agarics can also be made using this technique.
The kids were just delighted with them! They really liked them!
For the parent club, which was held in October together with the children "In the garden, in the garden" and was dedicated to harvesting in Russia, these hats were made of cardboard and polyethylene for vegetables and fruits.
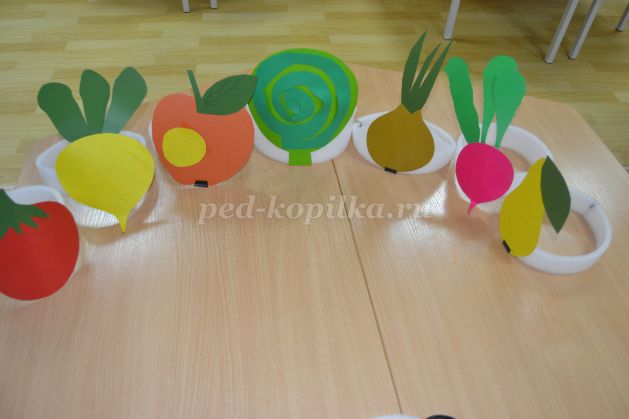
For the autumn holiday, here is such a wreath for Autumn from the same material and from colored paper.
Every year in December, New Year's Eve is approaching at school or kindergarten, and of course you are concerned about making a New Year's costume for a child with your own hands. And if, by a lucky chance, your son or daughter has the role of a boletus mushroom or a pretty one, then our master class will surely help you. After all, the master who created the image of a mushroom for his child took not only good photos, but also described step by step the entire process of creating a carnival costume for a boletus.
How to sew a boletus mushroom costume for the new year: MK with a photo
In order to make such a beautiful New Year's outfit for a baby, you will need:
- foam rubber 5 cm thick and 50 x 140 cm in size.
- (you can replace the foam rubber with a padding polyester if you make a cardboard base for the mushroom cap);
- brown fabric for the top of the hat measuring 70 x 70 cm;
- light beige fabric for the bottom of the hat measuring 50 x 50 cm;
- cotton fabric for the interior of the hat, 35 x 50 cm;
- milky white fabric for overalls measuring 150 x 70 cm.
- a piece of green fabric for a leaf measuring 20x30 cm;
- several spools of thread to match the color of the fabric;
- tinsel for decoration 2 meters long.
Do-it-yourself boletus mushroom cap
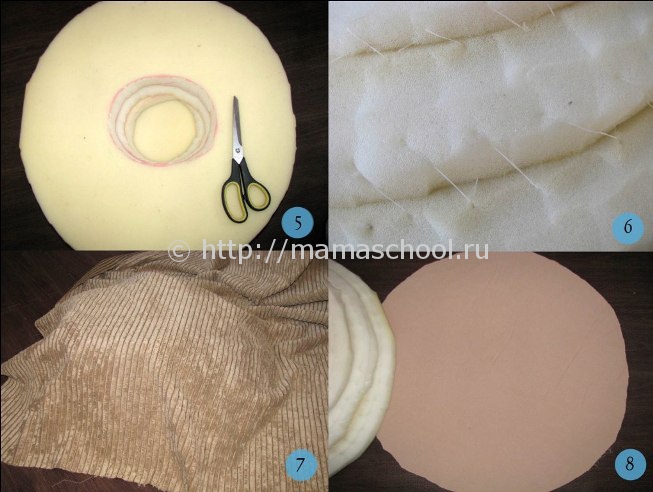
1) Let's prepare the details: cut out the first circle from the foam rubber, corresponding to the base of the desired hat. I have the first circle with a diameter of 50 cm, cut off the upper edge of the foam disk at an angle, rounding it. Let's make a blank of the second disk, cutting it to the size of the cut edge. By the same principle, we will make a blank for the third disk.
2) Cut out the center from the disks, focusing on the circumference of the child's head. To do this, draw an oval in the center of the first circle, the perimeter of which is equal to length circumference of the child's head plus 2 cm. Cut out an oval and try on the blank for the child. If suddenly the slot for the head turned out to be large, it is possible to correct it by making the slot in the next disk smaller.
3) - 4) Let's put all the blanks from the foam rubber with a "pyramid". Let's make a fourth disk without a slot, forming a mushroom hat.
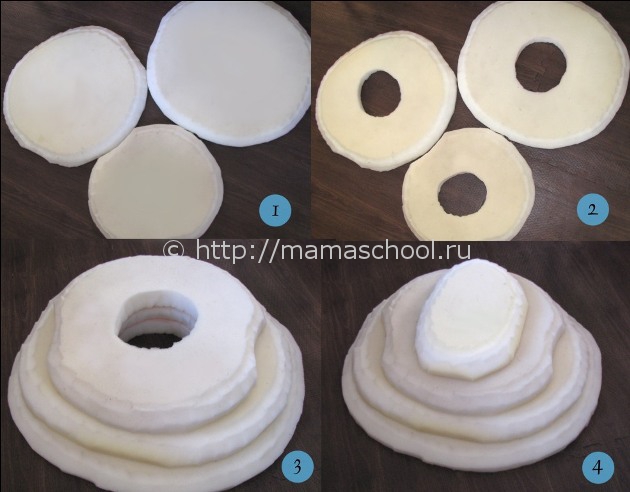
5) Let's combine all the disks so that the slots for the head in the form of ovals coincide.
6) Manually sew the disks at the edge, tightly connecting them to each other.
7) Cut out a brown fabric (I have wide striped velvet) a circle for the top of the hat, focusing on the height of the “pyramid”.
8) Let's make the same circle of beige fabric (I have narrow striped velveteen) for the bottom of the hat with a diameter of 50 cm. Let's make a slit for the head in the center in the form of an oval, the perimeter of which equal to the circle the head of the child minus 4 cm, we will process the edge of the slot on the overlock.
9) - 10) Sew two blanks of fabric, folding them with their right sides to each other. Laying a line, carefully combine the edges, making small folds on the brown fabric. Turn the hat piece right side out.
11) - 12) Let's roll the foam rubber as tight as possible into a roll, put it in a fabric hat and carefully straighten it, aligning the slots for the child's head.

13) Sew a "cap" of cotton fabric for the inside of the hat. To do this, we will cut three blanks: a rectangle 10 cm wide and 35 cm long and two identical semicircles with an arc length of 35 cm and a base equal to 18 cm.
14) Lay two lines, folding the fabric with the right side inward, connecting two semicircles with a rectangle along the edge of 35 cm.
15) - 16) Let's put the “cap” into the hat so that the edges of the rectangle (the middle part of the “cap”) coincide with the narrowest parts of the oval of the slot for the head. Sew the "hat" by hand.

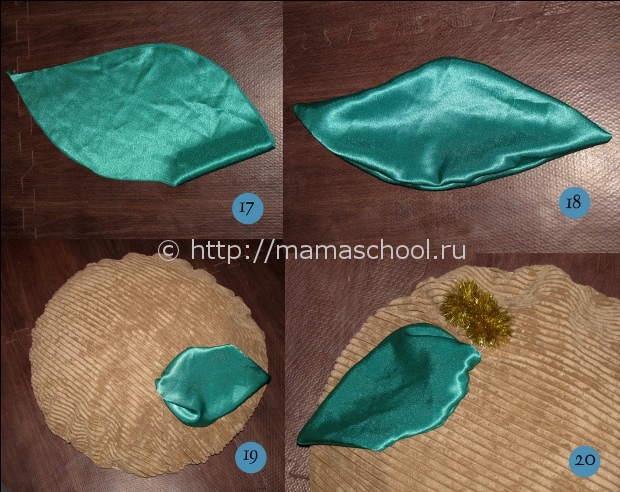
17) Fold the green fabric right side inward and cut out a leaf - a hat decoration.
18) Sew the edge of the leaf blank without completing the line by 2 - 3 cm in order to turn it on the front side.
19) Sew a leaf to the hat, making bartacks in several places.
20) Let's make a hat decoration in the form of two balls of tinsel.
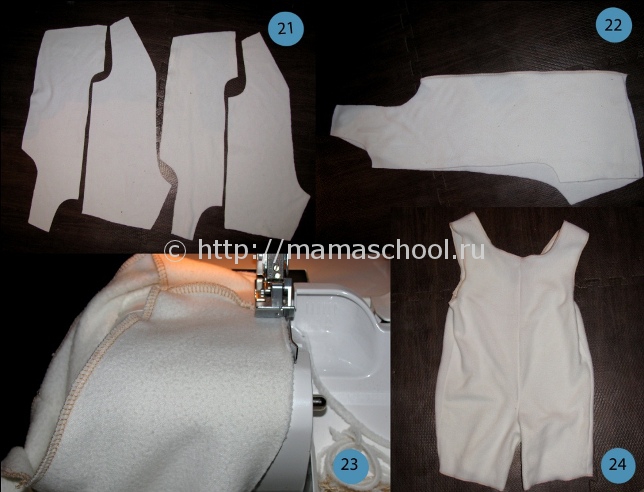
21) Fold the fabric for the overalls (I have fleece) with the front side inward and make a basting on the pattern with a 5 mm seam allowance. Let's cut the fabric.
22) - 23) Let's combine the front and back halves of the overalls face down and process the seams on the overlock. We will also process the armholes, the lower cut of the trousers and the neck.
24) Turn the jumpsuit right side out.
25) Sew by hand in the neck tinsel.
26) Cut out a pocket from the remnants of beige fabric and process the cut on the overlock.
27) - 28) Sew a pocket to the jumpsuit and decorate it with tinsel.

A wonderful New Year's outfit of the boletus mushroom is ready! 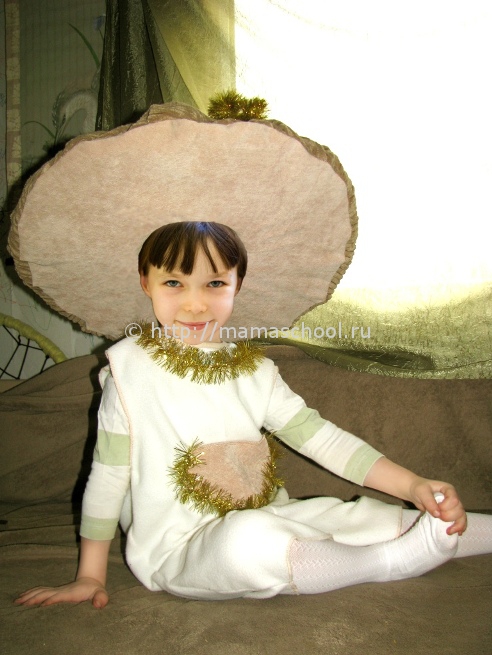
Kindergartens are preparing another series of children's autumn matinees with masquerade costumes.
Parents are tasked with preparing an autumn mask for the matinee.
One of possible solutions maybe making a mask of white fungus on the head of a child.
It is better to make masks with a child from cardboard or paper.
It will be a special pleasure for the child to do crafts with his parents, especially if at the end of the work he is waiting for a finished toy - a mask that can be played for a long time.
Naturally, in this creative process Every child needs the help of their parents.
If the child is old enough, then parents are required to provide overall leadership in the process.
If the child is far from being able to do everything on his own, then, as a rule, the parents are engaged in creativity, and the child learns and carefully follows the magical action - as it would seem, a new toy appears out of nothing - a carnival mask.
Below are pictures that allow you to make children's carnival autumn masks of porcini mushrooms with your own hands from paper with your children.
1. Crafts. Autumn masks. Autumn DIY crafts from cardboard. white mushroom mask White mushrooms. Sample. On right.
2. Crafts. Autumn masks. Autumn DIY crafts from cardboard. white mushroom mask White mushrooms. Sample. Left.

3. Crafts. Autumn masks. Autumn DIY crafts from cardboard. white mushroom mask White mushrooms. In color.
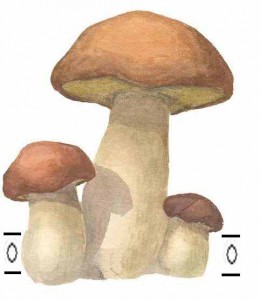
Below is a gallery of pictures that allow you to make children's carnival autumn masks of porcini mushrooms with your children from paper with your own hands.
Crafts. Autumn masks. Autumn DIY crafts from cardboard. white mushroom mask White mushrooms.
After spending a few hours, you can make a charming new Year costume mushroom for a boy or girl. A home-made costume will not hamper the movements of the child and delight the eye with its brightness and originality. Therefore, if you decide to sew an outfit for the New Year, russula, boletus or fly agaric, you can watch this photo master class and step by step make a mushroom costume and hat with us.
How to make a New Year's mushroom costume for a boy with your own hands
Do-it-yourself fly agaric hat
Cut out a circle with a diameter of 45 cm from cardboard.
From the circle you need to make a cone. To do this, cut out a circle segment.
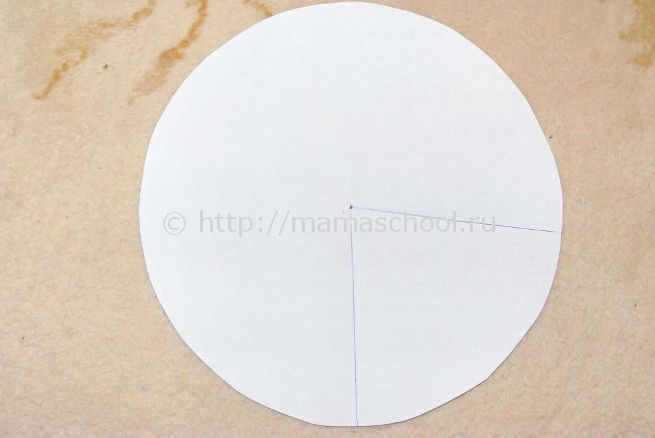
We form a cone.

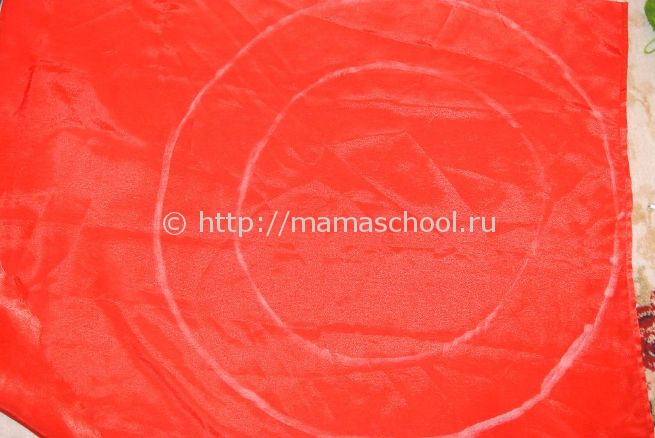
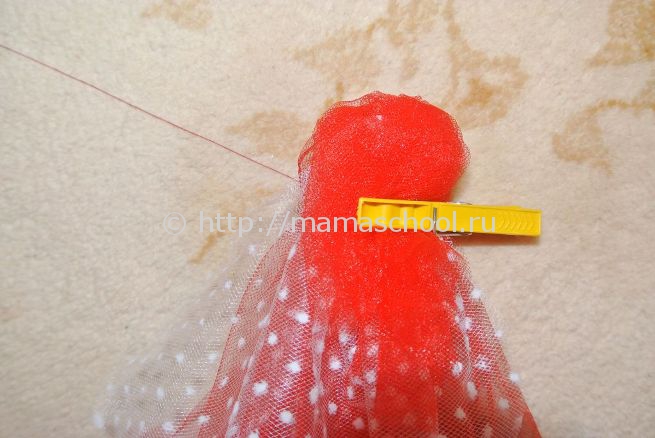
We take red fabric. We draw a circle on it with the same diameter as the cardboard circle. We make an allowance of 5-7 cm. Cut out.


Insert rubber band.

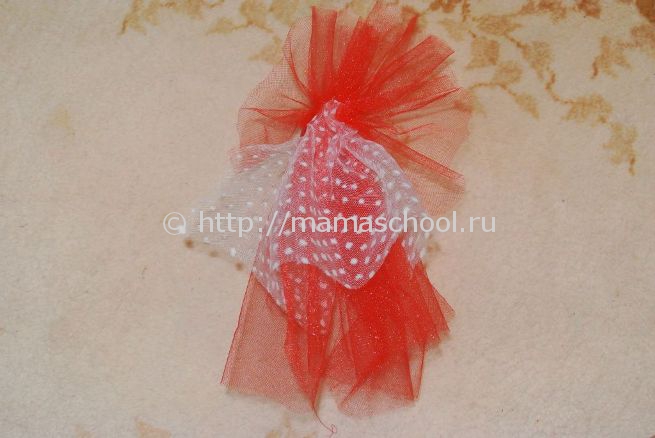
Cut out 12 circles. Six pieces of white fabric and six of organza.

We pin the circles to the main fabric. Then we sew.

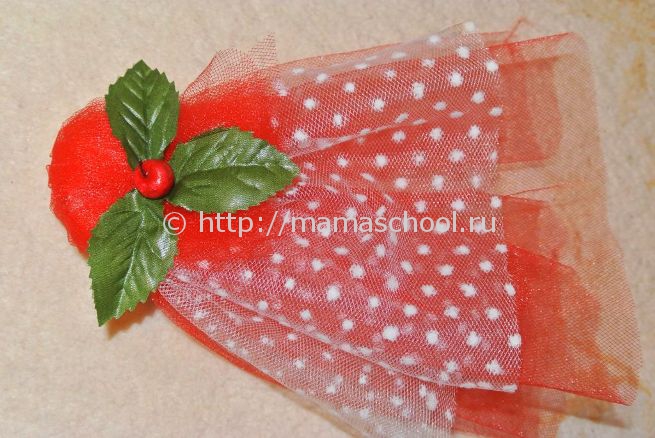
We take artificial leaves and fruits. We make a composition. Glue to the hat with a silicone gun.
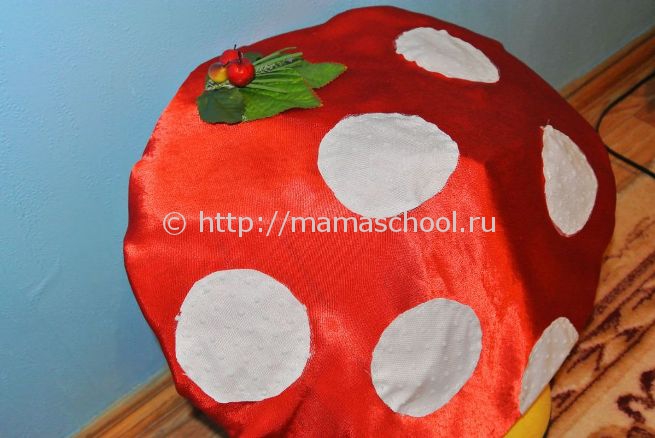
We put the fabric on the cone.
Fly agaric hat is ready!
Making Jabot
We take 2 pieces of organza: red and white.

We bend the top edge. Then we sew again.
We glue artificial leaves and an apple with a silicone gun.
Here is a frill we got.
The top of the suit is a white shirt or golf.
We sew panties
We are looking for a pattern on the Internet or in a magazine. You can also sew panties for a costume using the child's clothes. I cut my pants. We sew all the details. Insert rubber band.

The costume is ready.
Happy New Year holidays!


