Do-it-yourself coffee toys for dogs. Coffee toy: materials, fabric, patterns
Now handmade souvenirs are gaining more and more popularity. Among them, such amazing and cute creatures as attic animals are in demand. All of them have a brownish shade of fabric and a certain decor. All this together gives the impression of an old toy found somewhere in a chest. And also such souvenirs are flavored. Pattern coffee toys usually very simple, so the product does not require professional sewing skills. Even a novice needlewoman will cope with the task.
Why is the toy called a coffee toy
All characters made in this style have a brownish tint, which is obtained by lowering into a container or applying with a brush a solution prepared from ground or ground coffee toys. Everyone chooses a convenient method for themselves.
There is also a legend that explains the appearance of these toys. A woman who worked in a coffee factory sewed a toy for her daughter, which she often played with in the attic above the production facilities when her mother took it with her to shift. The girl forgot her toy. Having lain in the attic for many years, the fabric of the doll has grown old and saturated with the aroma of coffee, cinnamon and vanilla. This is exactly what modern needlewomen make this souvenir.
DIY coffee toys: patterns
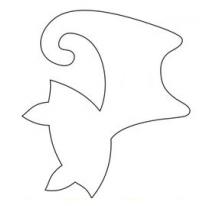
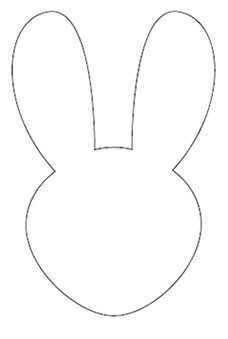
If you are making such a souvenir for the first time, use a template - one of the ones presented in the article or found on your own. To do this, simply print the image, cut it out along the contour and circle it on the fabric, after pinning it with pins. 
If you don’t like ready-made schemes or nothing you see suits you, make your own version of any character. 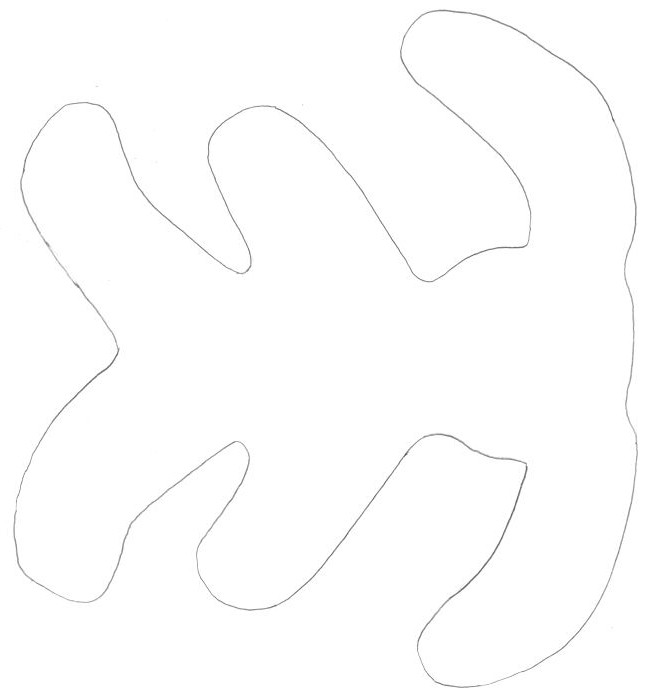 Building a pattern is easy. In fact, you just need to draw a simplified outline of the animal. As a rule, its proportions can be any, even completely unrealistic. Cats often have long necks, or the animal, on the contrary, takes on the shape of a circle or rectangle. So show your imagination, and drawing skills are not required here. The main thing is that the shape should be easy to cut out of the fabric and simply sew. Characters usually consist of one, maximum 2-3 separately made ones, which already includes paws, as well as a tail, ears. The easiest way is to make a souvenir as a whole.
Coffee toys: master class
It should be noted right away that the manufacturing sequence may differ slightly. Choose the one that seems most convenient to you. Since you will need to dye the white fabric, you can schedule this process before or after sewing the toy. In these cases, the composition is applied with a wide brush on the front side. More precisely, the surface on which the color is applied (before stitching the parts) will be the front. You can also dye a whole flap of fabric before cutting out elements with already applied contours or before applying them, however, this option is less convenient, since it is difficult to obtain a uniform distribution of the shade over the material and a larger amount of solution is required.
If you are painting cut parts, they can be dried directly on the surface where the process took place. Usually this is a table with a newspaper or oilcloth spread over it. To speed up the process, a hair dryer is sometimes used. If you apply the solution to sewn toys, it is better to dry them in the oven. To do this, you will need hanging loops, for which you can fix the toy on the grill. And also it will be necessary to carefully control the drying process so that the products do not burn.
So, let's look at the process of creating a coffee souvenir step by step. The sequence of work will be as follows:
Souvenirs to lift your spirits
Patterns of positive coffee toys are no different from ordinary ones. Tenderness, laughter, positive emotions are caused by painted muzzles (smiling, with a protruding tongue, surprised eyes) and inscriptions. You can come up with the text yourself, peep on other characters, photographs, or even hear from friends who constantly like to joke. Memorize or write down the phrases you like, and then use them in your creative process.
So, you have seen what a pattern of coffee toys is. You can draw such a template yourself or print any blank you like. It is not difficult to sew this cute thing, and the souvenir turns out to be very cute and cute.
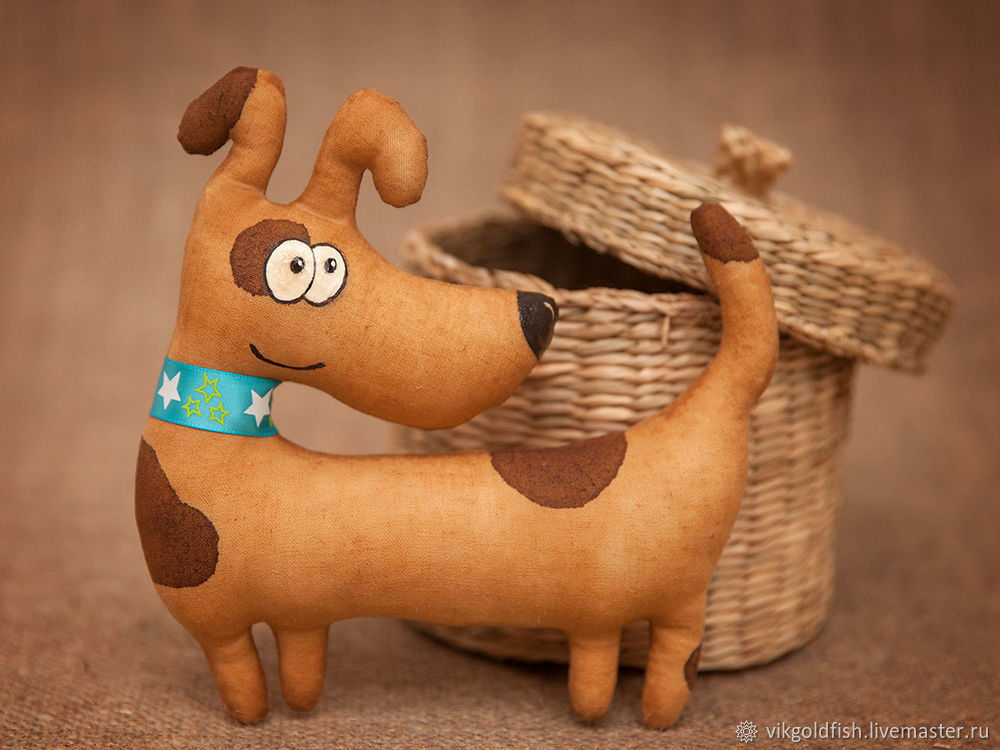
A very beautiful and interesting master class on the theme of the coming year - the Year of the Dog from Viktoriya GoldFish. it coffee dogs- a simple yard guy Tobik and a charming taxi driver Knopochka.
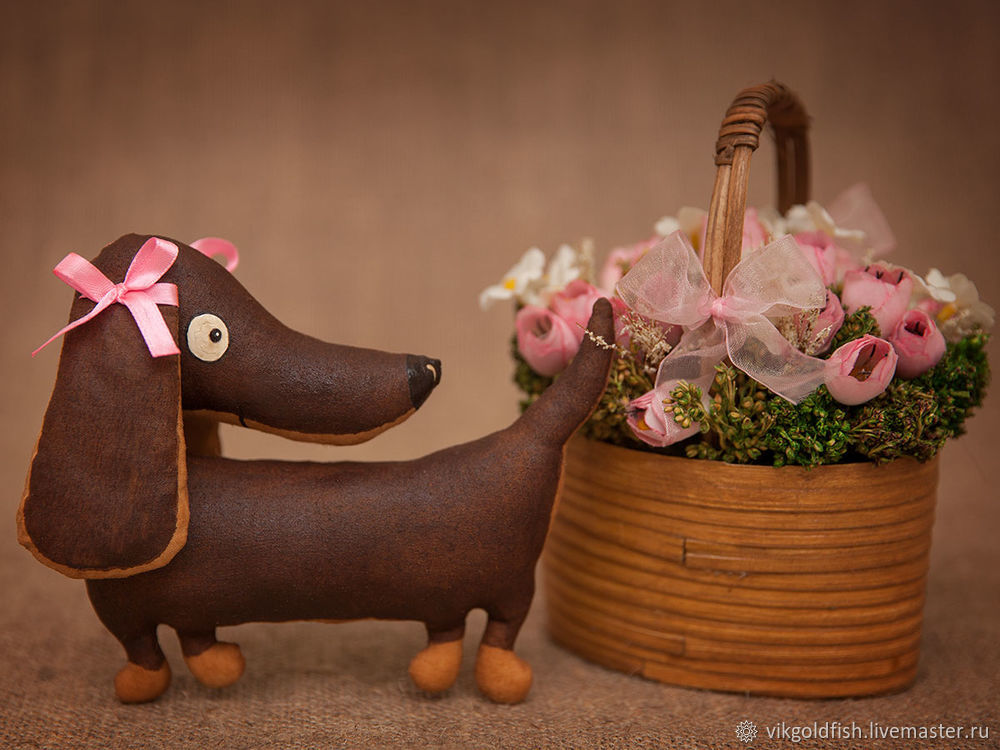
So what we need:
- a piece of white calico about 50x50 cm;
- filler;
- instant coffee;
- PVA glue;
- acrylic paints - white, black and brown;
- brushes, thread, needle.
Patterns:
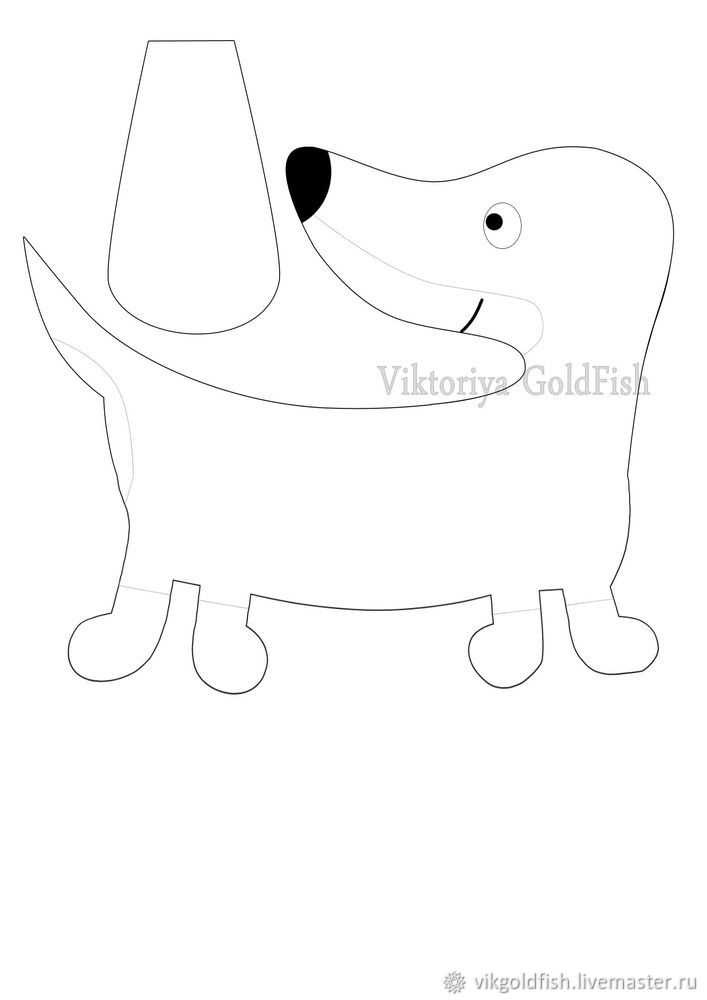
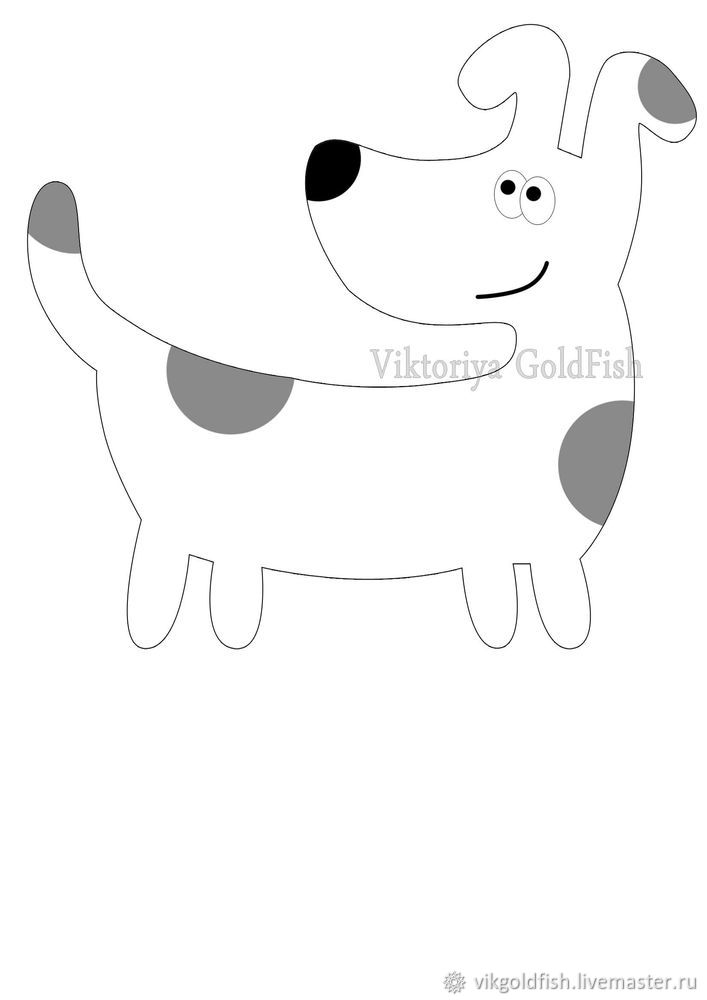
1. We transfer the pattern to the fabric, sew, not forgetting to leave holes for eversion. We cut the seams in the corners. If the fabric is very loose, I advise you to coat the PVA allowances on the seams in the places of cuts.
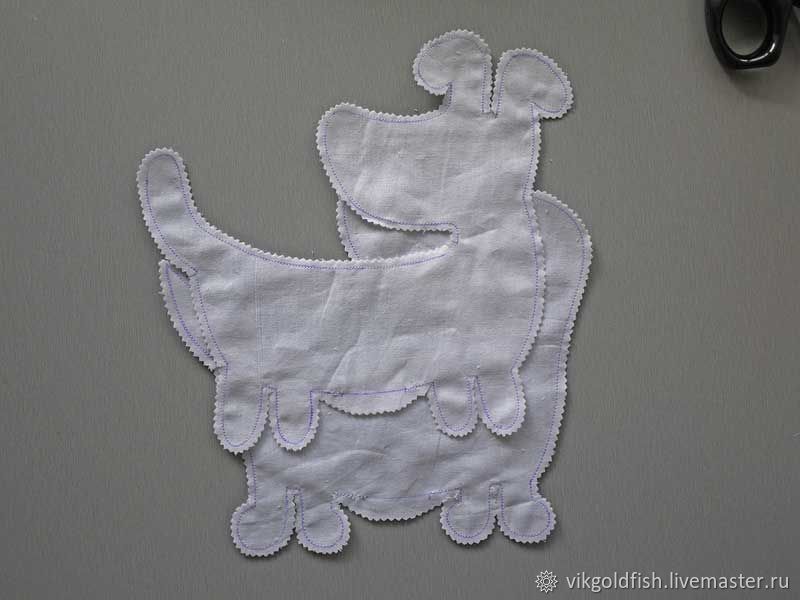
2. Carefully turn out all the details, stuff them tightly with filler, sew up the holes with a blind seam. We fill the ears of the buttons loosely, by about 2/3.
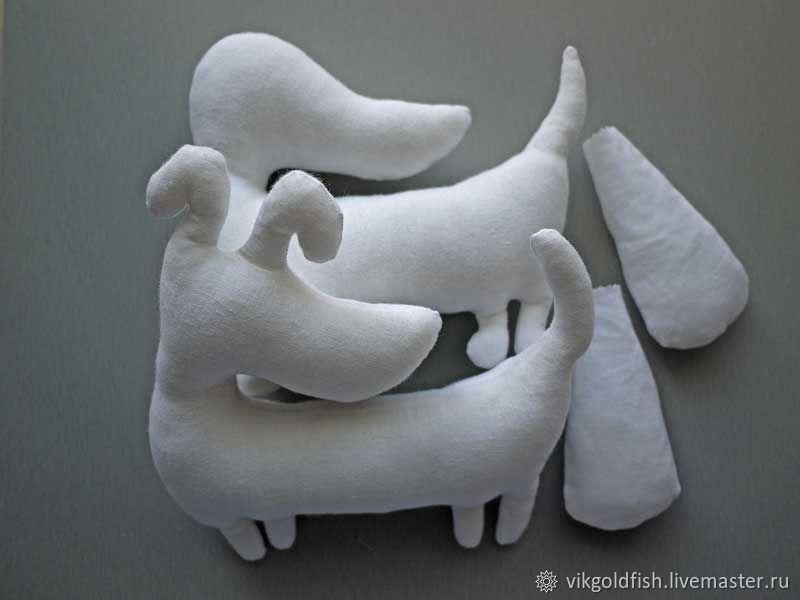
3. Sew on the ears to the Button.
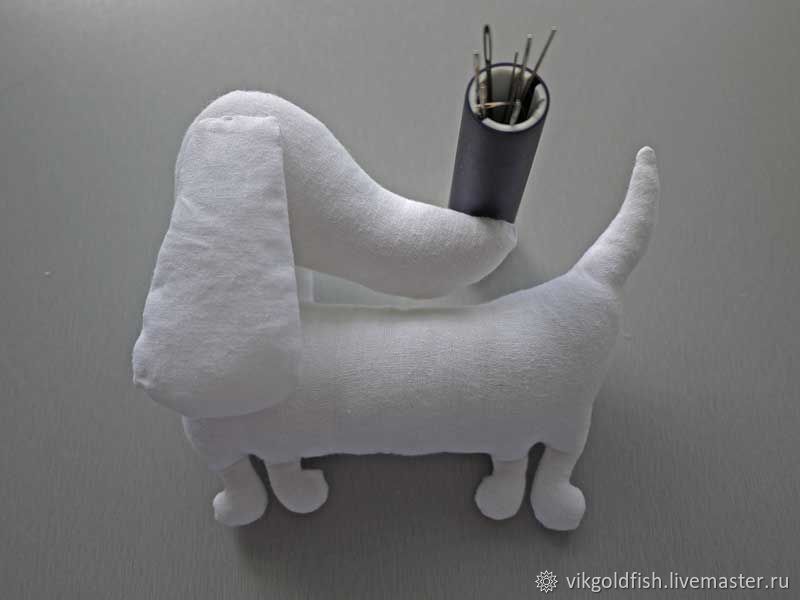
4. Dilute the coffee mixture for coloring toys - dilute 1 tablespoon without a slide of instant coffee in 3 tablespoons of boiling water. When the mixture has cooled slightly, add 1 tablespoon of PVA and a pinch of crystal vanillin. To remove excess paint, after dyeing, I blotted the toys a little with a paper towel.
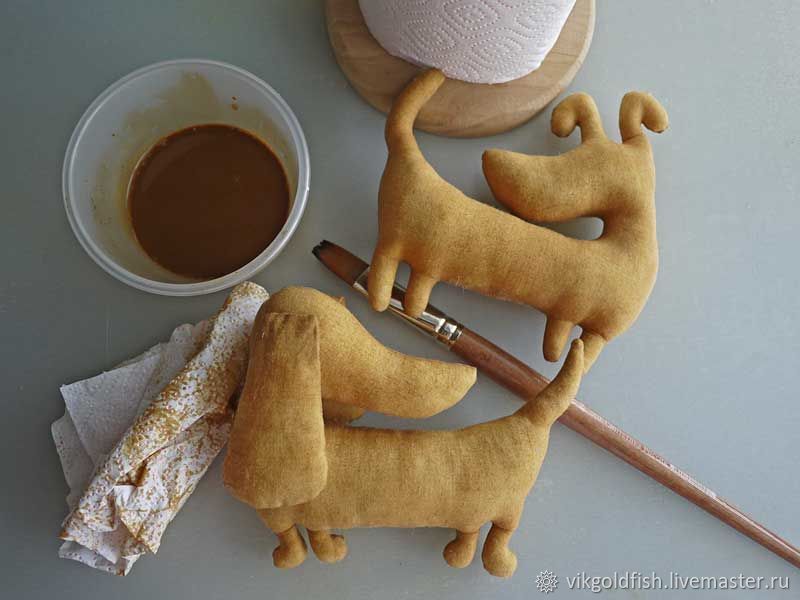
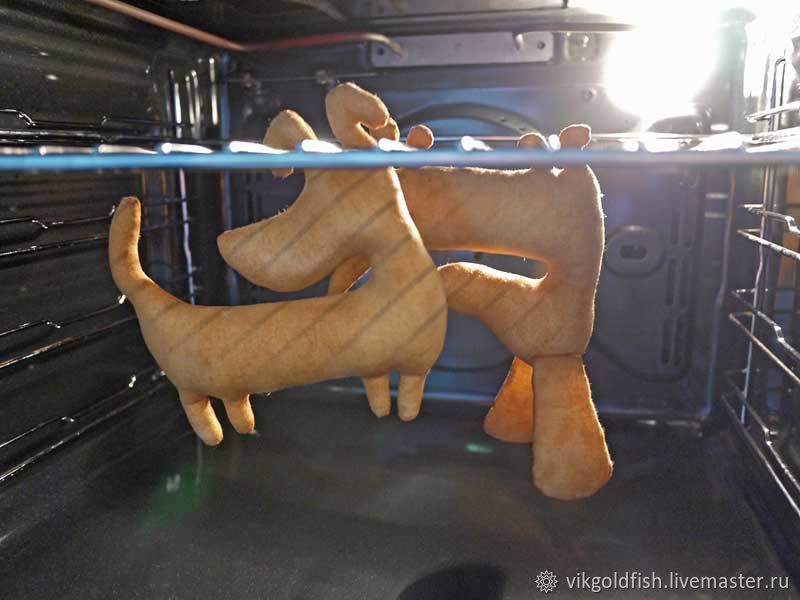
5. Dry the blanks. I baked in the oven at 75 degrees for about 10 minutes. You can use a hair dryer to dry, you can let the toys dry in a natural way.
6. In the remaining coffee solution, add half a teaspoon of brown acrylic paint (I have Van Dyck) and draw spots. Here, as fantasy tells me :) On Tobika, I painted the spots in one layer, I covered the Button in two layers to get a rich chocolate color.
Tell your friends about it:
And again, another master class on the theme of the coming year - the year of the Dog. This time it's coffee dogs - a simple yard guy Tobik and a charming dachshund Button.
So what we need:
A piece of white calico about 50x50cm;
Filler;
Instant coffee;
PVA glue;
Acrylic paints - white, black and brown;
Brushes, thread, needle.
Patterns:
1. We transfer the pattern to the fabric, sew, not forgetting to leave holes for eversion. We cut the seams in the corners. If the fabric is very loose, I advise you to coat the PVA allowances on the seams in the places of cuts.
2. Carefully turn out all the details, stuff them tightly with filler, sew up the holes with a blind seam. We fill the ears of the buttons loosely, by about 2/3.
3. Sew on the ears to the Button.
4. Dilute the coffee mixture for coloring toys - dilute 1 tablespoon without a slide of instant coffee in 3 tablespoons of boiling water. When the mixture has cooled slightly, add 1 tablespoon of PVA and a pinch of crystal vanillin. To remove excess paint, after dyeing, I blotted the toys a little with a paper towel.
5. Dry the blanks. I baked in the oven at 75 degrees for about 10 minutes. You can use a hair dryer to dry, you can let the toys dry in a natural way.
6. In the remaining coffee solution, add half a teaspoon of brown acrylic paint (I have Van Dyck) and draw spots. Here, as fantasy tells me 🙂 On Tobika, I painted the spots in one layer, I covered the Button in two layers to get a rich chocolate color.
7. Dry again. After complete drying, draw eyes, nose, mouth. Let dry well and cover with acrylic varnish (only eyes and nose).
That's all 🙂
All pleasant creativity!
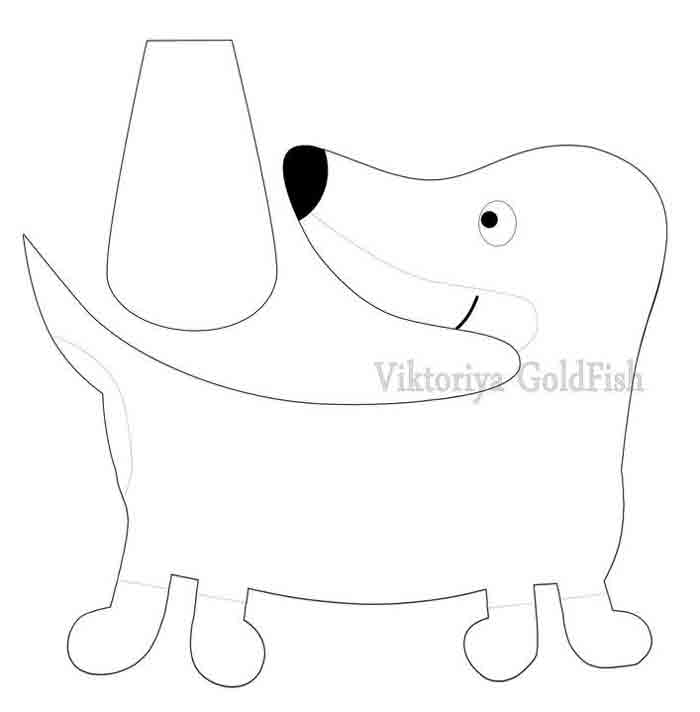
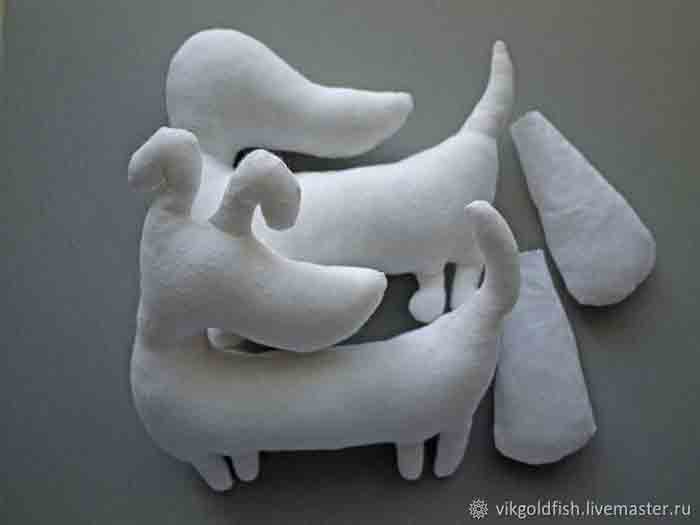
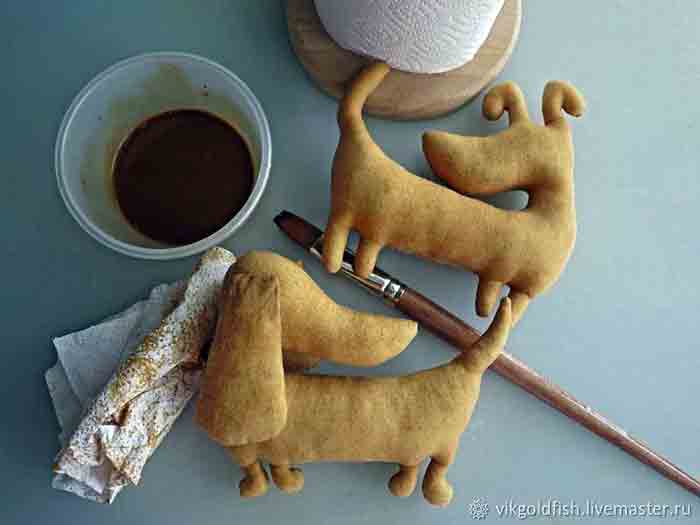
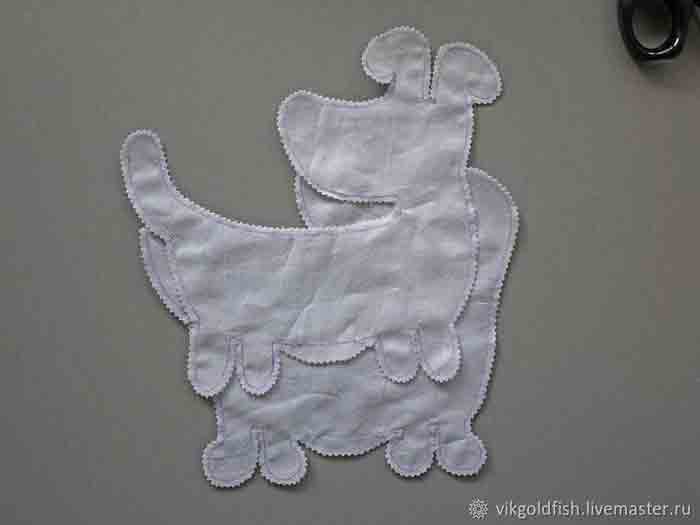
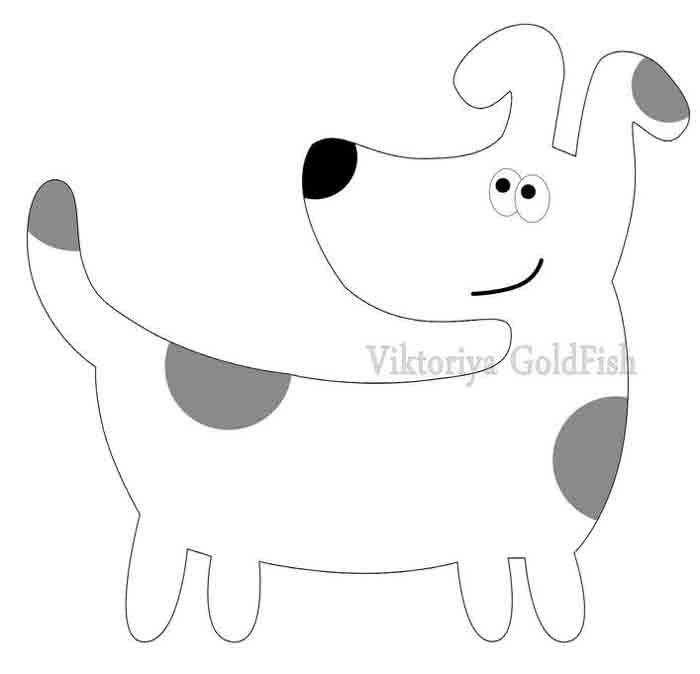
And again, another master class on the theme of the coming year - the year of the Dog.
This time it's coffee dogs - a simple yard guy Tobik and a charming dachshund Button.
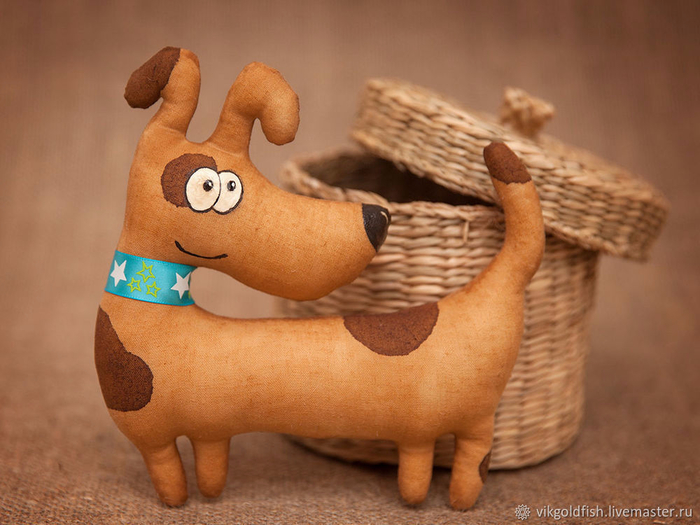
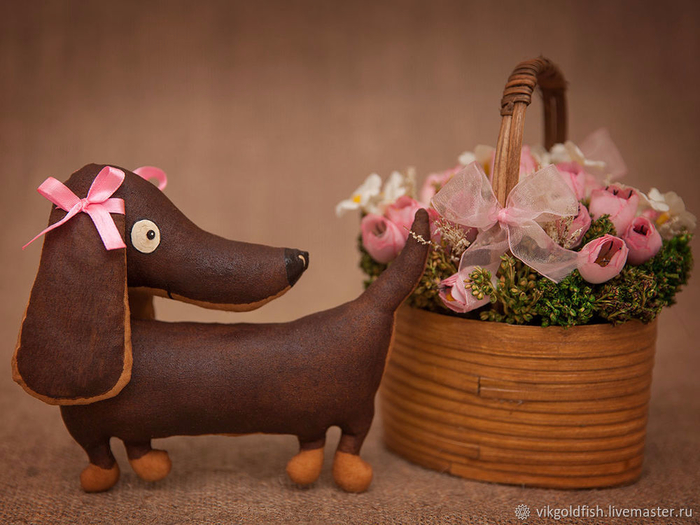
So what we need:
A piece of white calico about 50x50cm;
Filler;
Instant coffee;
PVA glue;
Acrylic paints - white, black and brown;
Brushes, thread, needle.
Patterns: 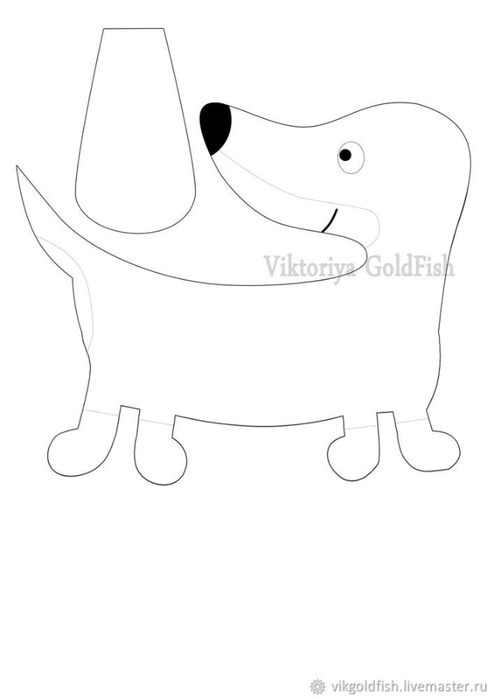
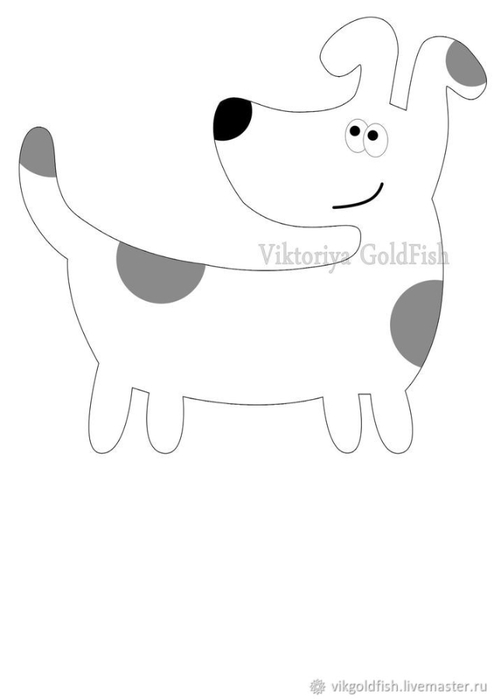
1. We transfer the pattern to the fabric, sew, not forgetting to leave holes for eversion. We cut the seams in the corners. If the fabric is very loose, I advise you to coat the PVA allowances on the seams in the places of cuts. 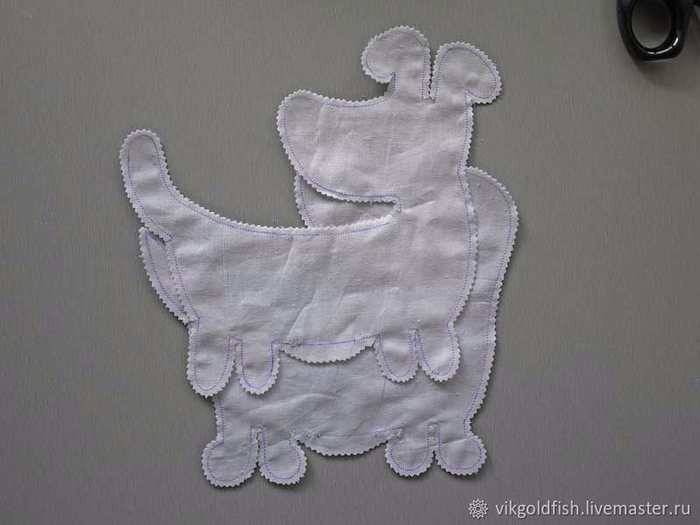
2. Carefully turn out all the details, stuff them tightly with filler, sew up the holes with a blind seam. We fill the ears of the buttons loosely, by about 2/3. 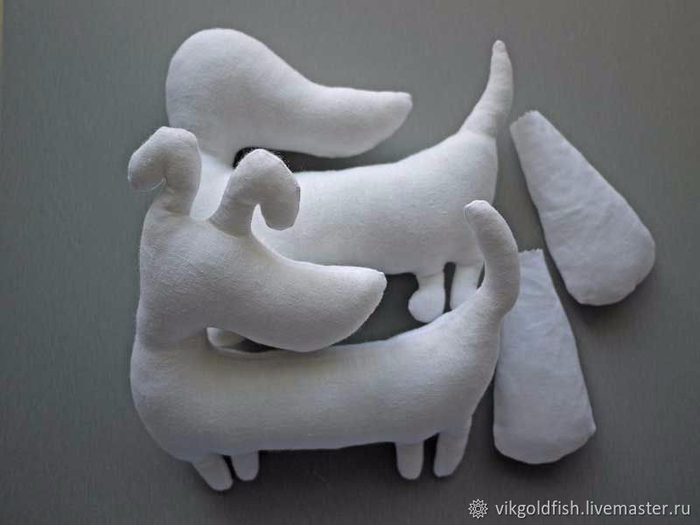
3. Sew on the ears to the Button. 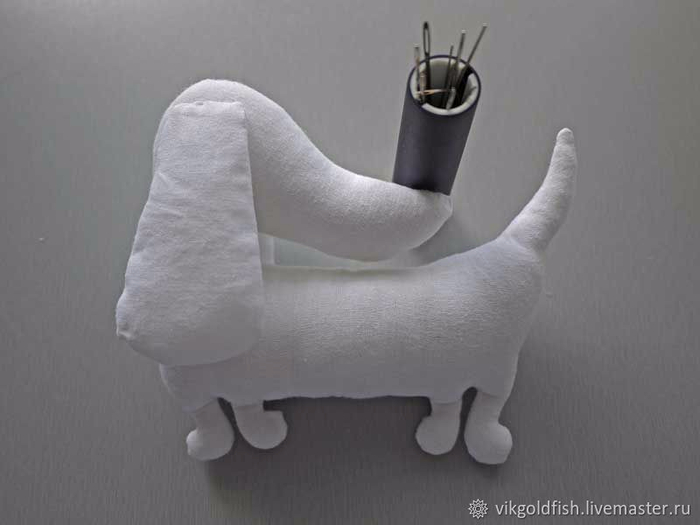
4. Dilute the coffee mixture for coloring toys - dilute 1 tablespoon without a slide of instant coffee in 3 tablespoons of boiling water. When the mixture has cooled slightly, add 1 tablespoon of PVA and a pinch of crystal vanillin. To remove excess paint, after dyeing, I blotted the toys a little with a paper towel. 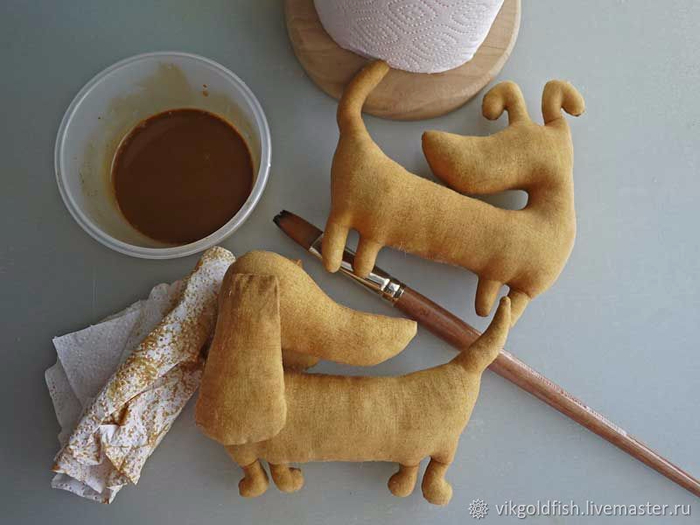
5. Dry the blanks. I baked in the oven at 75 degrees for about 10 minutes. You can use a hair dryer to dry, you can let the toys dry in a natural way. 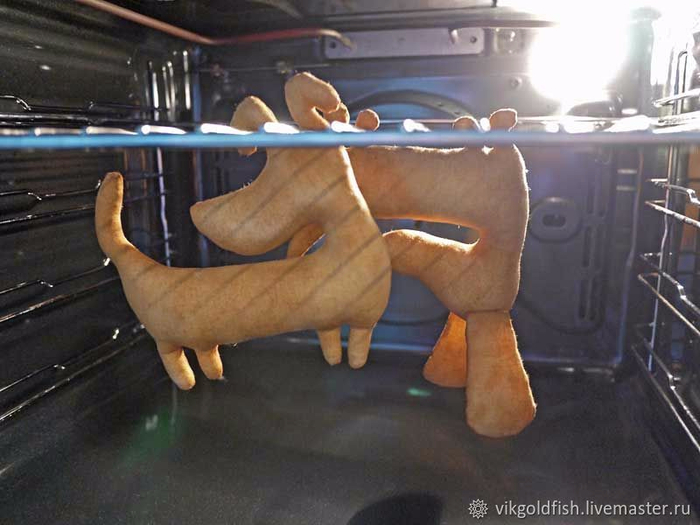
6. In the remaining coffee solution, add half a teaspoon of brown acrylic paint (I have Van Dyck) and draw spots. Here, as fantasy tells me :) On Tobika, I painted the spots in one layer, I covered the Button in two layers to get a rich chocolate color. 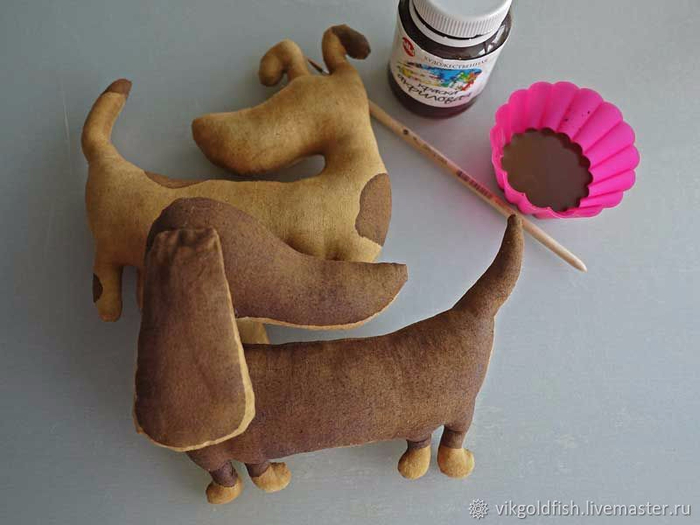
7. Dry again. After complete drying, draw eyes, nose, mouth. Let dry well and cover with acrylic varnish (only eyes and nose).
That's all :) All pleasant creativity! 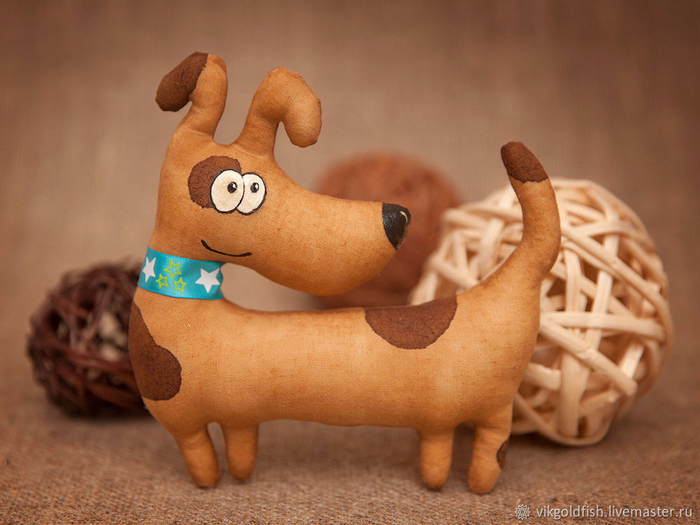
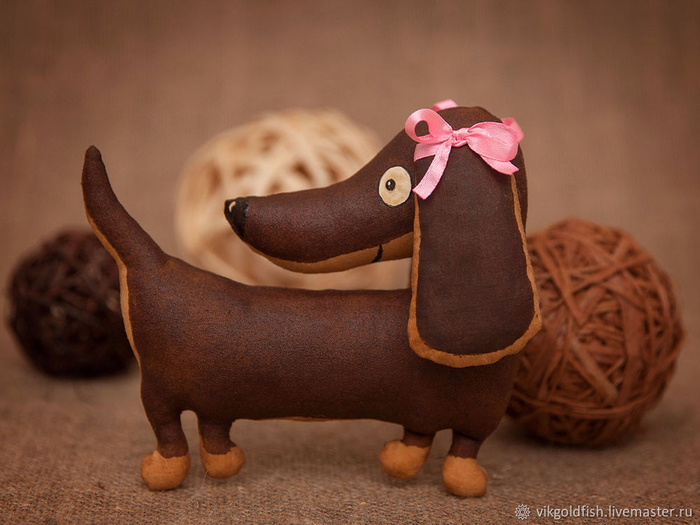
Unusual, similar to those stale in the attic, coffee toys are just asking to be a gift for a dear person. We offer you patterns of coffee toys!
By the way, the legend of their origin begins in the attic. One day, the mother of a little girl sewed a rag doll for her. Mom worked at a coffee factory, and there was no one to leave her daughter with, so she took her to work with her. The girl was playing with her rag toy, and at the end of the shift she forgot to pick it up. Since then, she lay for several years in the same place where her little mistress left her. Soaked in the smell of vanilla, herbs and the unique aroma of coffee, the toy received a second life in a new way and became a symbol of home comfort, gaining extraordinary popularity.
And also, such cute animals: cats, owls, foxes, fish, frogs, dogs and elephants will be not only a toy, but also an unusual sachet, thanks to the aromas they exude. You can hang them in your car and enjoy the aroma of coffee on the way to work. Can be placed in a wardrobe and inhale the scent of lavender on the dress. Or use it as Christmas decorations and then the aroma of citrus and vanilla will bring the holiday on their own.
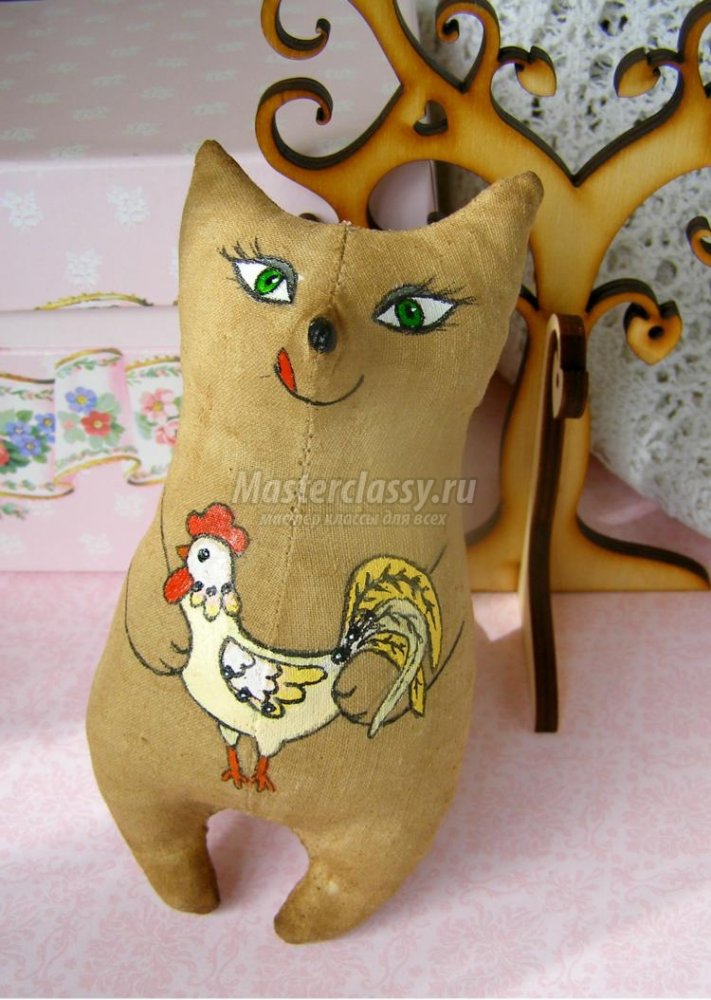
Such a simple, outwardly vintage toy, you can buy ready-made. But, what if you like the mixture of several smells, but there was no such toy in the store? Then we offer you several patterns of coffee toys that you can make with your own hands.
We have no doubt that you will like the process and the result. And whether the toy will become a gift or will continue to please the craftswoman who sewed it - we leave this choice to you.
Using the example of a bear, consider the creation of a coffee toy.
We will need:
- Natural fabric. Such a toy can be sewn from linen or from cotton fabrics (from coarse calico, satin or chintz).
- Instant coffee, no matter what brand.
- PVA glue (any stationery or carpentry).
- Flat brush with synthetic or hog bristles.
- Filler (synthetic winterizer, synthetic winterizer, holofiber).
- Paper, pencil.
- Tools: scissors, needle and thread, knitting needle, sewing machine.
- Aromatic fillers: vanillin, coffee, citrus, cinnamon.
We draw or print a pattern of our teddy bear. If you want another figure, then you can make a horse, or a hare, or any other. The manufacturing principle is exactly the same as will be described below.
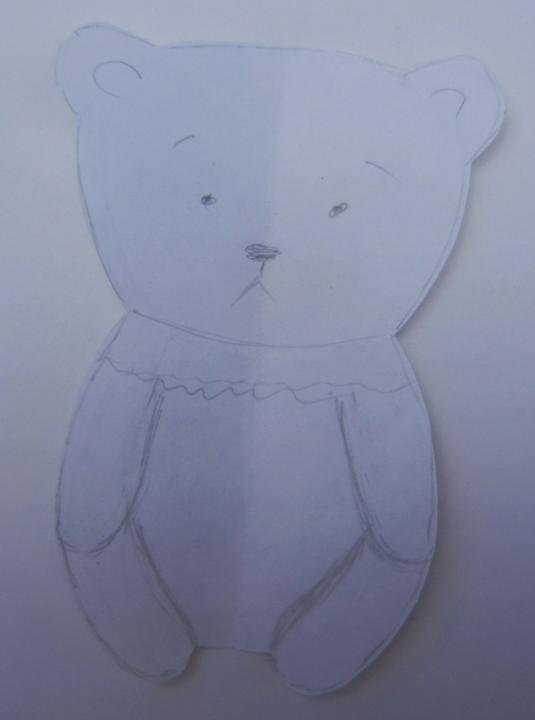
We transfer the pattern to the fabric folded in half.
Sew the pieces together before cutting. So you can be less worried that at some point the fabric will move out. We leave an unsewn area to turn the toy inside out and fill with filler.
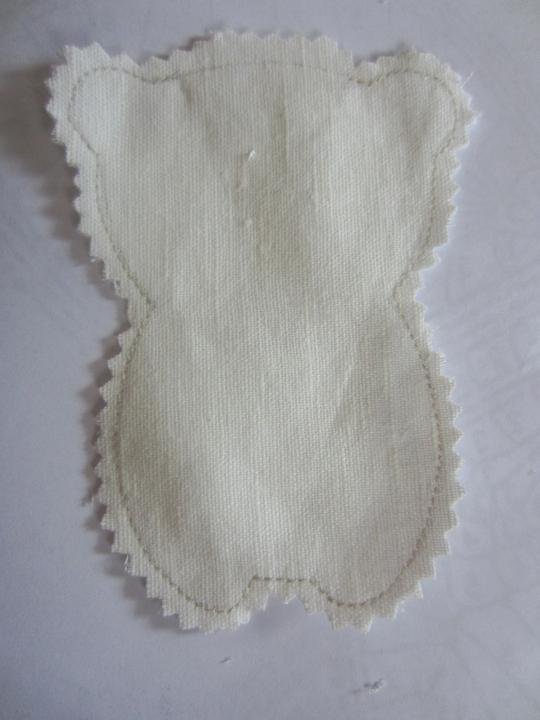
It makes sense to walk along the cut edge with glue if the fabric crumbles a lot.
We turn the parts out without waiting for the glue to dry. We fill the toy with filler. In small areas (paws and ears) we help ourselves with a knitting needle so that the filler evenly fills the figure with itself. After that, you can sew up the slot with a hidden seam. Don't forget to add string so you can hang the toy. To do this, take the cord of the required length, fold it in half, making a loop. At the ends, connect the resulting loop with a knot - so you can be sure that the rope will not slip out of the toy.
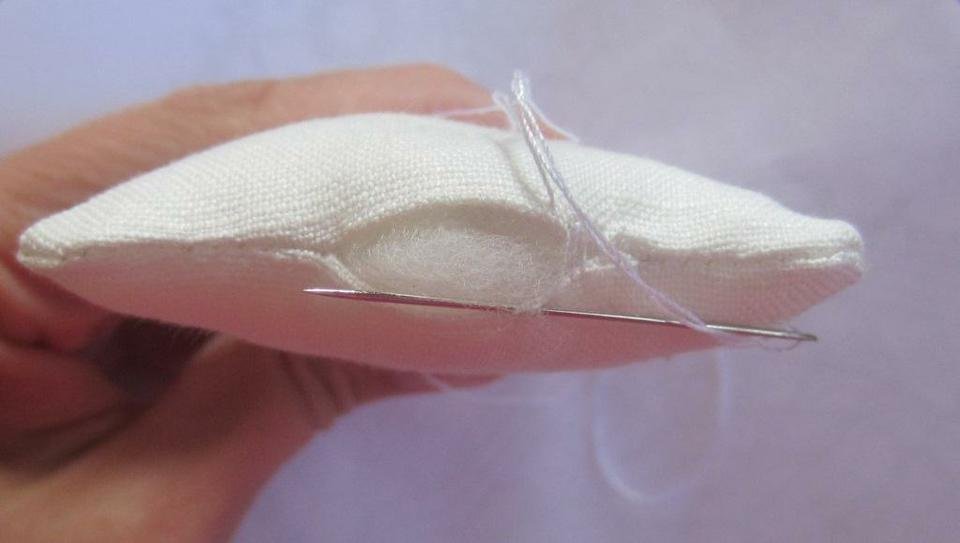
We give the paws of the bear cub volume. We mark them with a pencil and sew them by hand, with not too wide stitches, through and through, pulling the fabric.
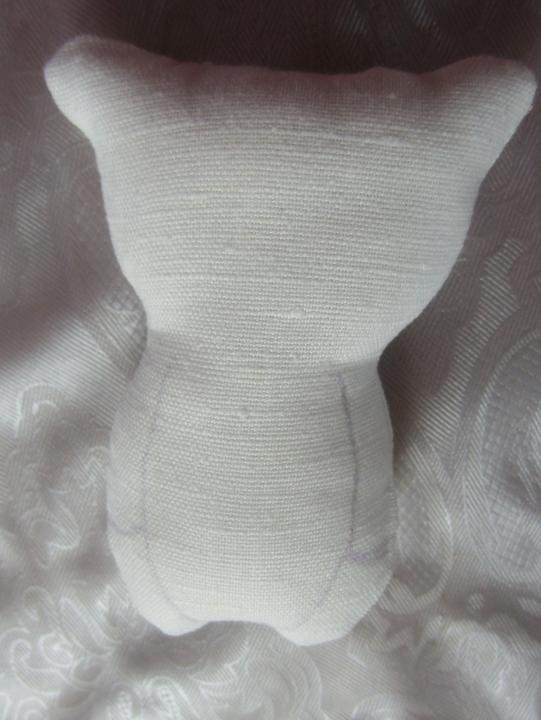
The toy is ready, it remains to paint.
We prepare our tinting liquid according to this recipe: 2 teaspoons of instant coffee (more is possible - then the shade of the toy will turn out darker) pour 0.05 liters of boiling water. We add our additional flavors: citrus, vanilla, cinnamon. Pour in 2 more teaspoons of PVA glue and mix the composition thoroughly.
We lower the brush into the composition, wring it out so that the liquid does not pour, and tint the toy. Our task is to tint quickly in order to paint the surface of the toy and at the same time, the stuffing should not be impregnated with the composition.
![]()
We dry the figure on the street or in an open oven, at a temperature of 100 ° - 150 °.
For painting we use paints on fabric, ceramics or glass. You can use gel pens, glitter or pastels. For the muzzle, use a thin brush or contour.
Additionally, we decorate with decoupage napkins, lace, ribbons, badges and other things that come to mind. You can, for example, tie a lace frill around your neck. The length should be twice the circumference of the neck so that the frill folds. Lightly tint the decorative collar with the same composition - so the whole toy will look organic. Connect the lace into a ring and fasten with a thread. Dress on the toy and collect the folds. Fix.
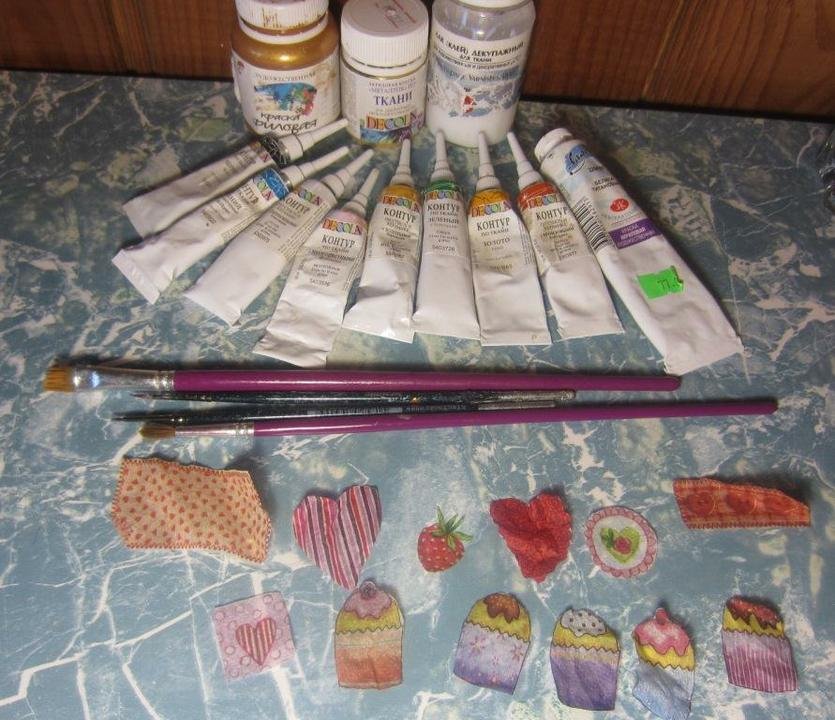
If you wish, you can go over the toy with gold acrylic paint, additionally shading it.
So we looked at how to make a cute toy - in detail and with an example. A few more patterns of funny coffee animals: 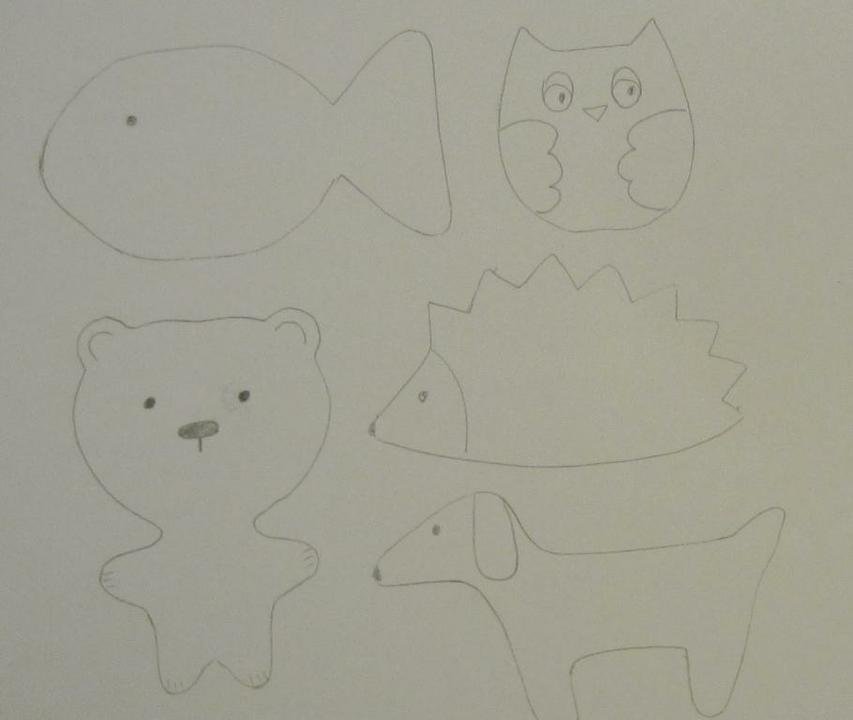
Video compilation


