Coffee dogs for the new year. Master class on making, photo and pattern of coffee toys
Tell your friends about it:
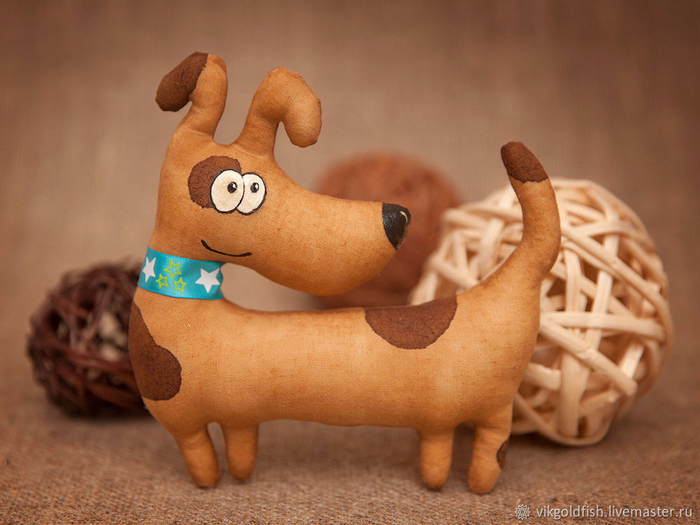
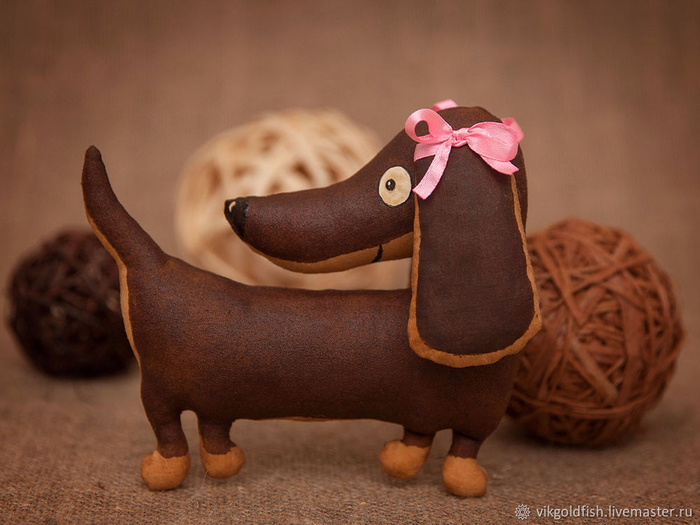
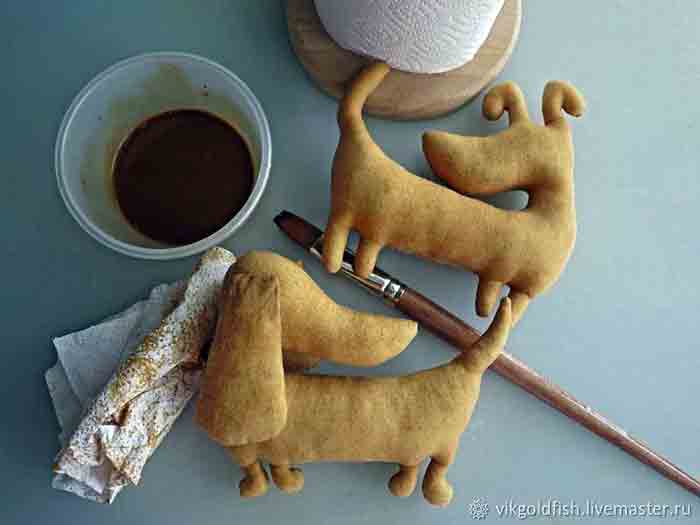
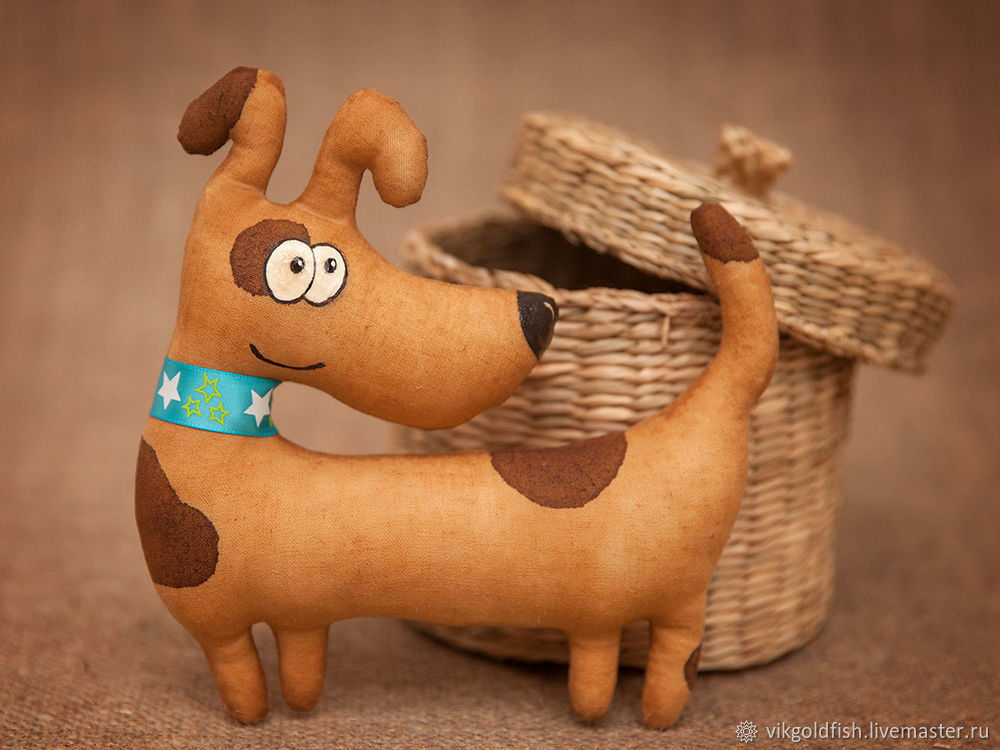
And again, another master class on the theme of the coming year - the year of the Dog. This time it coffee dogs- a simple yard guy Tobik and a charming taxi driver Knopochka.
So what we need:
A piece of white calico about 50x50cm;
Filler;
Instant coffee;
PVA glue;
Acrylic paints - white, black and brown;
Brushes, thread, needle.
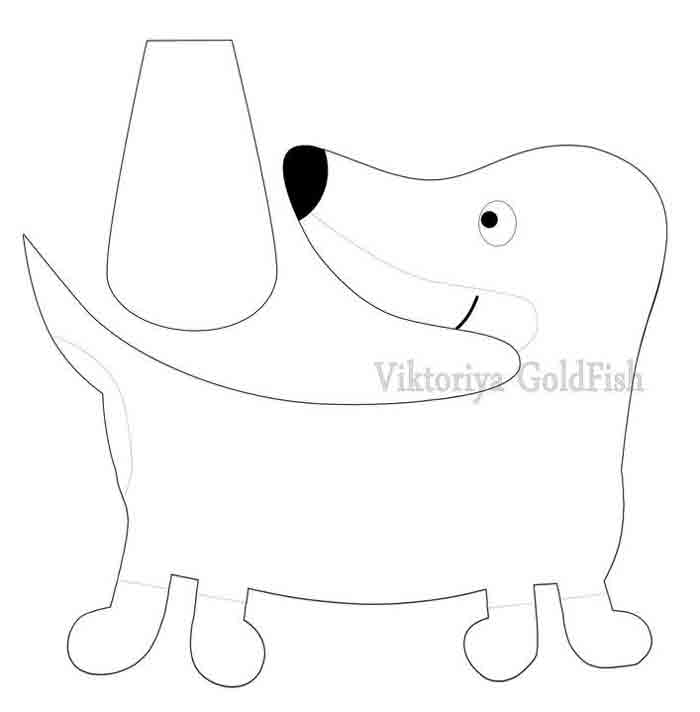
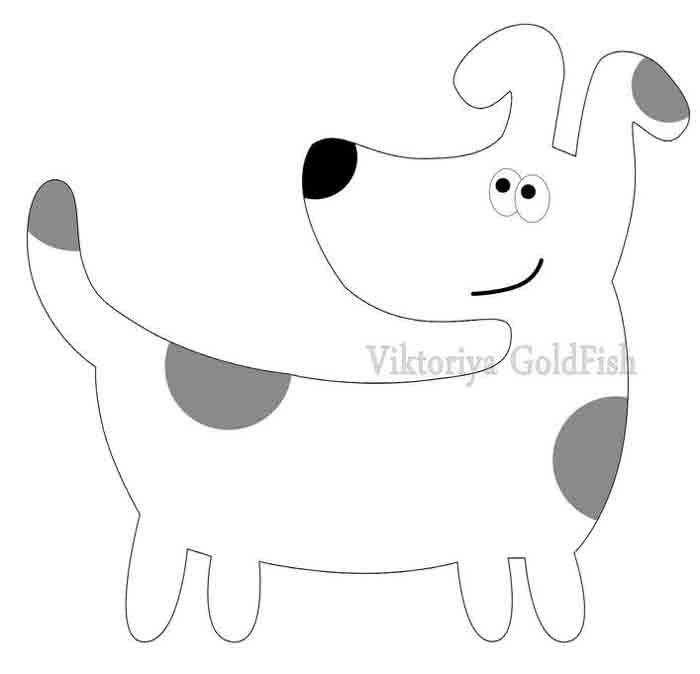
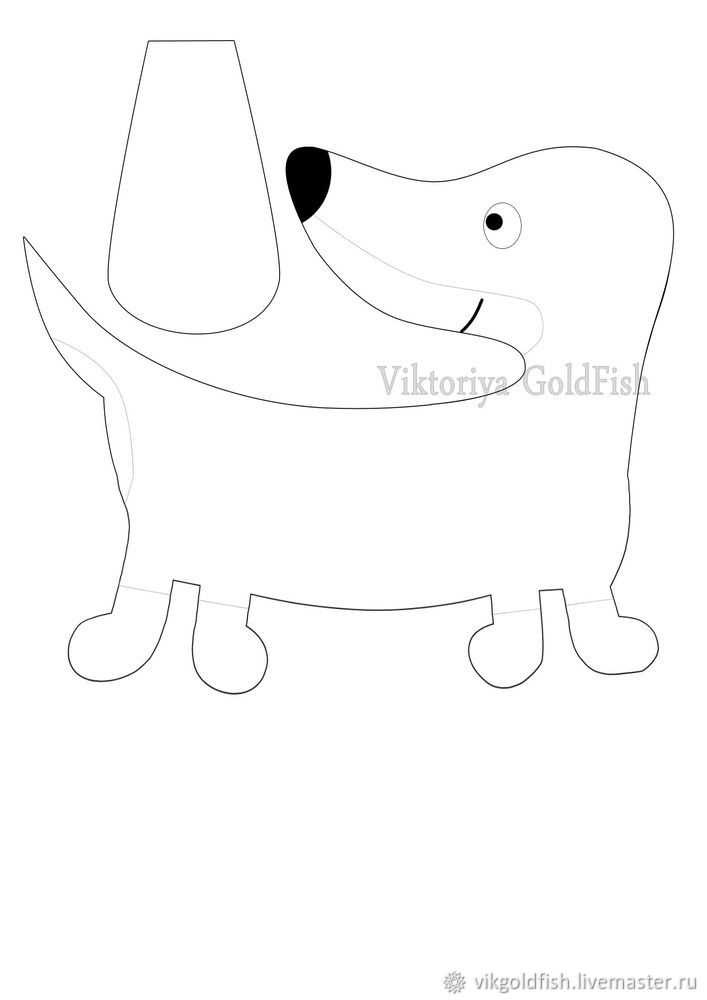
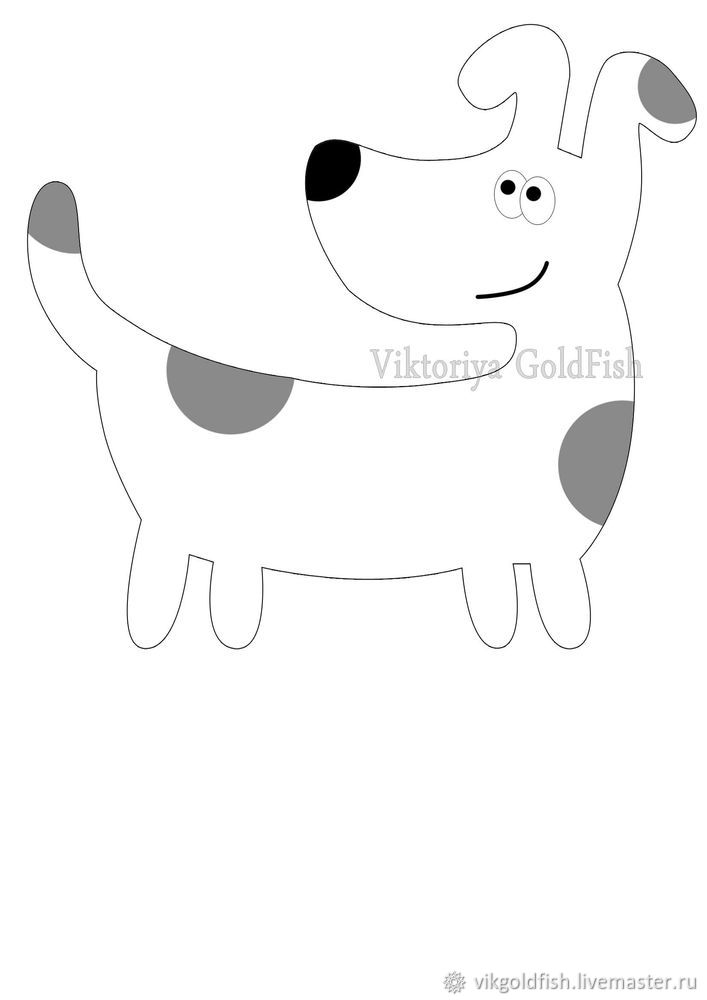
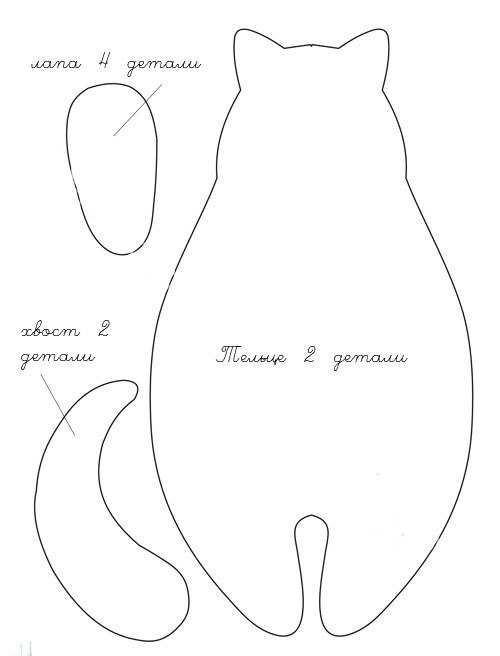
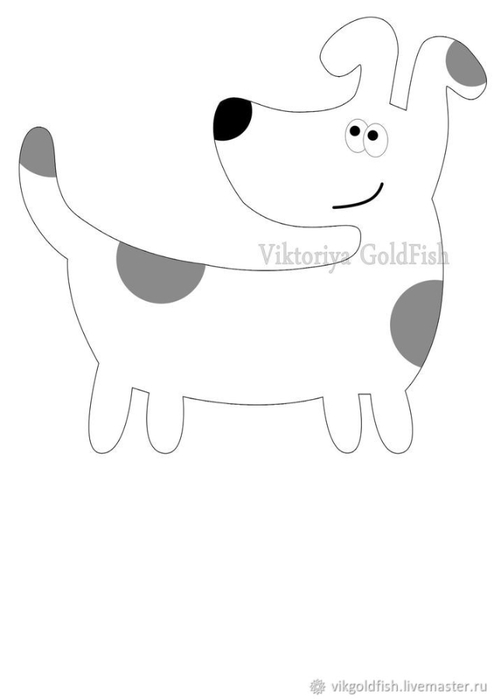
Patterns:
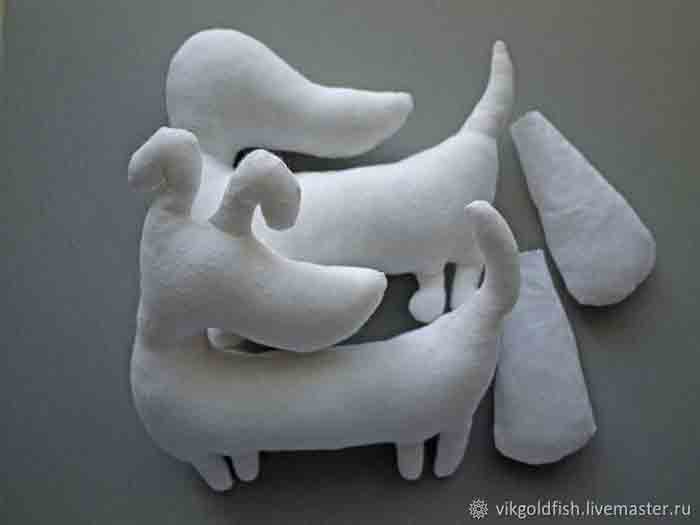
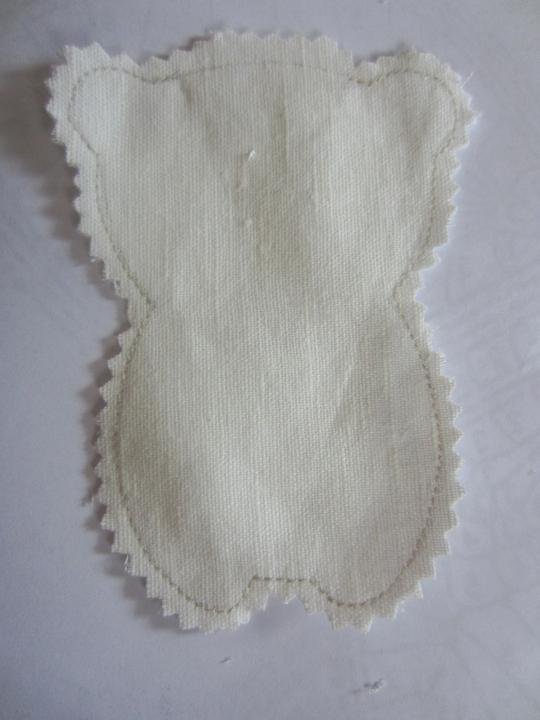
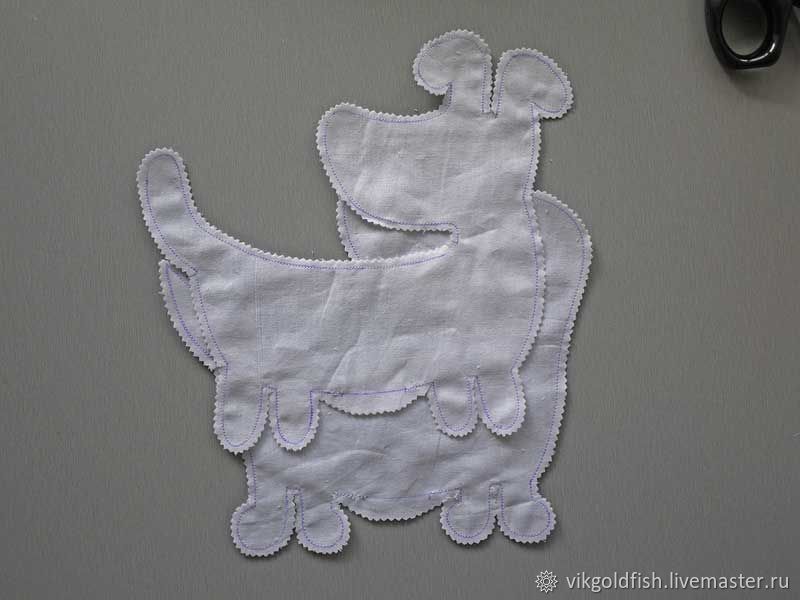
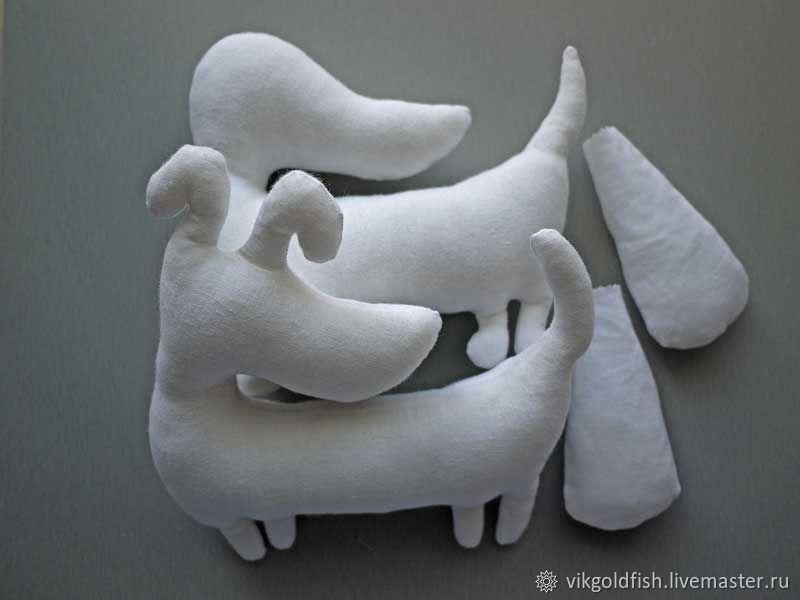
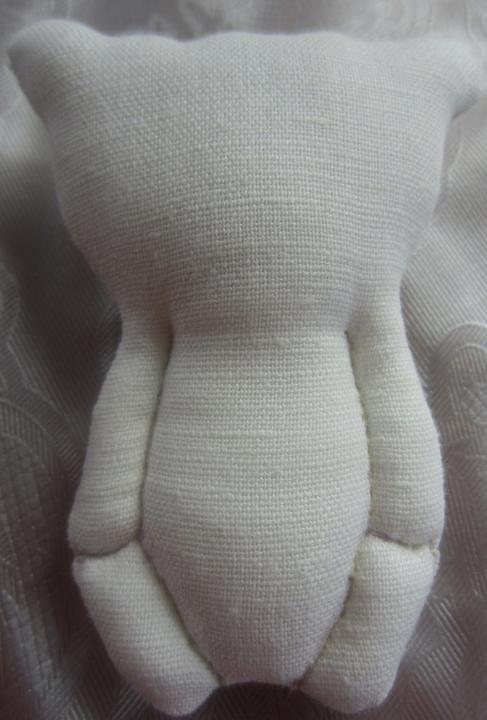
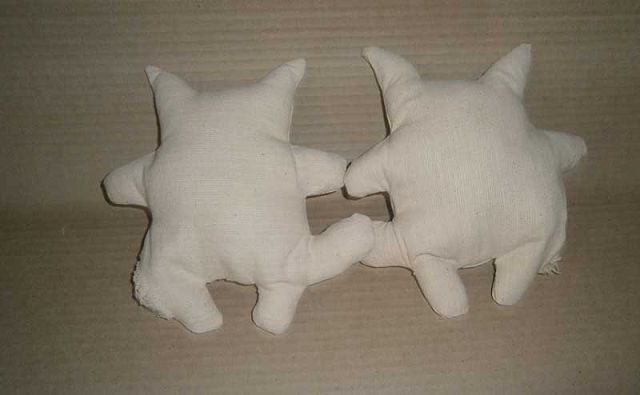
1. We transfer the pattern to the fabric, sew, not forgetting to leave holes for eversion. We cut the seams in the corners. If the fabric is very loose, I advise you to coat the PVA allowances on the seams in the places of cuts.
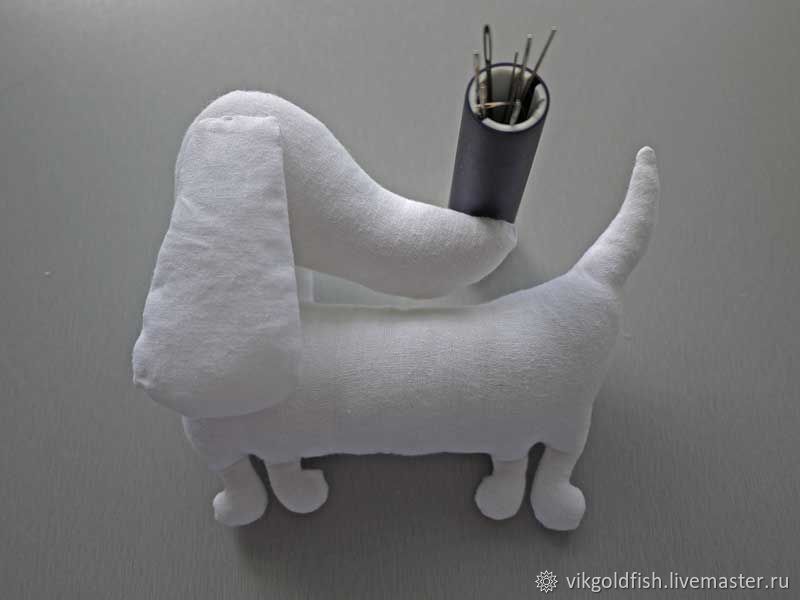
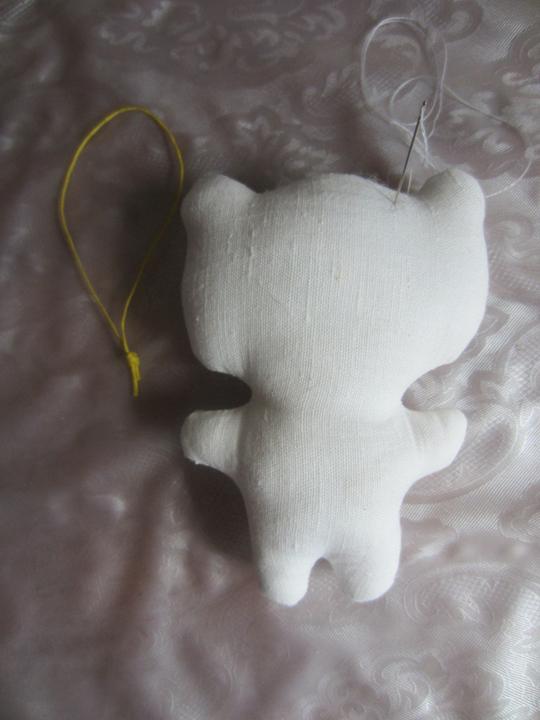
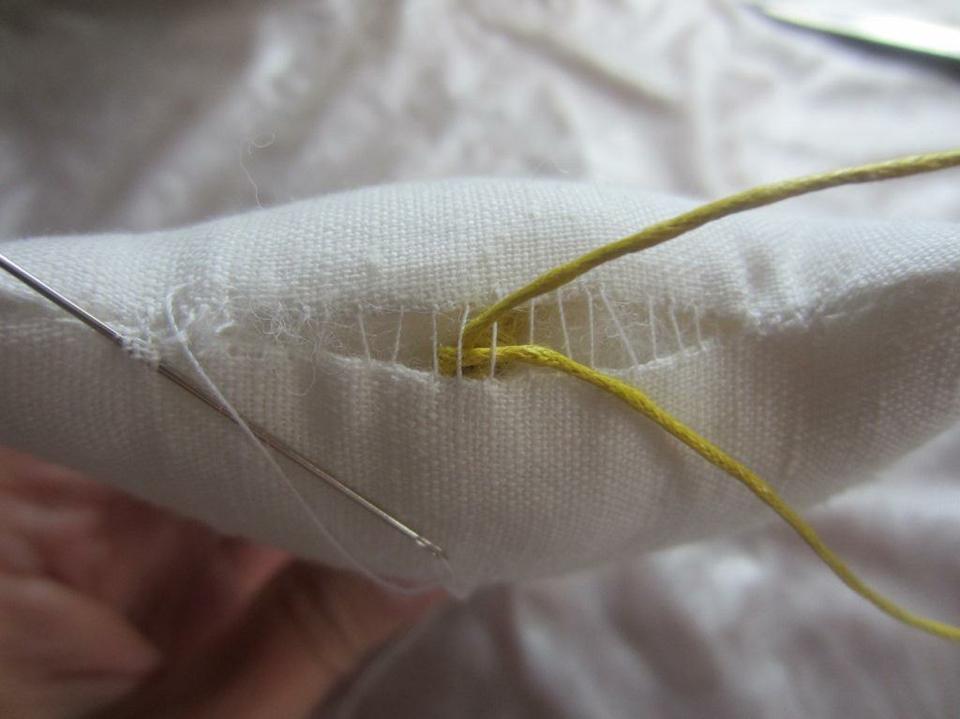
2. Carefully turn out all the details, stuff them tightly with filler, sew up the holes with a blind seam. We fill the ears of the buttons loosely, by about 2/3.
3. Sew on the ears to the Button.
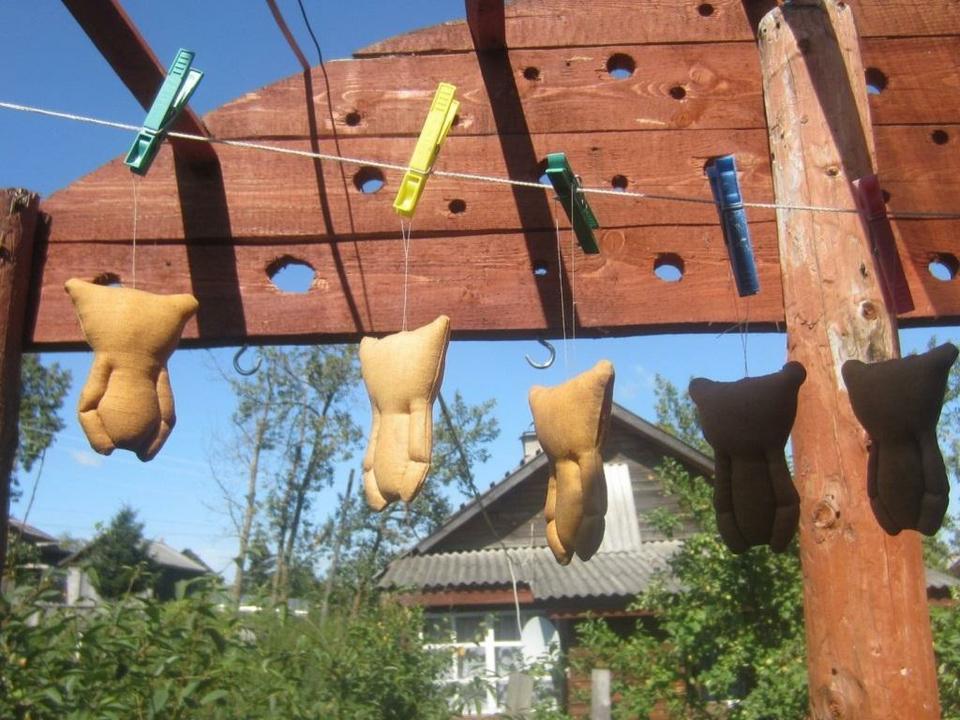
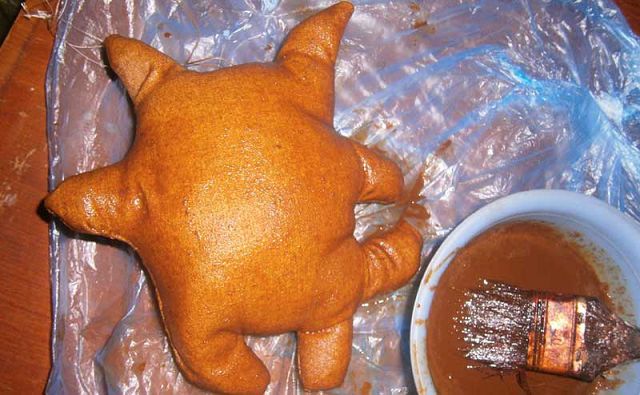
4. Dilute the coffee mixture for coloring toys - dilute 1 tablespoon without a slide of instant coffee in 3 tablespoons of boiling water. When the mixture has cooled slightly, add 1 tablespoon of PVA and a pinch of crystal vanillin. To remove excess paint, after dyeing, I blotted the toys a little with a paper towel.
5. Dry the blanks. I baked in the oven at 75 degrees for about 10 minutes. You can use a hair dryer to dry, you can let the toys dry in a natural way.
6. In the remaining coffee solution, add half a teaspoon of brown acrylic paint (I have Van Dyck) and draw spots. Here, as fantasy tells me 🙂 On Tobika, I painted the spots in one layer, I covered the Button in two layers to get a rich chocolate color.
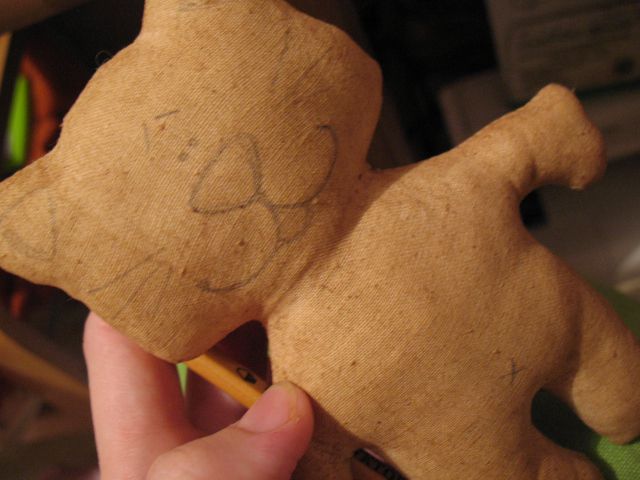
7. Dry again. After complete drying, draw eyes, nose, mouth. Let dry well and cover with acrylic varnish (only eyes and nose).
That's all 🙂
All pleasant creativity!
![]()
Unusual, similar to those stale in the attic, coffee toys are just asking to be a gift for a dear person. We offer you patterns of coffee toys!
By the way, the legend of their origin begins in the attic. One day, the mother of a little girl sewed a rag doll for her. Mom worked at a coffee factory, and there was no one to leave her daughter with, so she took her to work with her. The girl was playing with her rag toy, and at the end of the shift she forgot to pick it up. Since then, she lay for several years in the same place where her little mistress left her. Soaked in the smell of vanilla, herbs and the unique aroma of coffee, the toy received a second life in a new way and became a symbol of home comfort, gaining extraordinary popularity.
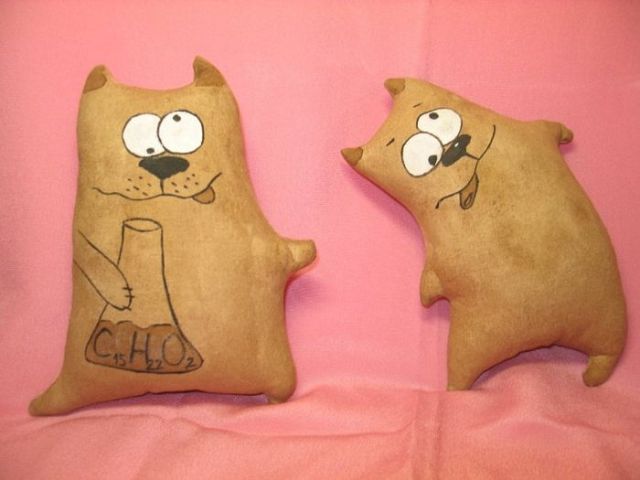
And also, such cute animals: cats, owls, foxes, fish, frogs, dogs and elephants will be not only a toy, but also an unusual sachet, thanks to the aromas they exude. You can hang them in your car and enjoy the aroma of coffee on the way to work. Can be placed in a wardrobe and inhale the scent of lavender on the dress. Or use it as Christmas decorations and then the aroma of citrus and vanilla will bring the holiday on their own.
Such a simple, outwardly vintage toy, you can buy ready-made. But, what if you like the mixture of several smells, but there was no such toy in the store? Then we offer you several patterns of coffee toys that you can make with your own hands.
We have no doubt that you will like the process and the result. And whether the toy will become a gift or will continue to please the craftswoman who sewed it - we leave this choice to you.
Using the example of a bear, consider the creation of a coffee toy.
We will need:
- Natural fabric. Such a toy can be sewn from linen or from cotton fabrics (from coarse calico, satin or chintz).
- Instant coffee, no matter what brand.
- PVA glue (any stationery or carpentry).
- Flat brush with synthetic or hog bristles.
- Filler (synthetic winterizer, synthetic winterizer, holofiber).
- Paper, pencil.
- Tools: scissors, needle and thread, knitting needle, sewing machine.
- Aromatic fillers: vanillin, coffee, citrus, cinnamon.
We draw or print a pattern of our teddy bear. If you want another figure, then you can make a horse, or a hare, or any other. The manufacturing principle is exactly the same as will be described below.
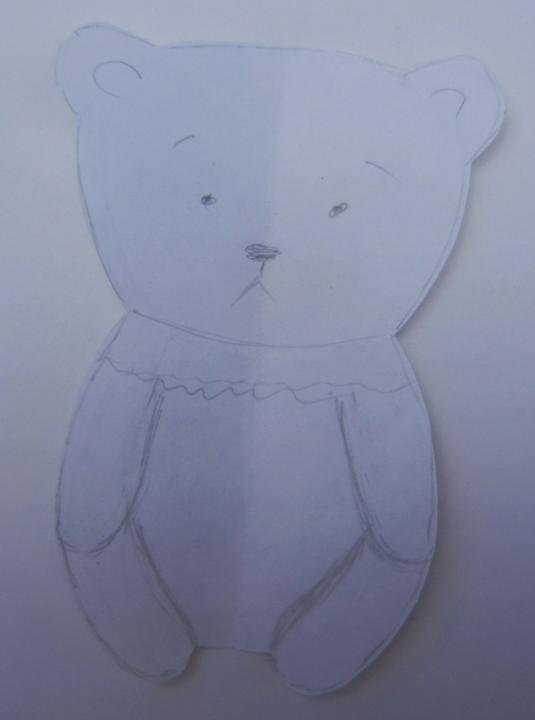
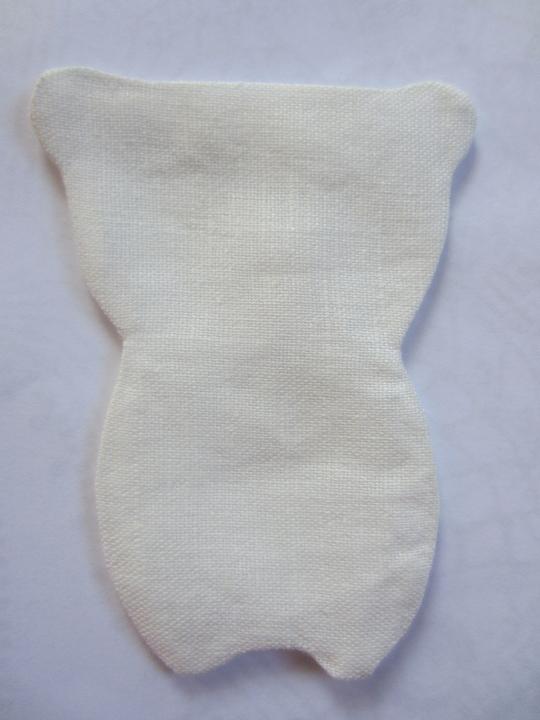
We transfer the pattern to the fabric folded in half.
Sew the pieces together before cutting. So you can be less worried that at some point the fabric will move out. We leave an unsewn area to turn the toy inside out and fill with filler.
It makes sense to walk along the cut edge with glue if the fabric crumbles a lot.
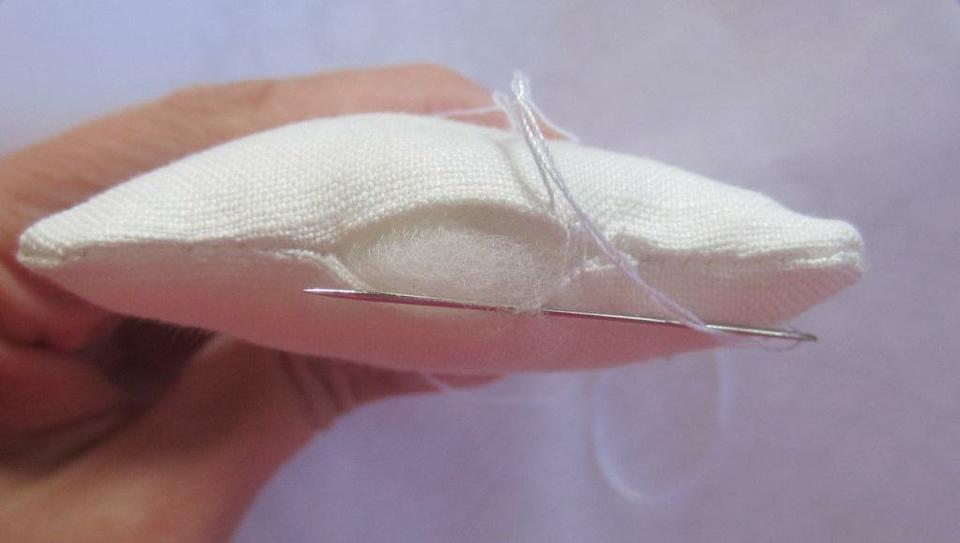
We turn the parts out without waiting for the glue to dry. We fill the toy with filler. In small areas (paws and ears) we help ourselves with a knitting needle so that the filler evenly fills the figure with itself. After that, you can sew up the slot with a hidden seam. Don't forget to add string so you can hang the toy. To do this, take the cord of the required length, fold it in half, making a loop. At the ends, connect the resulting loop with a knot - so you can be sure that the rope will not slip out of the toy.

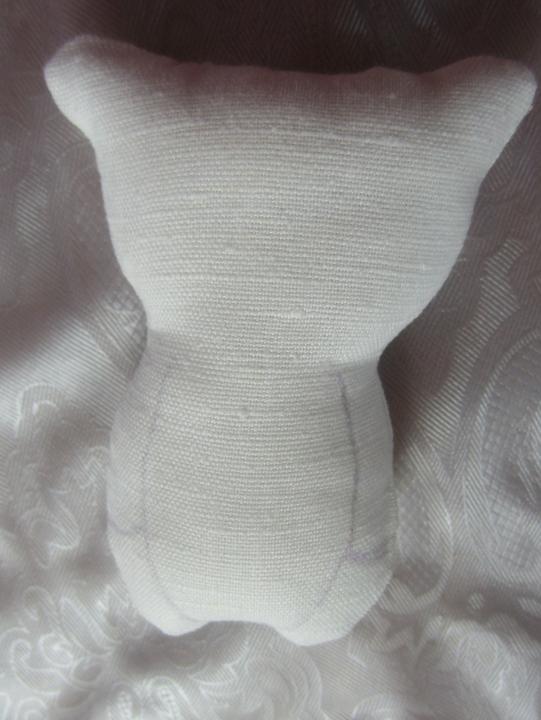
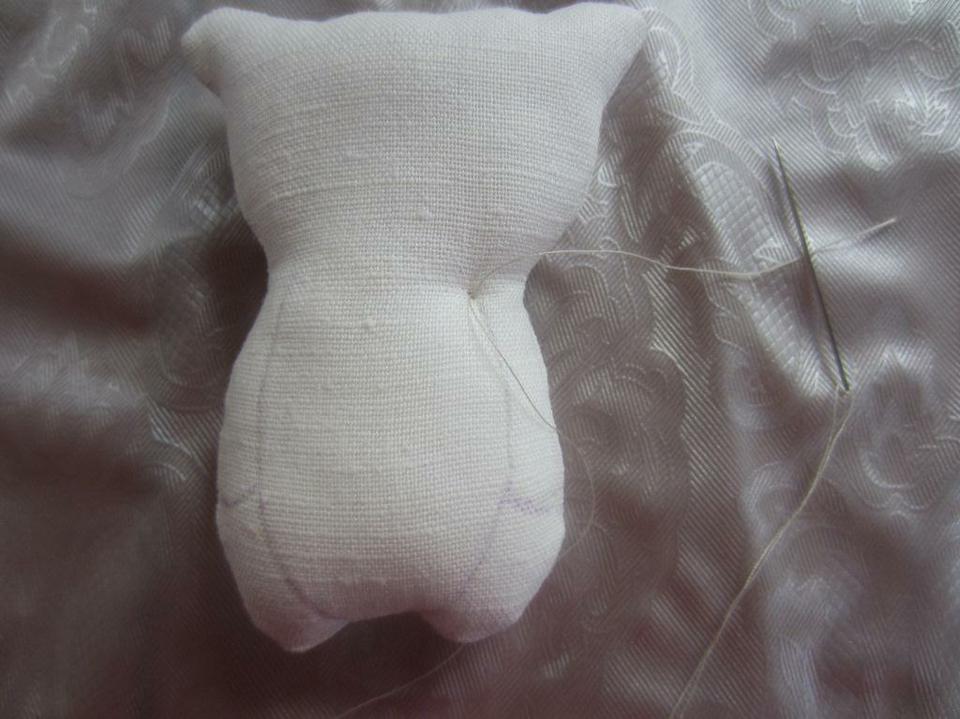
We give the paws of the bear cub volume. We mark them with a pencil and sew them by hand, with not too wide stitches, through and through, pulling the fabric.

The toy is ready, it remains to paint.
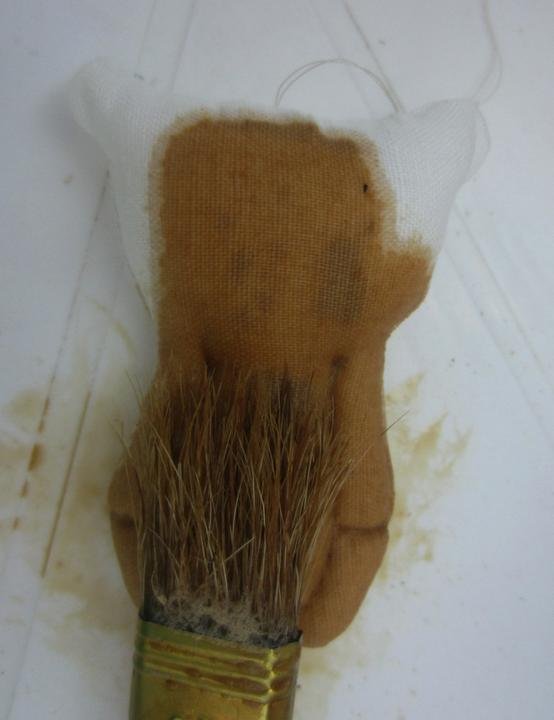
We prepare our tinting liquid according to this recipe: 2 teaspoons of instant coffee (more is possible - then the shade of the toy will turn out darker) pour 0.05 liters of boiling water. We add our additional flavors: citrus, vanilla, cinnamon. Pour in 2 more teaspoons of PVA glue and mix the composition thoroughly.
We lower the brush into the composition, wring it out so that the liquid does not pour, and tint the toy. Our task is to tint quickly in order to paint the surface of the toy and at the same time, the stuffing should not be impregnated with the composition.
We dry the figure on the street or in an open oven, at a temperature of 100 ° - 150 °.
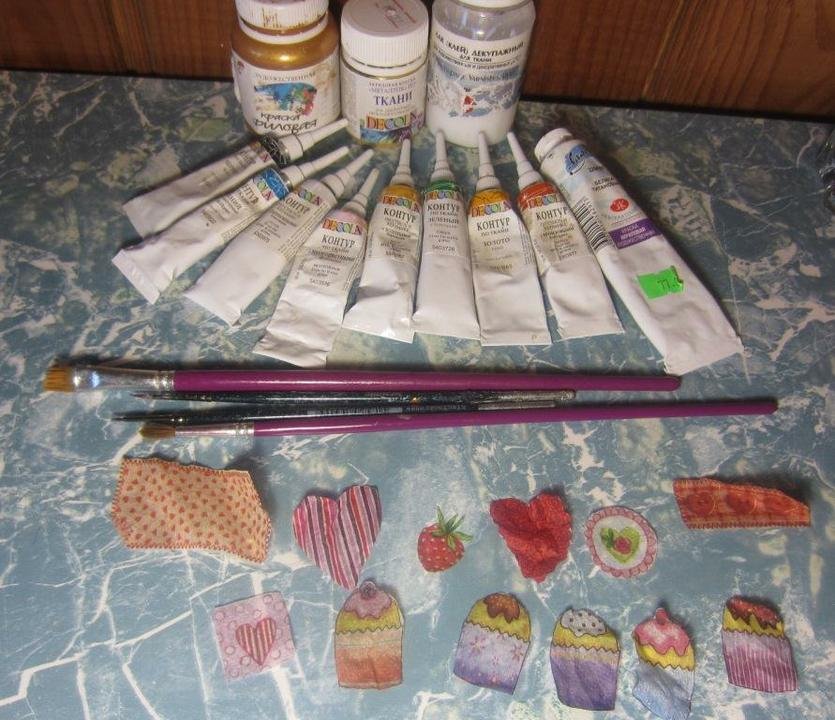
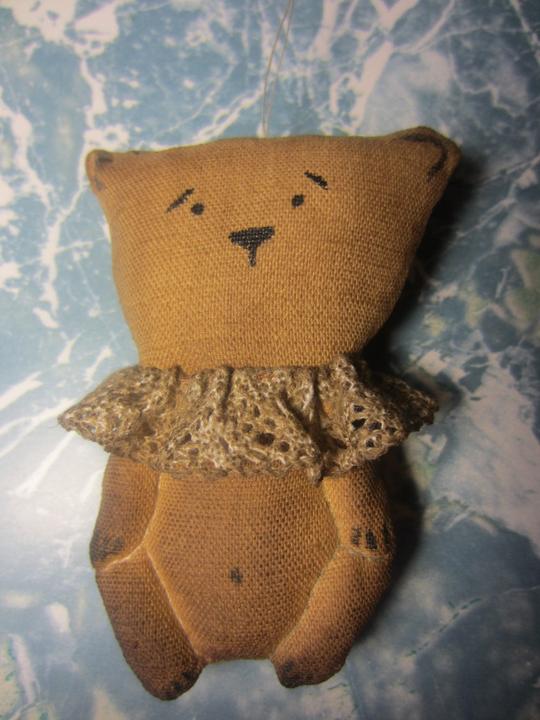
For painting we use paints on fabric, ceramics or glass. You can use gel pens, glitter or pastels. For the muzzle, use a thin brush or contour.
Additionally, we decorate with decoupage napkins, lace, ribbons, badges and other things that come to mind. You can, for example, tie a lace frill around your neck. The length should be twice the circumference of the neck so that the frill folds. Lightly tint the decorative collar with the same composition - so the whole toy will look organic. Connect the lace into a ring and fasten with a thread. Dress on the toy and collect the folds. Fix.
If you wish, you can go over the toy with gold acrylic paint, additionally shading it.
So we looked at how to make a cute toy - in detail and with an example. A few more patterns of funny coffee animals: 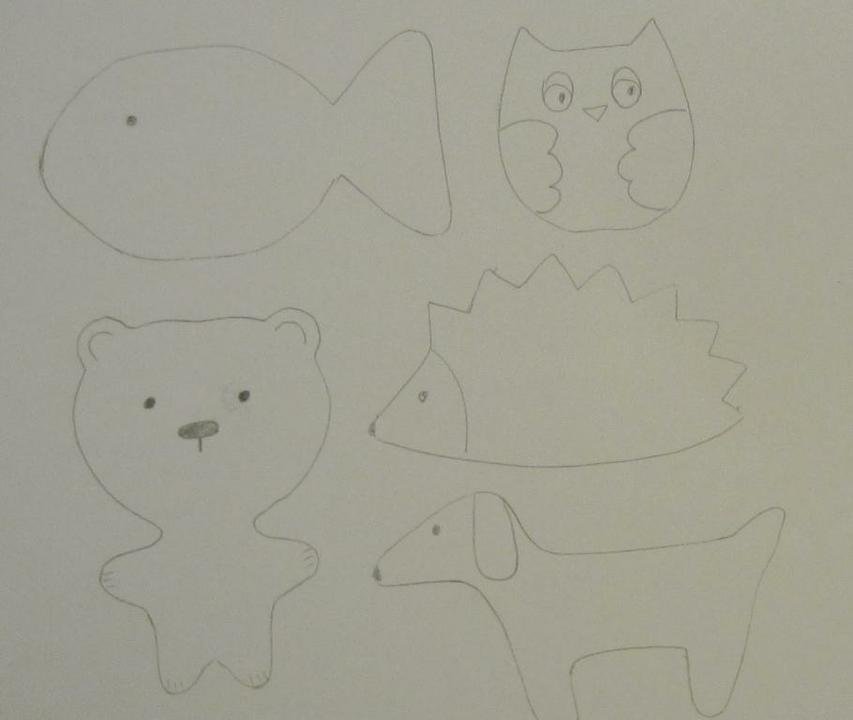
Video compilation
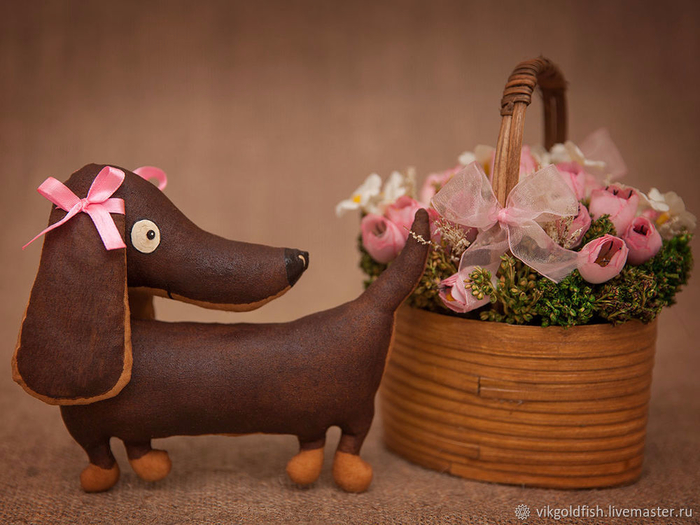
A very beautiful and interesting master class on the theme of the coming year - the Year of the Dog from Viktoriya GoldFish. These are coffee dogs - a simple yard guy Tobik and a charming dachshund Button.

So what we need:
- a piece of white calico about 50x50 cm;
- filler;
- instant coffee;
- PVA glue;
- acrylic paints - white, black and brown;
- brushes, thread, needle.
Patterns:
1. We transfer the pattern to the fabric, sew, not forgetting to leave holes for eversion. We cut the seams in the corners. If the fabric is very loose, I advise you to coat the PVA allowances on the seams in the places of cuts.
2. Carefully turn out all the details, stuff them tightly with filler, sew up the holes with a blind seam. We fill the ears of the buttons loosely, by about 2/3.
3. Sew on the ears to the Button.
4. Dilute the coffee mixture for coloring toys - dilute 1 tablespoon without a slide of instant coffee in 3 tablespoons of boiling water. When the mixture has cooled slightly, add 1 tablespoon of PVA and a pinch of crystal vanillin. To remove excess paint, after dyeing, I blotted the toys a little with a paper towel.

5. Dry the blanks. I baked in the oven at 75 degrees for about 10 minutes. You can use a hair dryer to dry, you can let the toys dry in a natural way.

6. In the remaining coffee solution, add half a teaspoon of brown acrylic paint (I have Van Dyck) and draw spots. Here, as fantasy tells me :) On Tobika, I painted the spots in one layer, I covered the Button in two layers to get a rich chocolate color.
What are coffee toys? These are toys that are made using freshly ground or instant coffee. Probably, they were invented by lovers of this aromatic drink. For many, this drink is an assistant in the morning awakening. In many countries there is even a coffee drinking ritual that can last for hours. In our article you will find patterns of coffee toys with your own hands.
For people whose souls are warmed by the smell of such a drink, we decided to create coffee toys so that you can take crafts with you and feel the pleasant aroma of coffee at any time. You can also use such toys as an addition to interior details.
Let's start creating
Cute bear cubs
We will need cotton fabric, instant coffee, PVA glue, a hard brush, a synthetic winterizer for filling toys, scissors, threads, needles, paper, cardboard, acrylic paints, ribbons, bows, lace (for decoration).
Print the pattern, make a stencil out of cardboard and cut it out.
Attach the stencil to the fabric folded in half. Sew with a sewing machine or by hand, leaving a hole for stuffing, cut out.

If the fabric of your choice crumbles a lot, you can use PVA glue and coat the seam. Turn out the resulting part.
Now we tightly stuff the bear with synthetic winterizer, you can also use other fillers (cotton wool, holofiber). We sew the hole with a hidden seam.
You can attach a rope to the toy, then you need to do this before you sew up the hole.
Now you can sew. Create volume for the upper paws. To do this, draw lines on both sides of the bear's body.
We sew the toy through with small stitches.
We prepare coffee for toning toys: 2 teaspoons and 50 ml of boiling water, stir, add 2 teaspoons of glue. Mix thoroughly.
We dip the brush, wring it out a little and paint the bear.

Tinting of the product should take a minimum of time, because. the filler quickly absorbs the coffee drink, but we do not need this.

Now dry thoroughly in the sun or in the oven at a temperature of 100-150 degrees.
We proceed to the decor of our product. Let's draw the bear's eyes, noses, claws and navel with a thin brush or contour. The neck of the toy can be decorated with lace or some kind of ornament can be drawn. You can also tie a beautiful bow.
You can also use our hedgehog, owl, fish and dog patterns.

Easy option

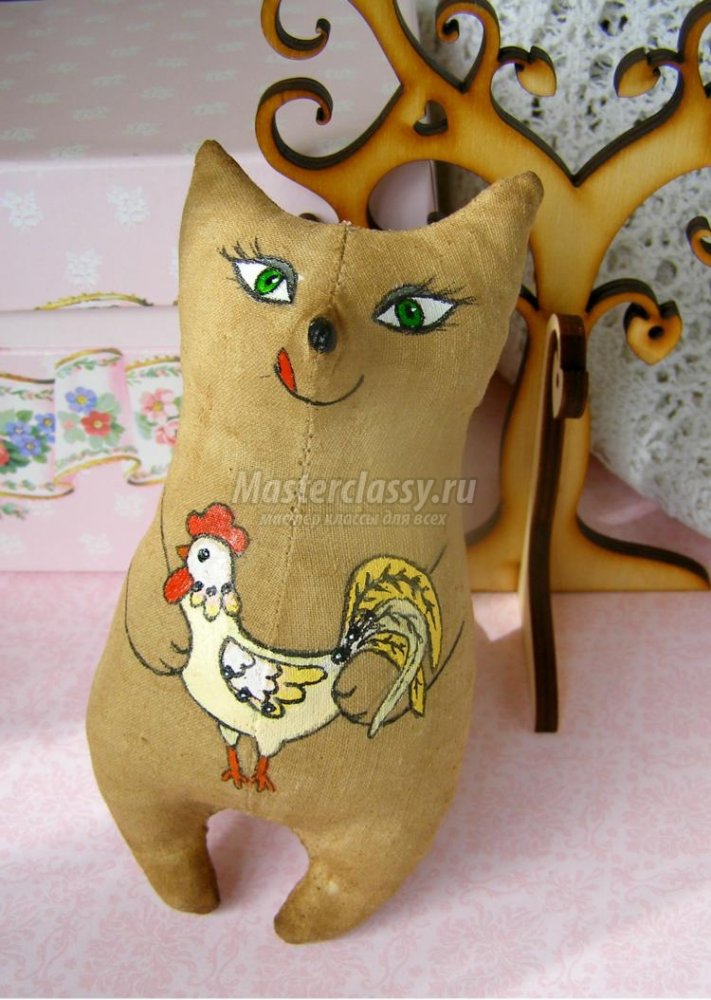
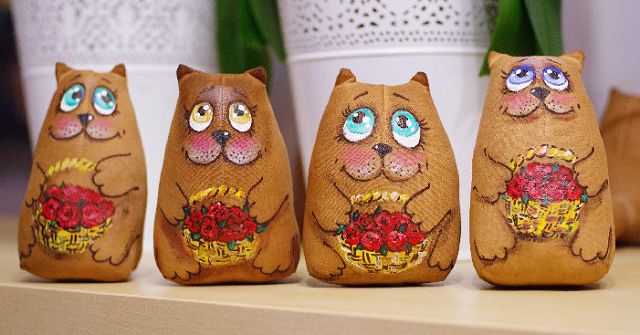
Creating cats is one of the easiest and most interesting activities. These animals are loved by both adults and children, so introduce your little helpers to this unique undertaking. Patterns of cats can be any, so choose the ones that you like, or maybe you want to draw your own future toy. The choice is yours.
We begin the master class by transferring the pattern to a fabric folded in half. Toys can be made from linen or calico. We sew the details, leaving a hole for stuffing, and steam it with an iron. Cut out the product.
Now you need to fill the cat with filler tightly enough, but not too much. Sew up the left hole.
Now let's prepare the coffee toner. Pour 2 teaspoons of coffee and the same amount of cinnamon, a bag of vanilla into a metal cup or saucepan. We fill hot water and put on fire. When the mixture begins to bubble, remove it and strain thoroughly.
We paint the toy with a wide dense brush.
We dry the toy in the sun or in the oven for half an hour, you can also just hang the cat in the room, then the drying will last all night.
Let's take care of the design of the muzzle of our beast. You can draw with ordinary markers or fabric paints.
What exactly your cat will be is up to you. Imagine and create masterpieces.
Painstaking work
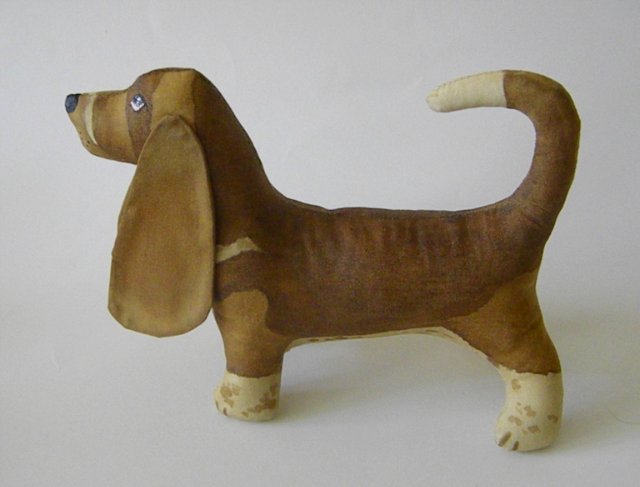
Creating such a dog is the most painstaking work. First, we will do everything that was done with the previous toys, preparing for coloring. The ears of such a dog can not be stuffed with filler, and we inserted a wire into the tail so that its shape would hold.
It is necessary to color such a dog in layers, i.e. on darker areas, apply more layers of coffee solution. Thus, the natural color of the animal is obtained. Eyes, nose and mouth can be drawn with markers or gel pens.
Now you know how to make various coffee critters. The whole family can be involved in this activity. Using your imagination, you can come up with your own patterns of toys: a hare, a horse, a giraffe, an owl and others. Also, such toys are often decorated with cool inscriptions that will delight not only you and your loved ones, but also friends who come to visit you. You can also add a few other spices to your coffee drink at your discretion: cinnamon, nutmeg, ground ginger.
And again, another master class on the theme of the coming year - the year of the Dog.
This time it's coffee dogs - a simple yard guy Tobik and a charming dachshund Button.

So what we need:
A piece of white calico about 50x50cm;
Filler;
Instant coffee;
PVA glue;
Acrylic paints - white, black and brown;
Brushes, thread, needle.
Patterns: 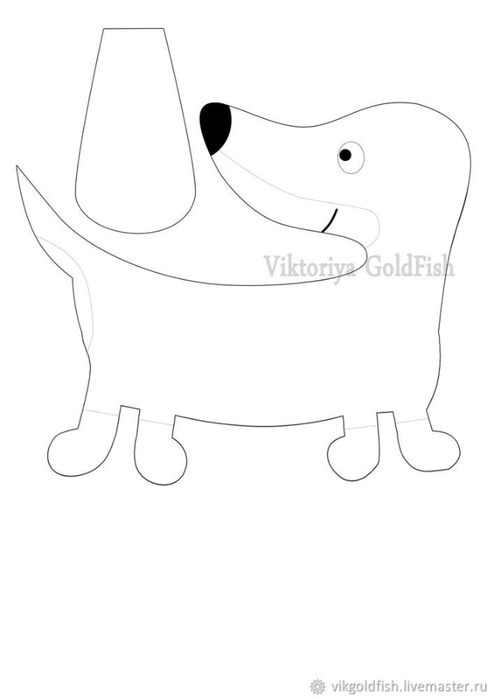
1. We transfer the pattern to the fabric, sew, not forgetting to leave holes for eversion. We cut the seams in the corners. If the fabric is very loose, I advise you to coat the PVA allowances on the seams in the places of cuts. 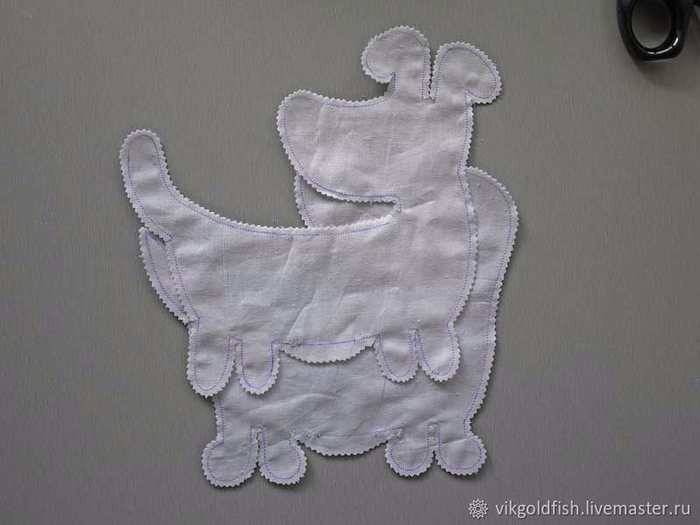
2. Carefully turn out all the details, stuff them tightly with filler, sew up the holes with a blind seam. We fill the ears of the buttons loosely, by about 2/3. 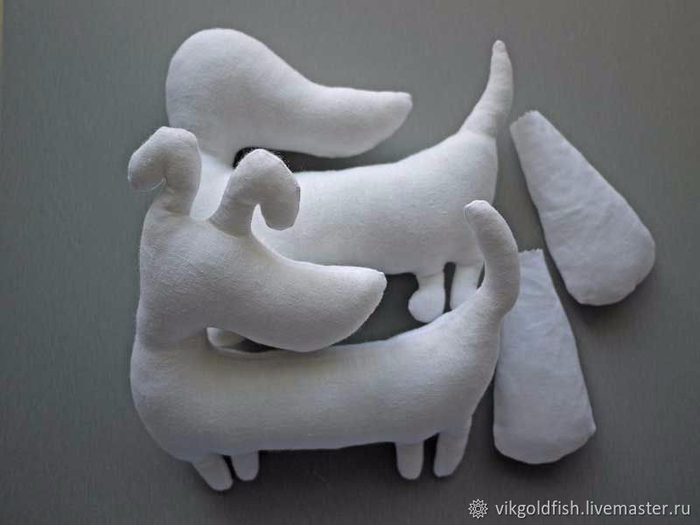
3. Sew on the ears to the Button. 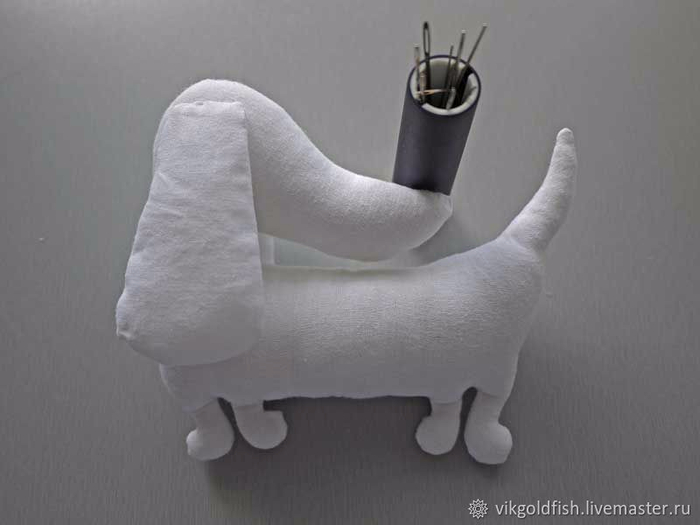
4. Dilute the coffee mixture for coloring toys - dilute 1 tablespoon without a slide of instant coffee in 3 tablespoons of boiling water. When the mixture has cooled slightly, add 1 tablespoon of PVA and a pinch of crystal vanillin. To remove excess paint, after dyeing, I blotted the toys a little with a paper towel. 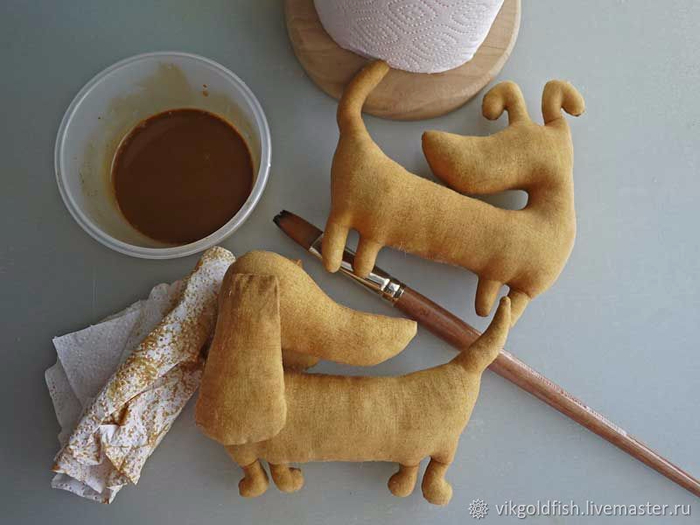
5. Dry the blanks. I baked in the oven at 75 degrees for about 10 minutes. You can use a hair dryer to dry, you can let the toys dry in a natural way. 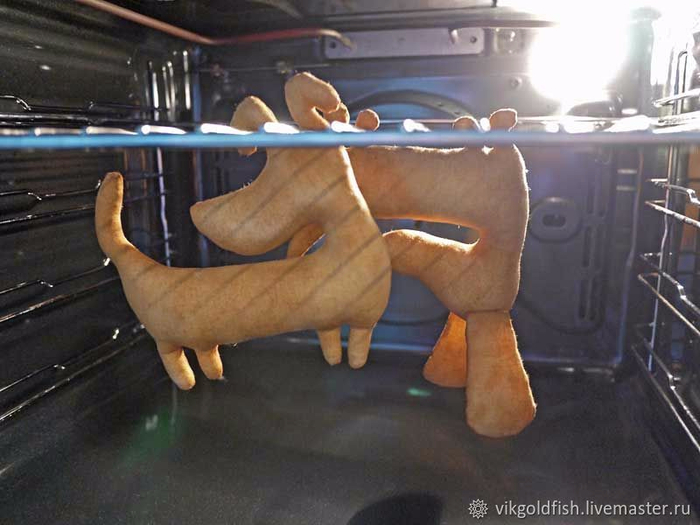
6. In the remaining coffee solution, add half a teaspoon of brown acrylic paint (I have Van Dyck) and draw spots. Here, as fantasy tells me :) On Tobika, I painted the spots in one layer, I covered the Button in two layers to get a rich chocolate color. 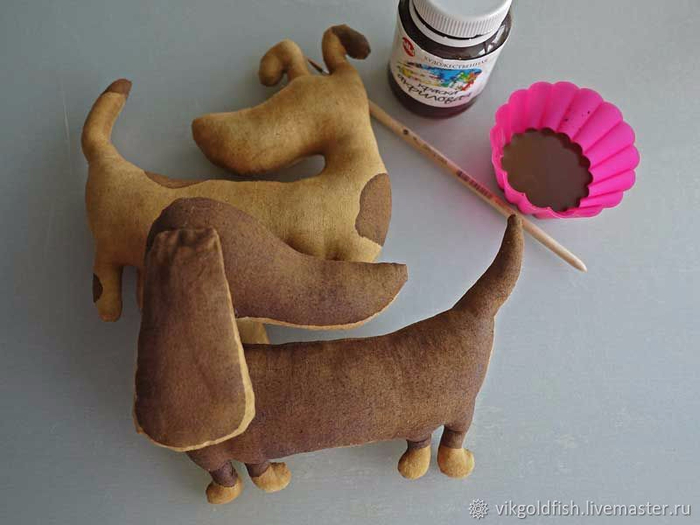
7. Dry again. After complete drying, draw eyes, nose, mouth. Let dry well and cover with acrylic varnish (only eyes and nose).
That's all :) All pleasant creativity!